Publish spaces on the Web
Guide for publishing spaces on the Web.
Use the Web Publishing function, the space and files are able to browsing without Fleekdrive’s account.
Edit the Web Publishing.
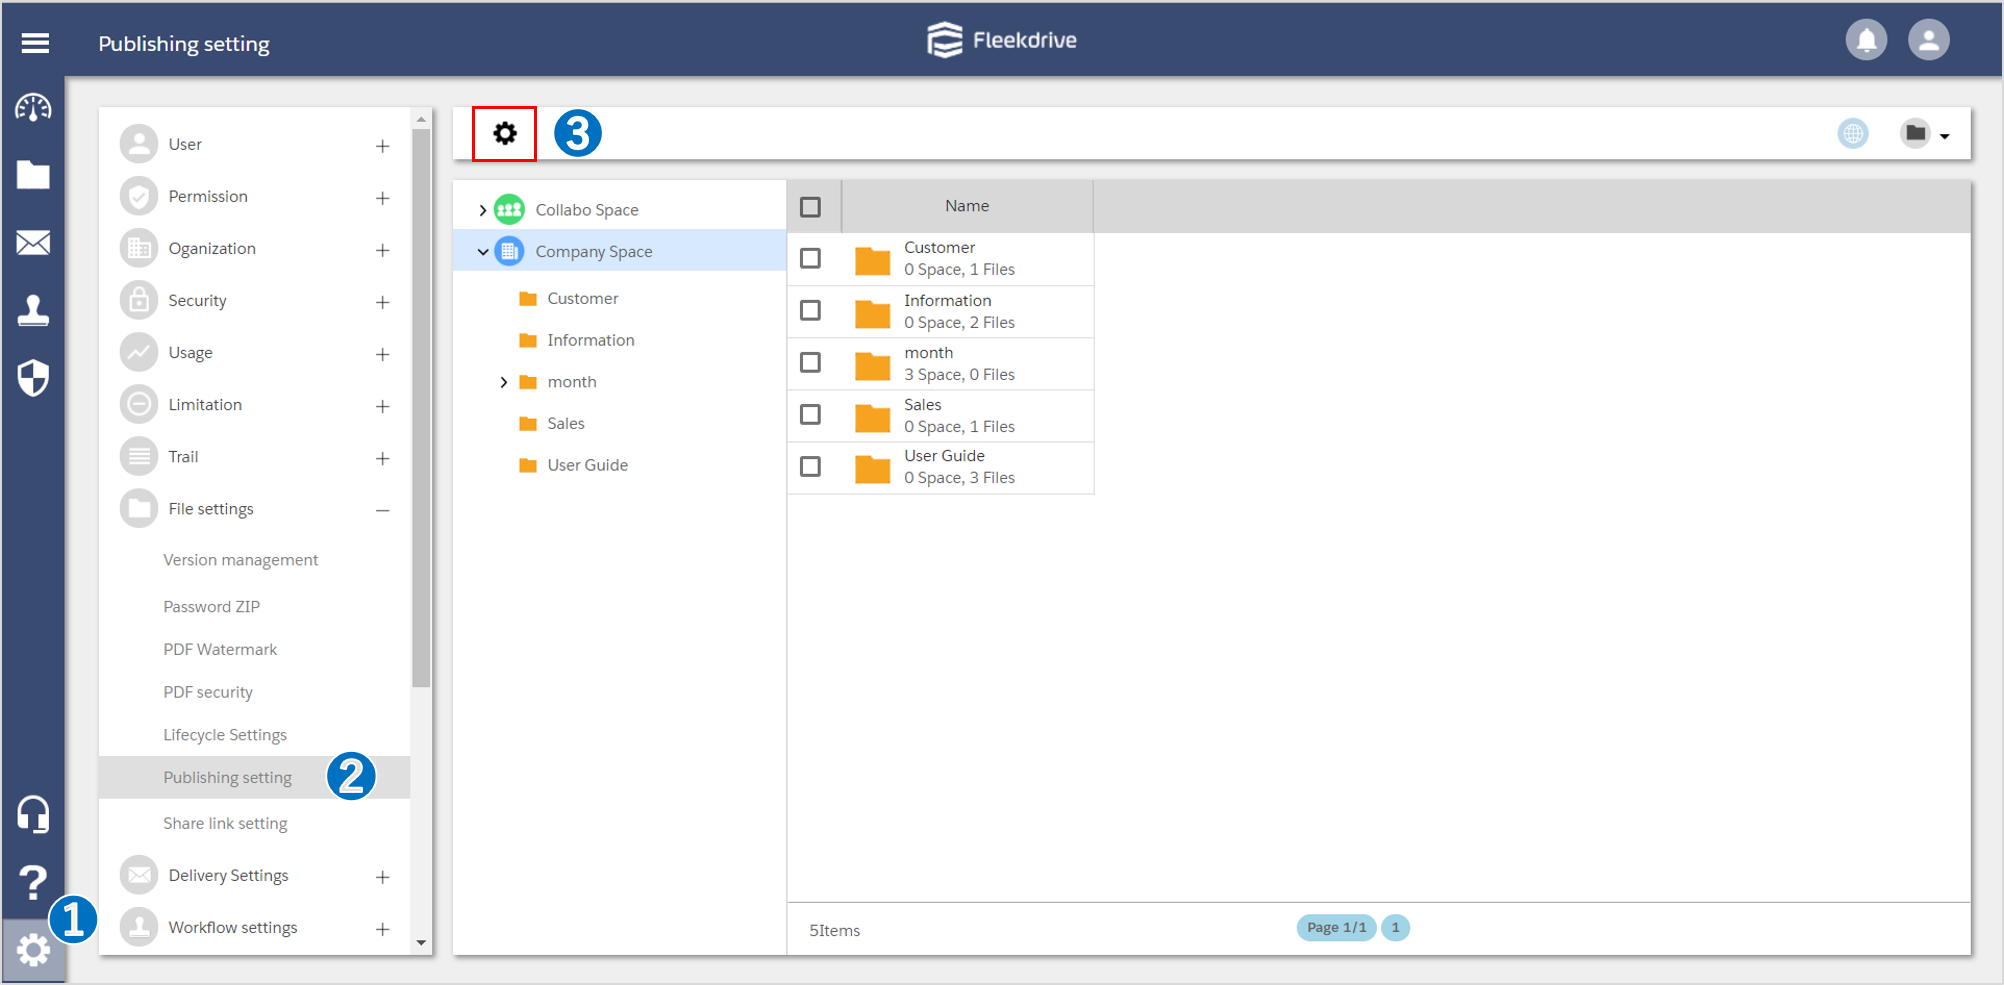
Open the “Publishing setting” from the Settings.
Click the gear icon at the top center of the screen.
Switch language by pulldown, and enter the site title for each language.
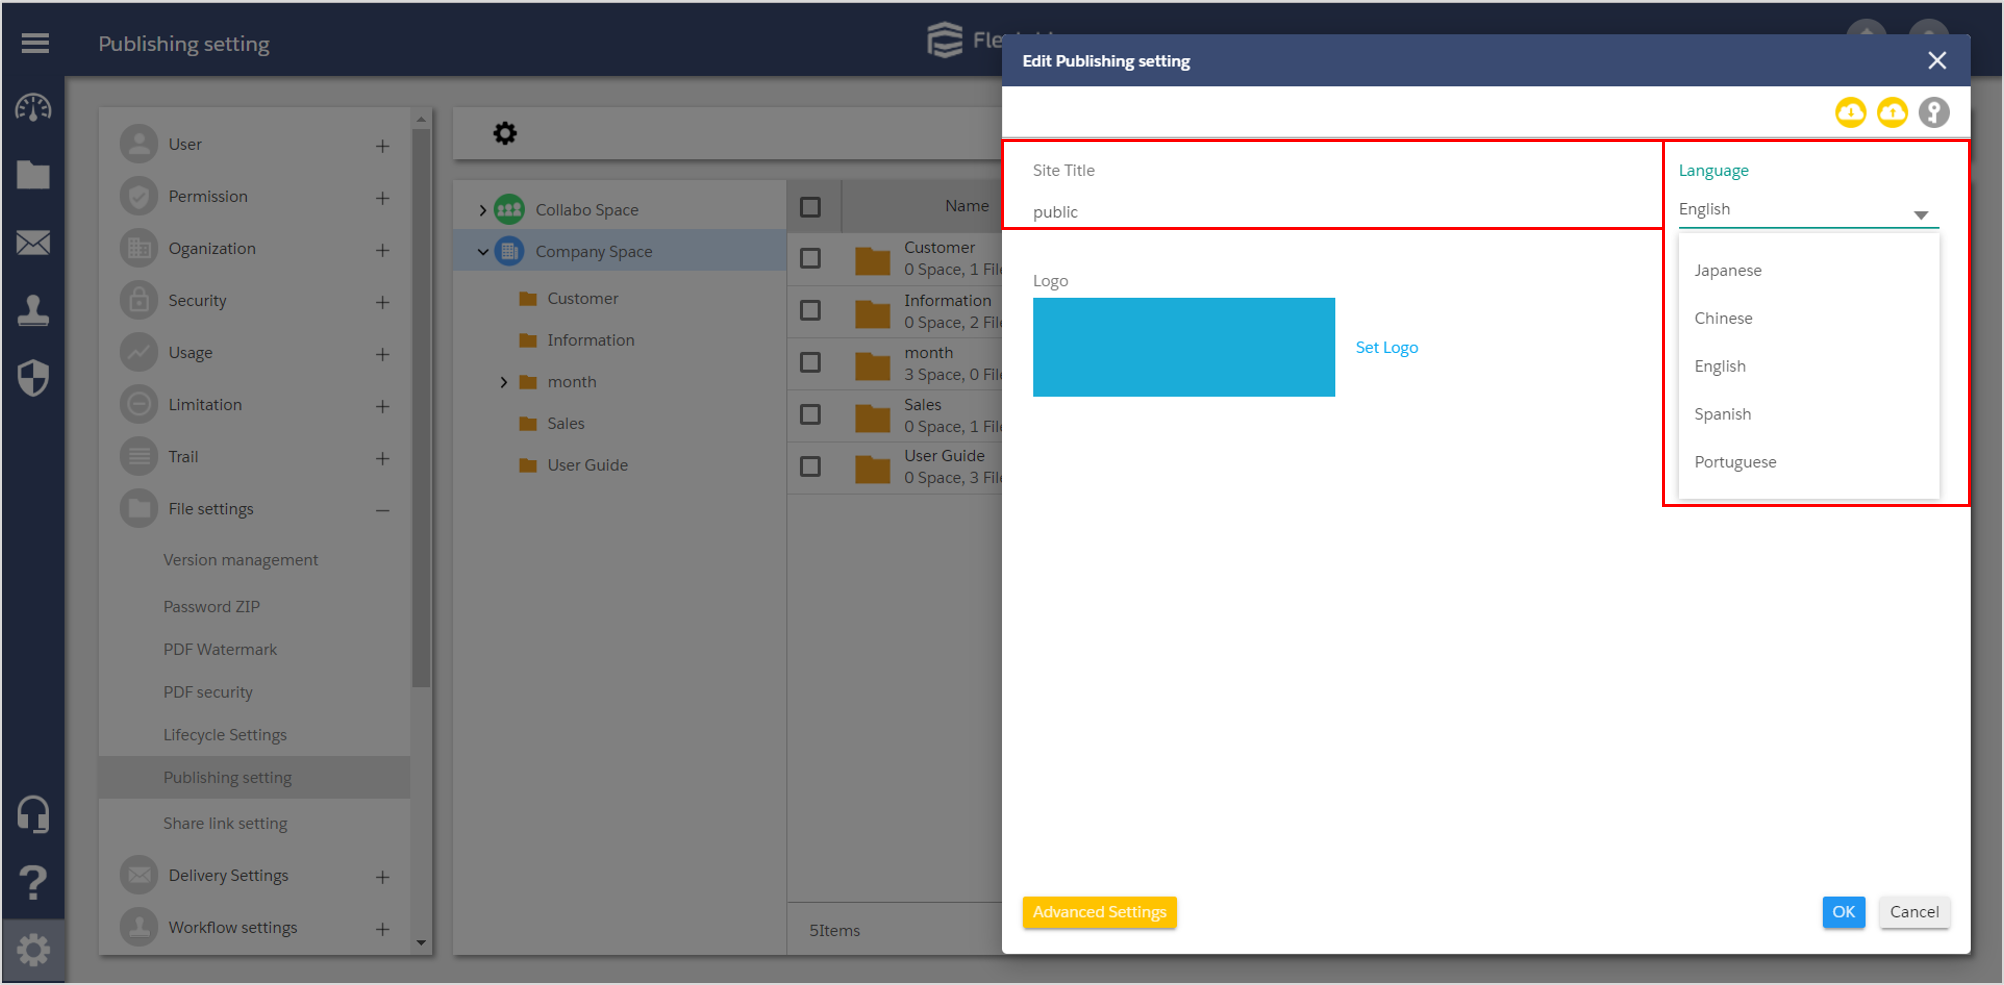
Set the logo of web Publishing screen.
Set the logo that displayed on the Web page.
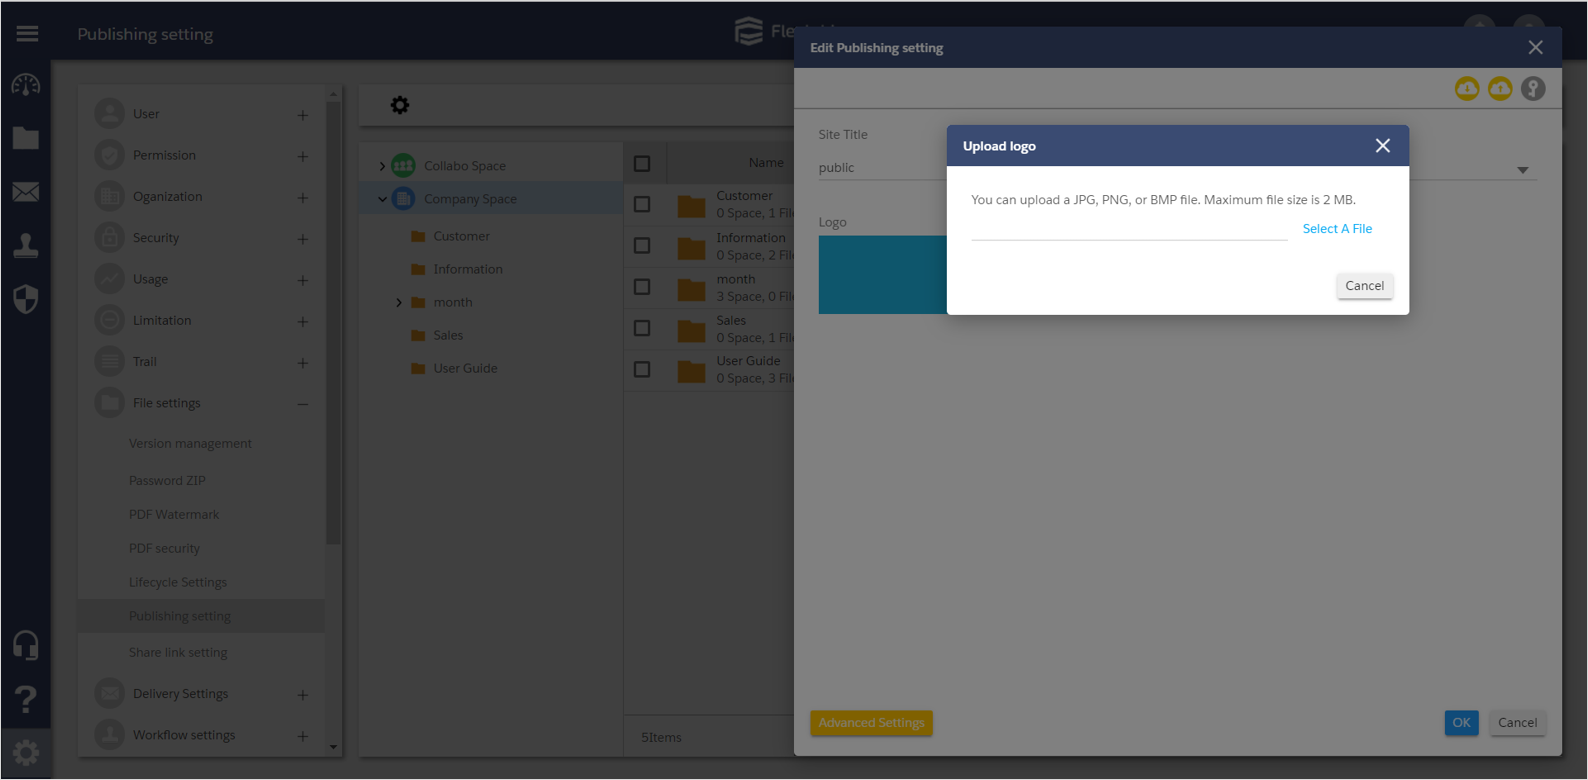
Click the “Set Logo” and upload the JPG, PNG, BMP file (within 2MB).
Set the Security.
Click the “Advanced Settings” button to make the security settings.
Set password to access Public page if needed.
When setting a fixed character string, select “Set Password” and enter a character string.
To set the password generated by system, select “Automatic password generation”, and indicate the character length of password.

If select “Site password setting” or “Automatic password generation” for “Security”, it can check the “Send a password email to yourself”.
If checked, the password will not be notified to the recipient, but will be notified to the sending execution user (sender), please tell the password by such as SMS or Telephone, etc.
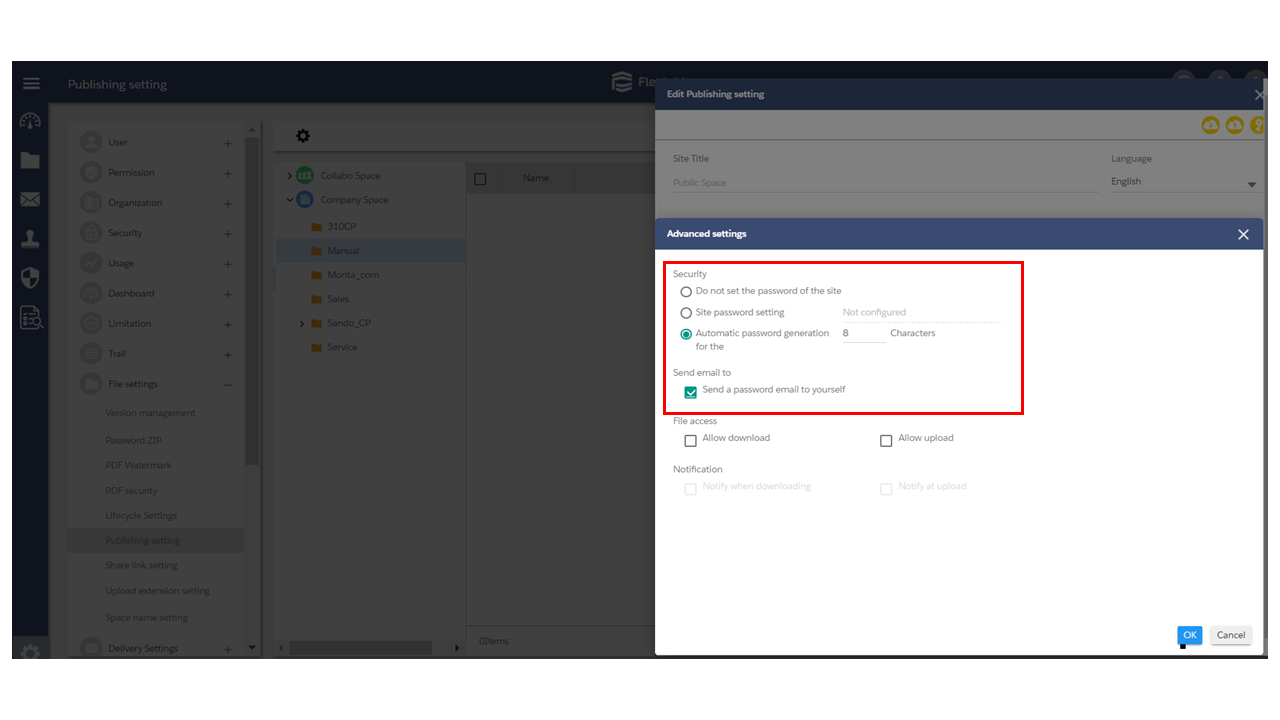
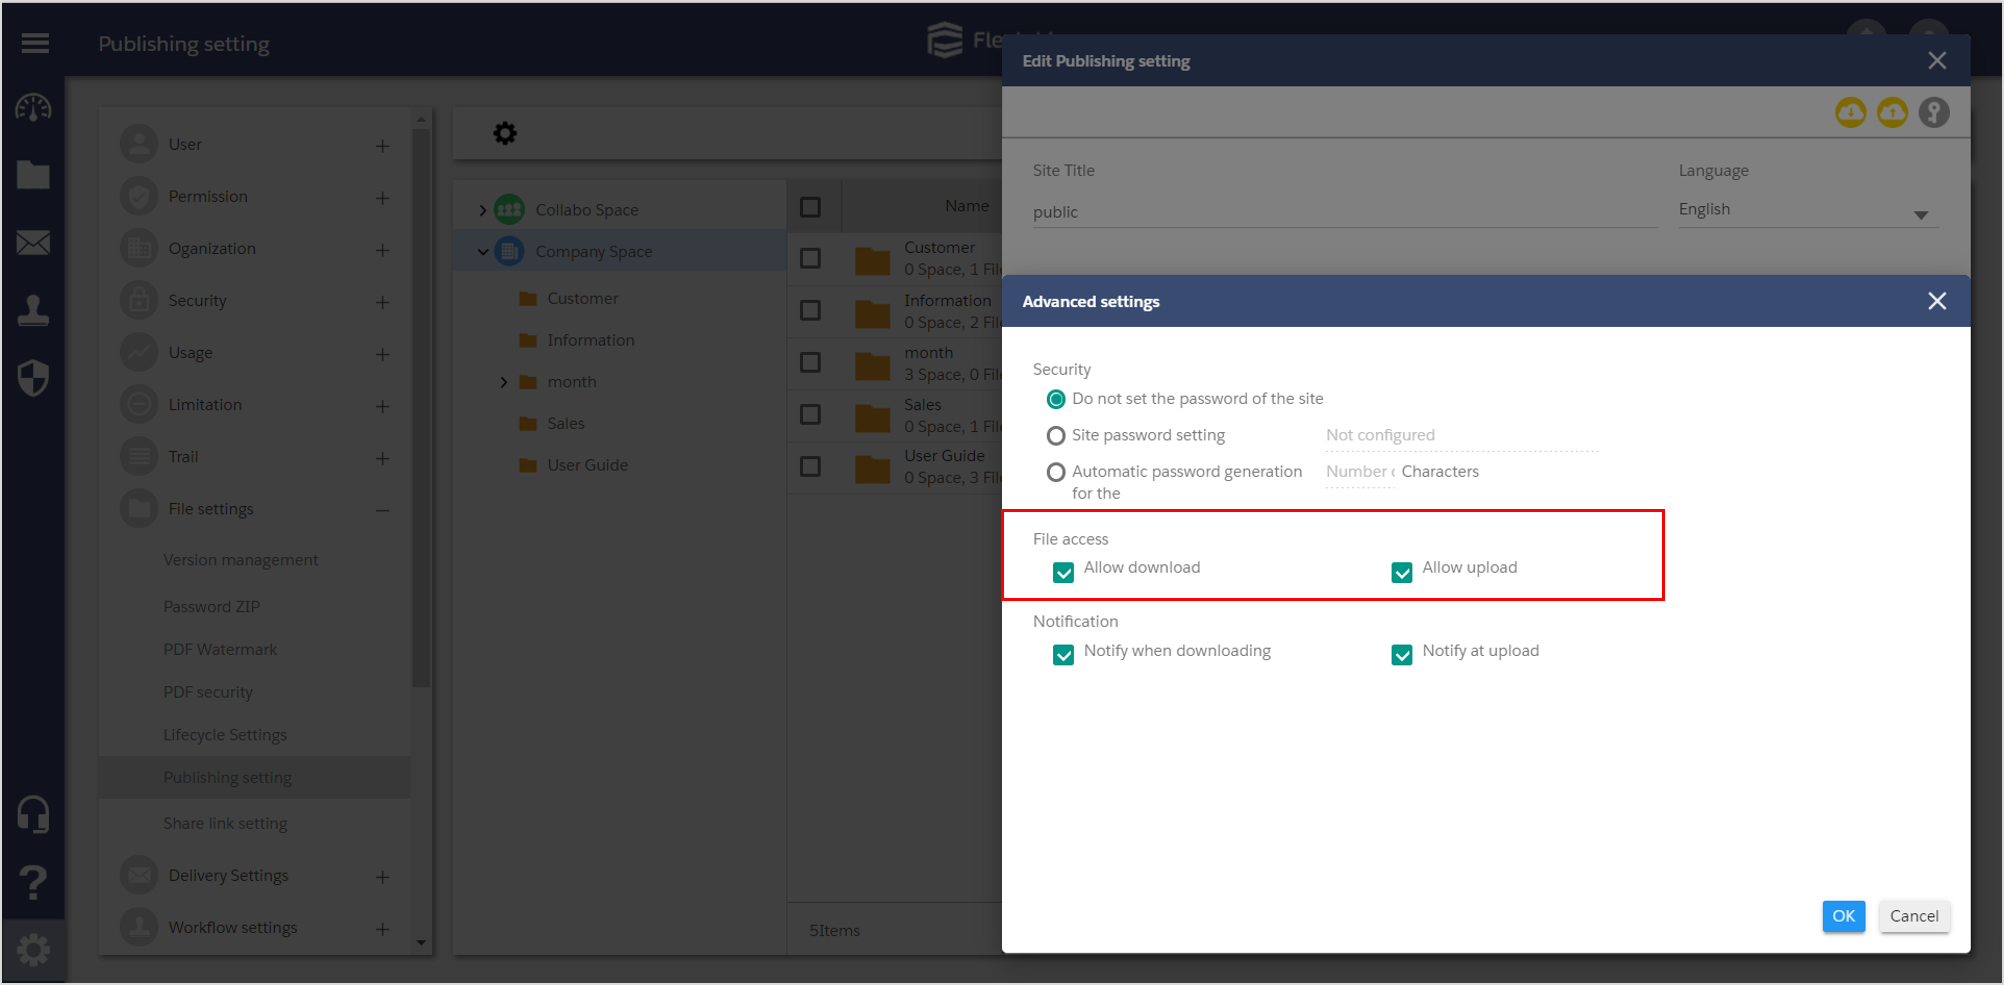
Set the operations that external users can perform in the public space.
・Allow users to download…When it’s not checked, the file cannot be downloaded and only displays in the browser.
・Allow users to upload…When the user accessed, the file can be uploaded.
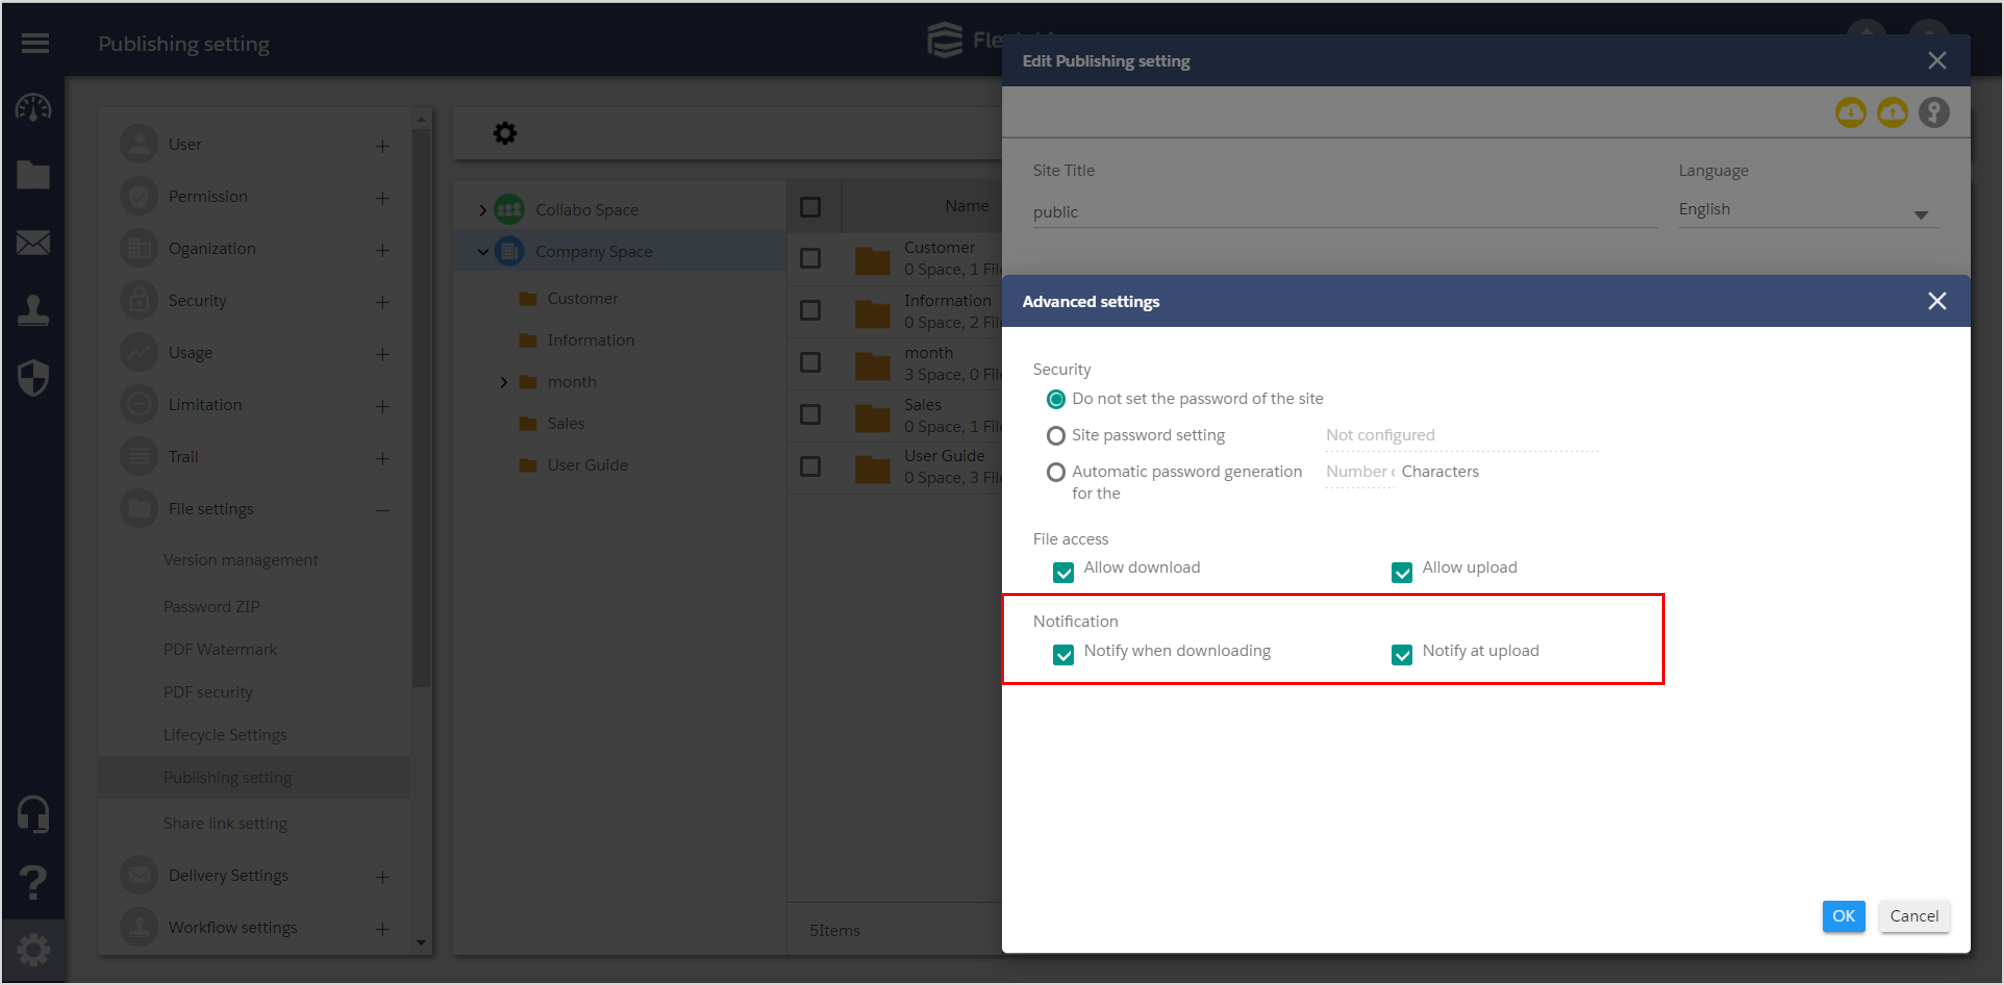
Settings of email notification when the external user perform in the published space.
・Notify when downloading…Notify by email when the external user download the file.
・Notify when uploading…Notify by email when the external user upload the file.
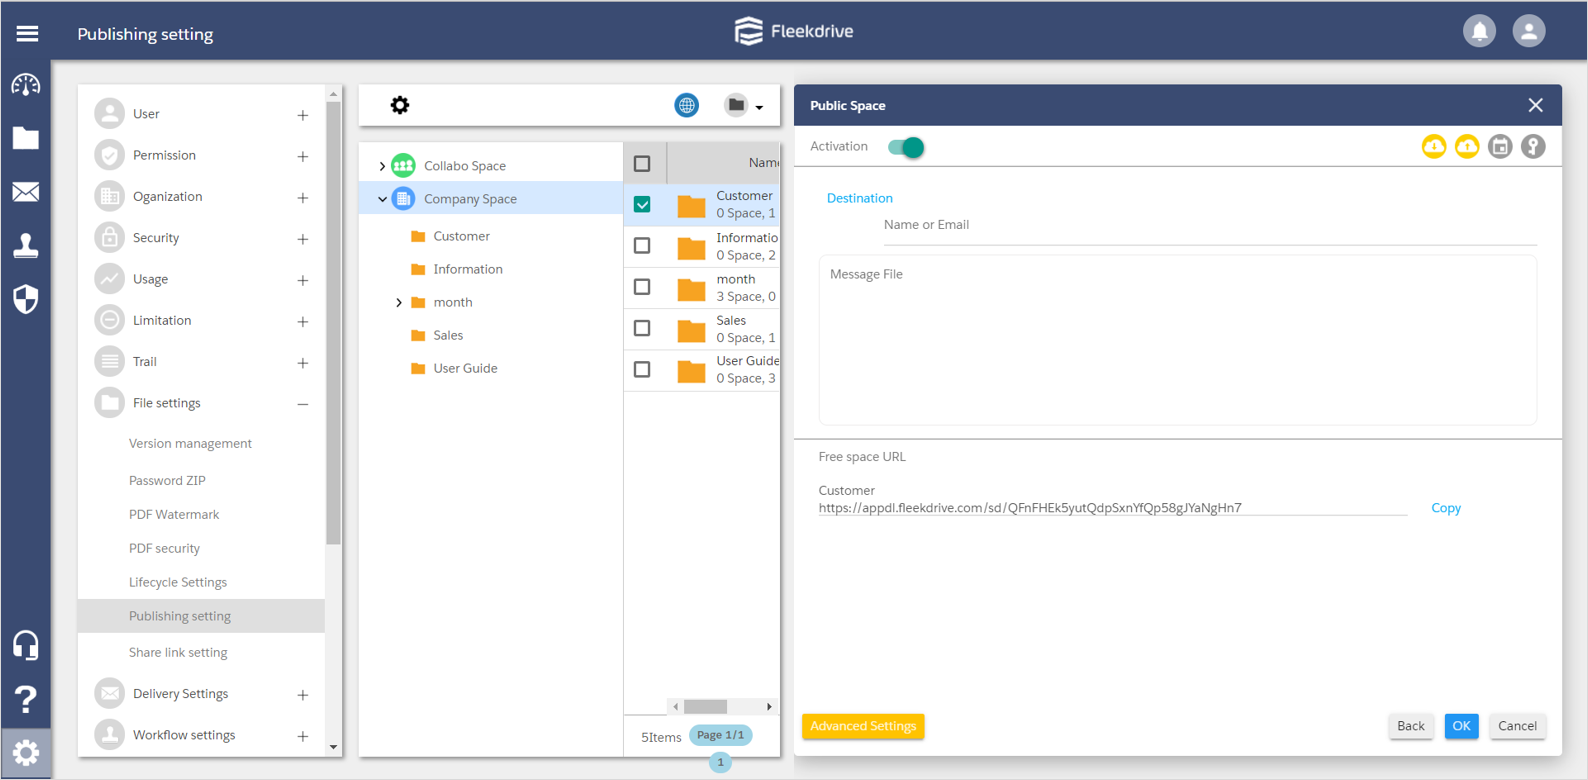
Create a new Public Space.
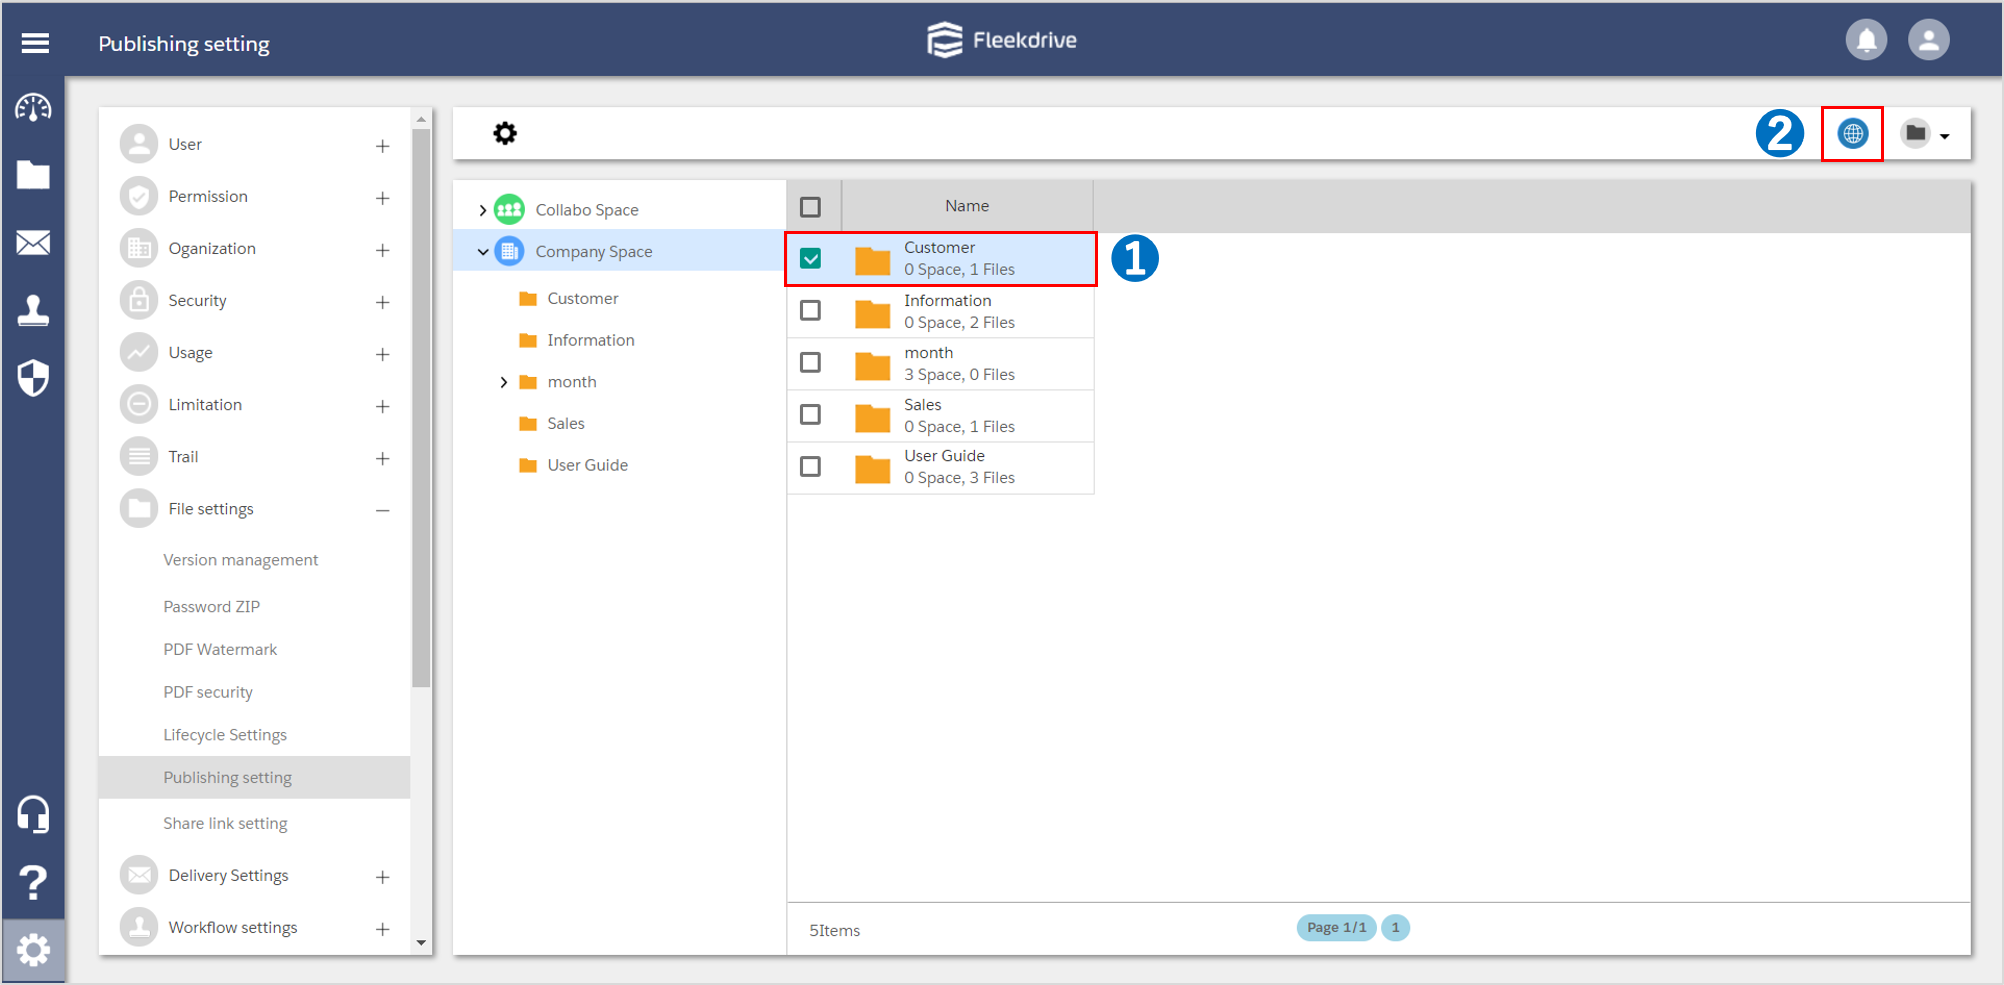
Select the space to be set for publishing, and set each items.
Select the space for publishing, and click the icon “Publishing Setting” on the upper right of the screen.
Turn on the activation toggle button, and activate the Public space setting.
Change the settings if you wish to change the site title and logo individually.
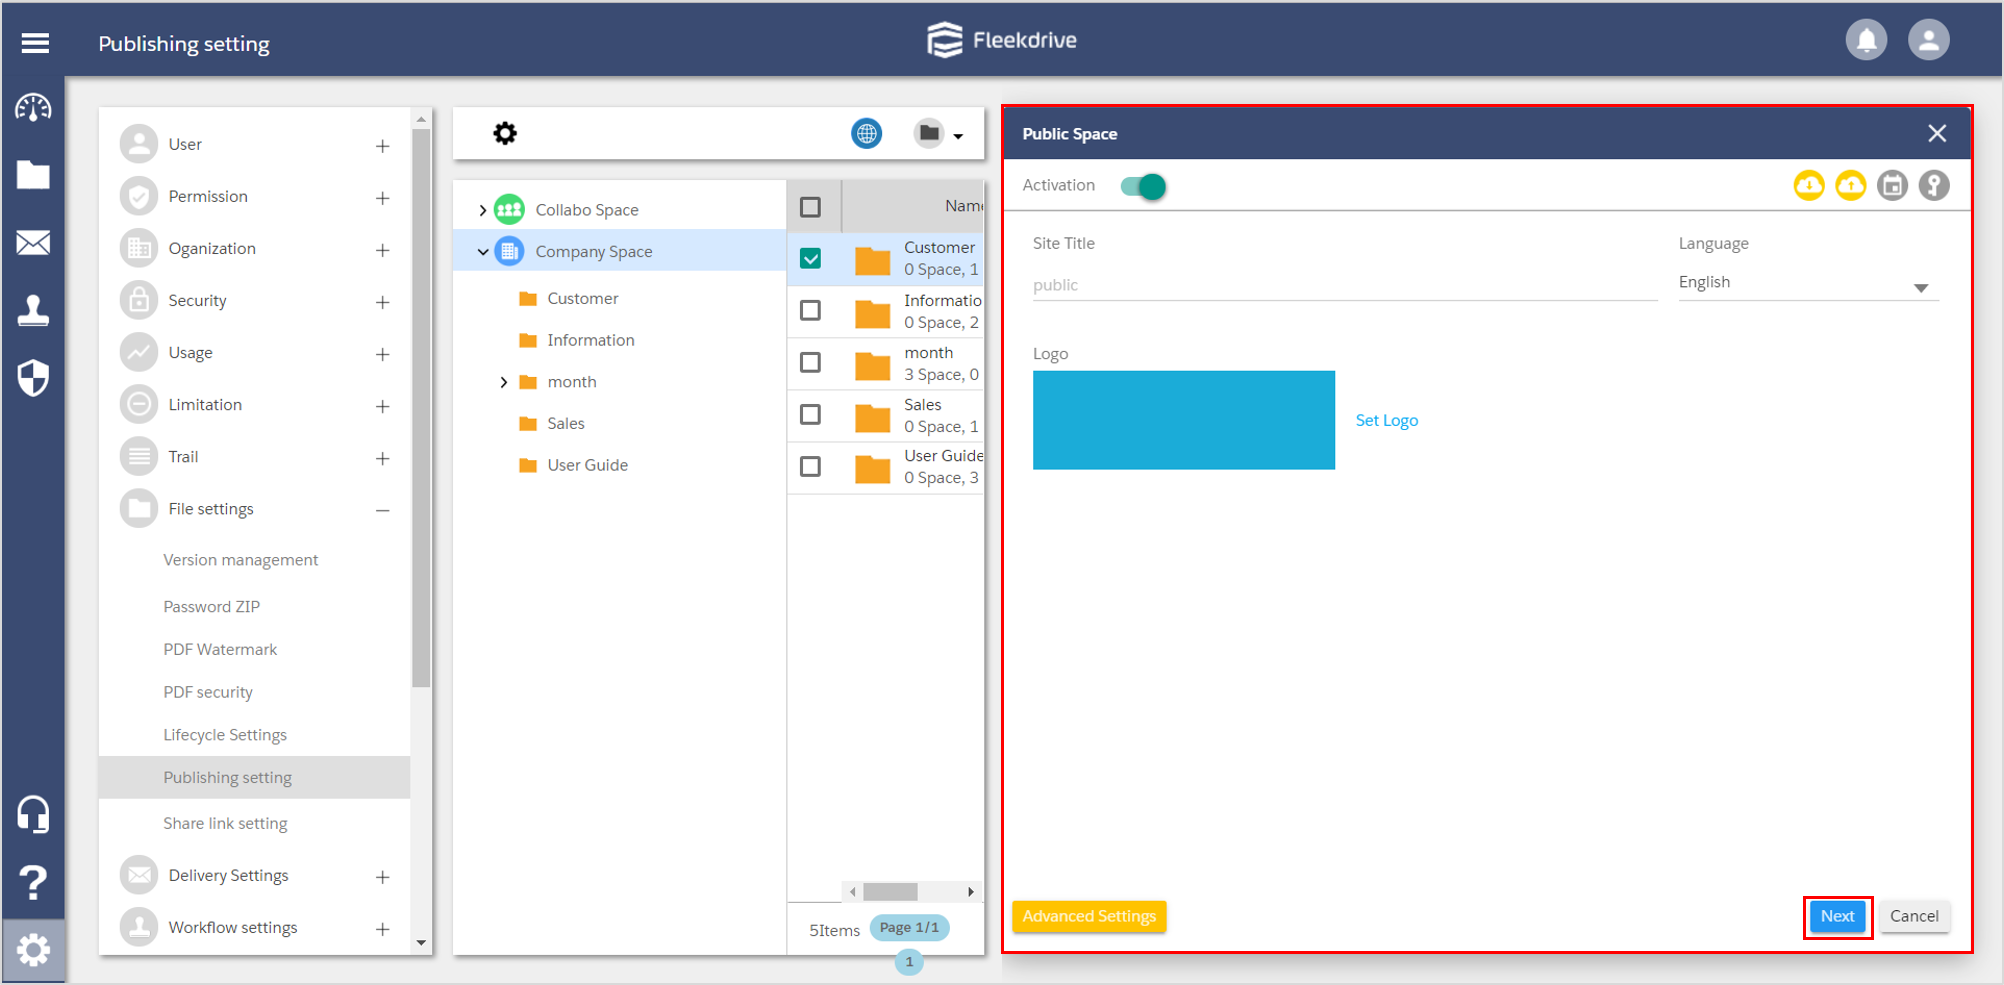
Click “Advanced Settings”, and check Public period, Security, File access, Notification settings.
Notify Public page by e-mail.
Click the “Next” button for notifying the Public screen by e-mail.
After inputting the address and message, click “OK” button.
When publishing space setting is set for multiple spaces at once, each space URL is displayed in Public space URL.
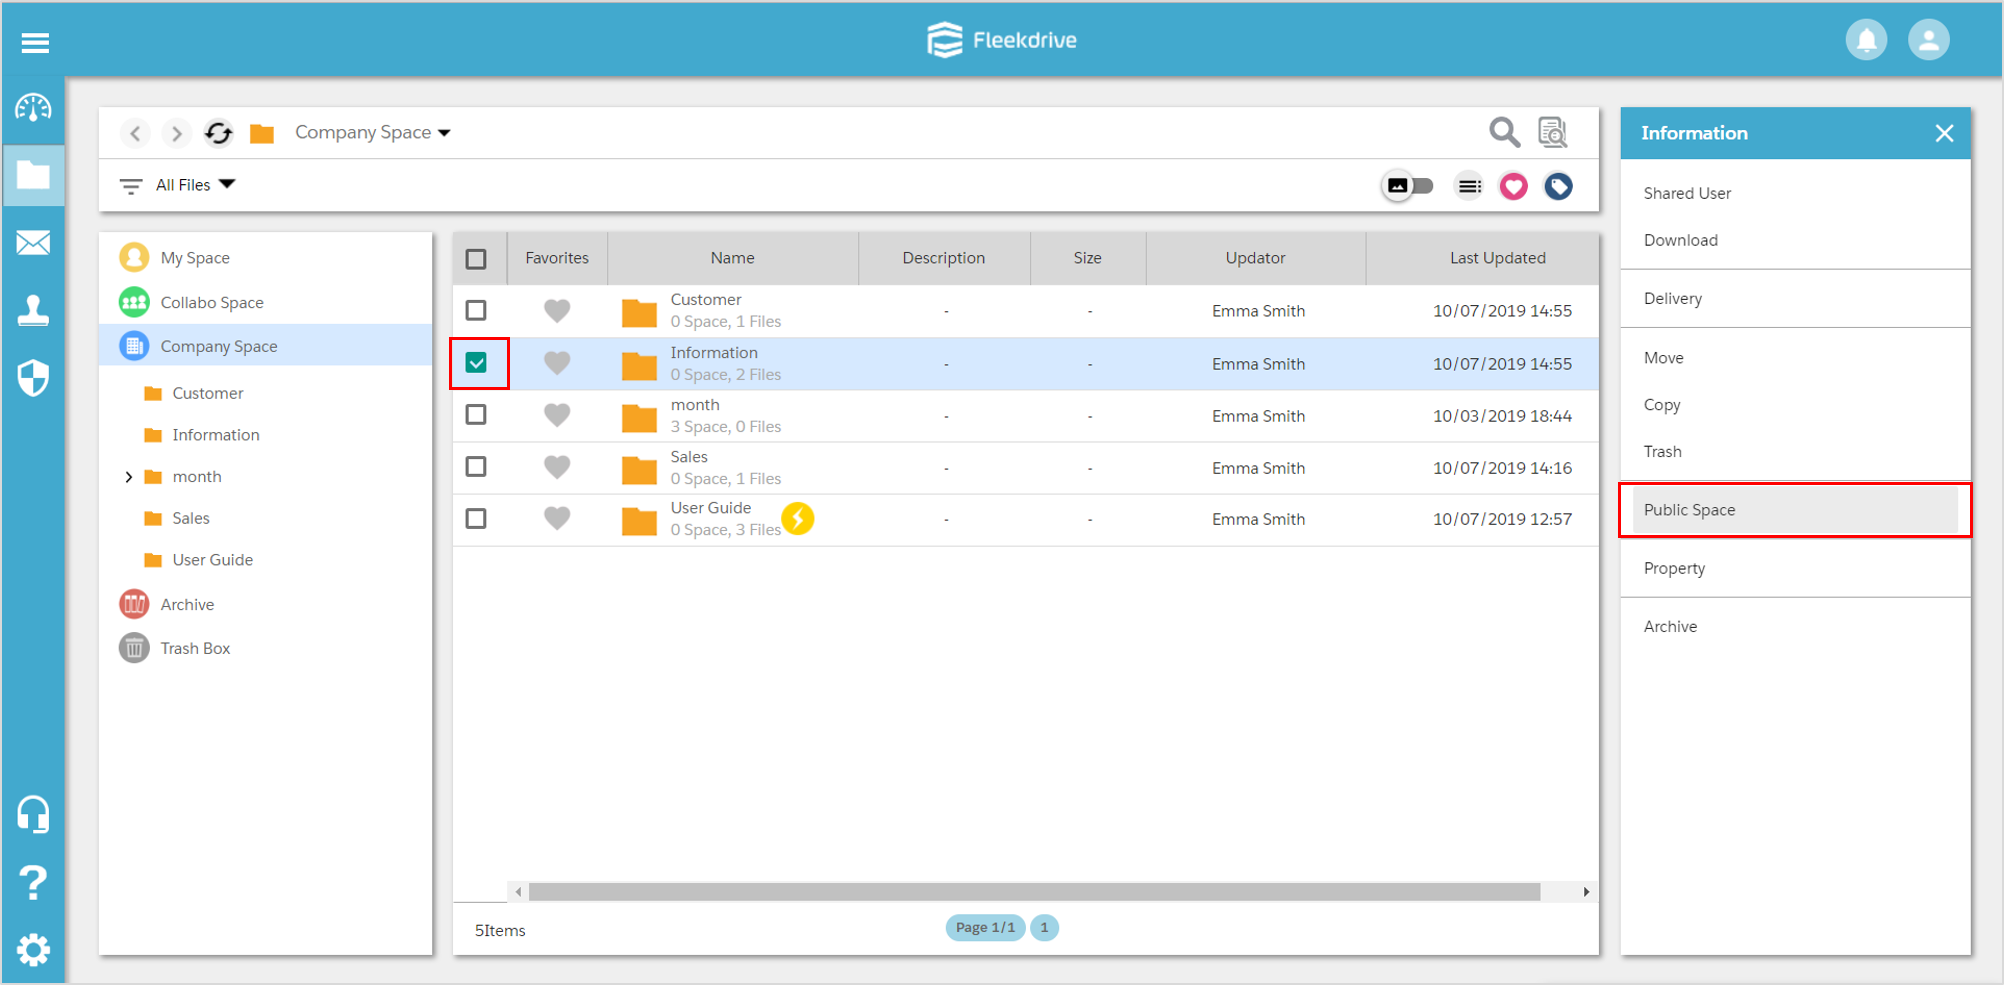
Set individually from File Sharing.
It is also possible to set Public space individually from file sharing.
When setting from File sharing, put a check for the target space, and select “Public space” in the navigation on the right of the screen.
<Supplement> When the authority of the Public Space is inherited.
If the user who set the public space cannot see the space (the reference permission is lost),
change the permission to the user who has the target Public Space.
For more details, refer to When is the public space right inherited?
Select the user who will take over the public space and click “OK” to take over it to that user.
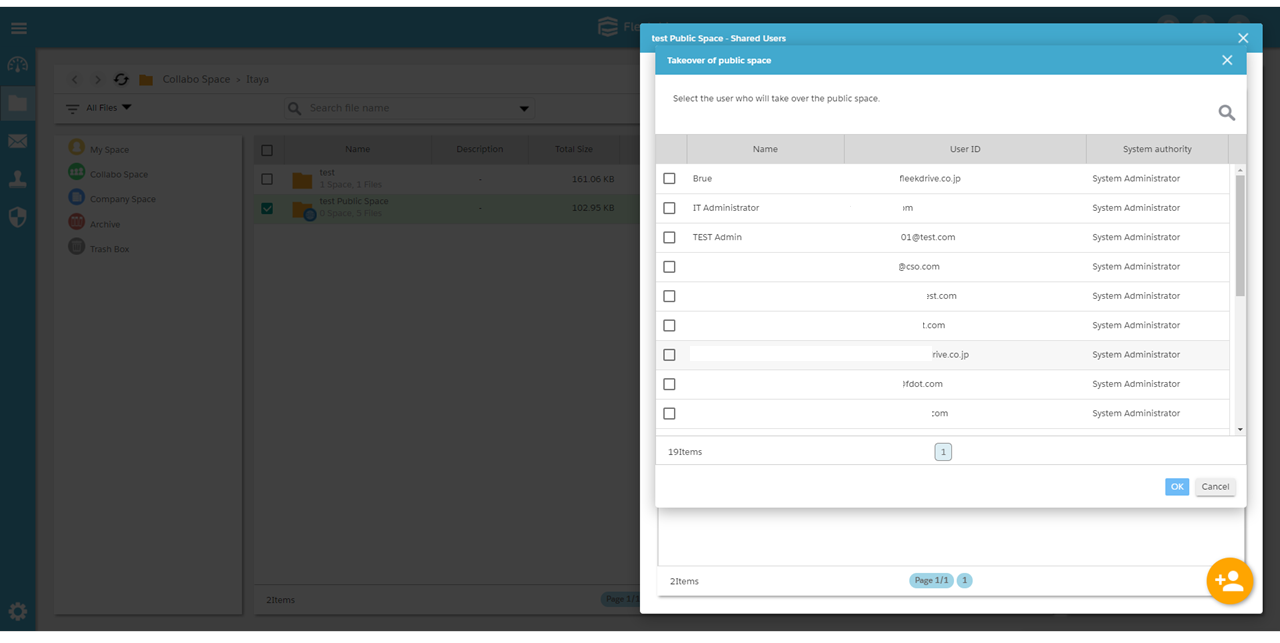
* Only "users with default System Administrator privileges" can take over the Public Space.
Last Updated : 27 Mar 2022