Create a Post
This guide explains how to create a post on the bulletin board.
Note: A Business Plus plan is required to use the Bulletin Board feature.
For more details, please refer to [this page].
Note: This feature will be available after the major version update scheduled for June 28, 2025.
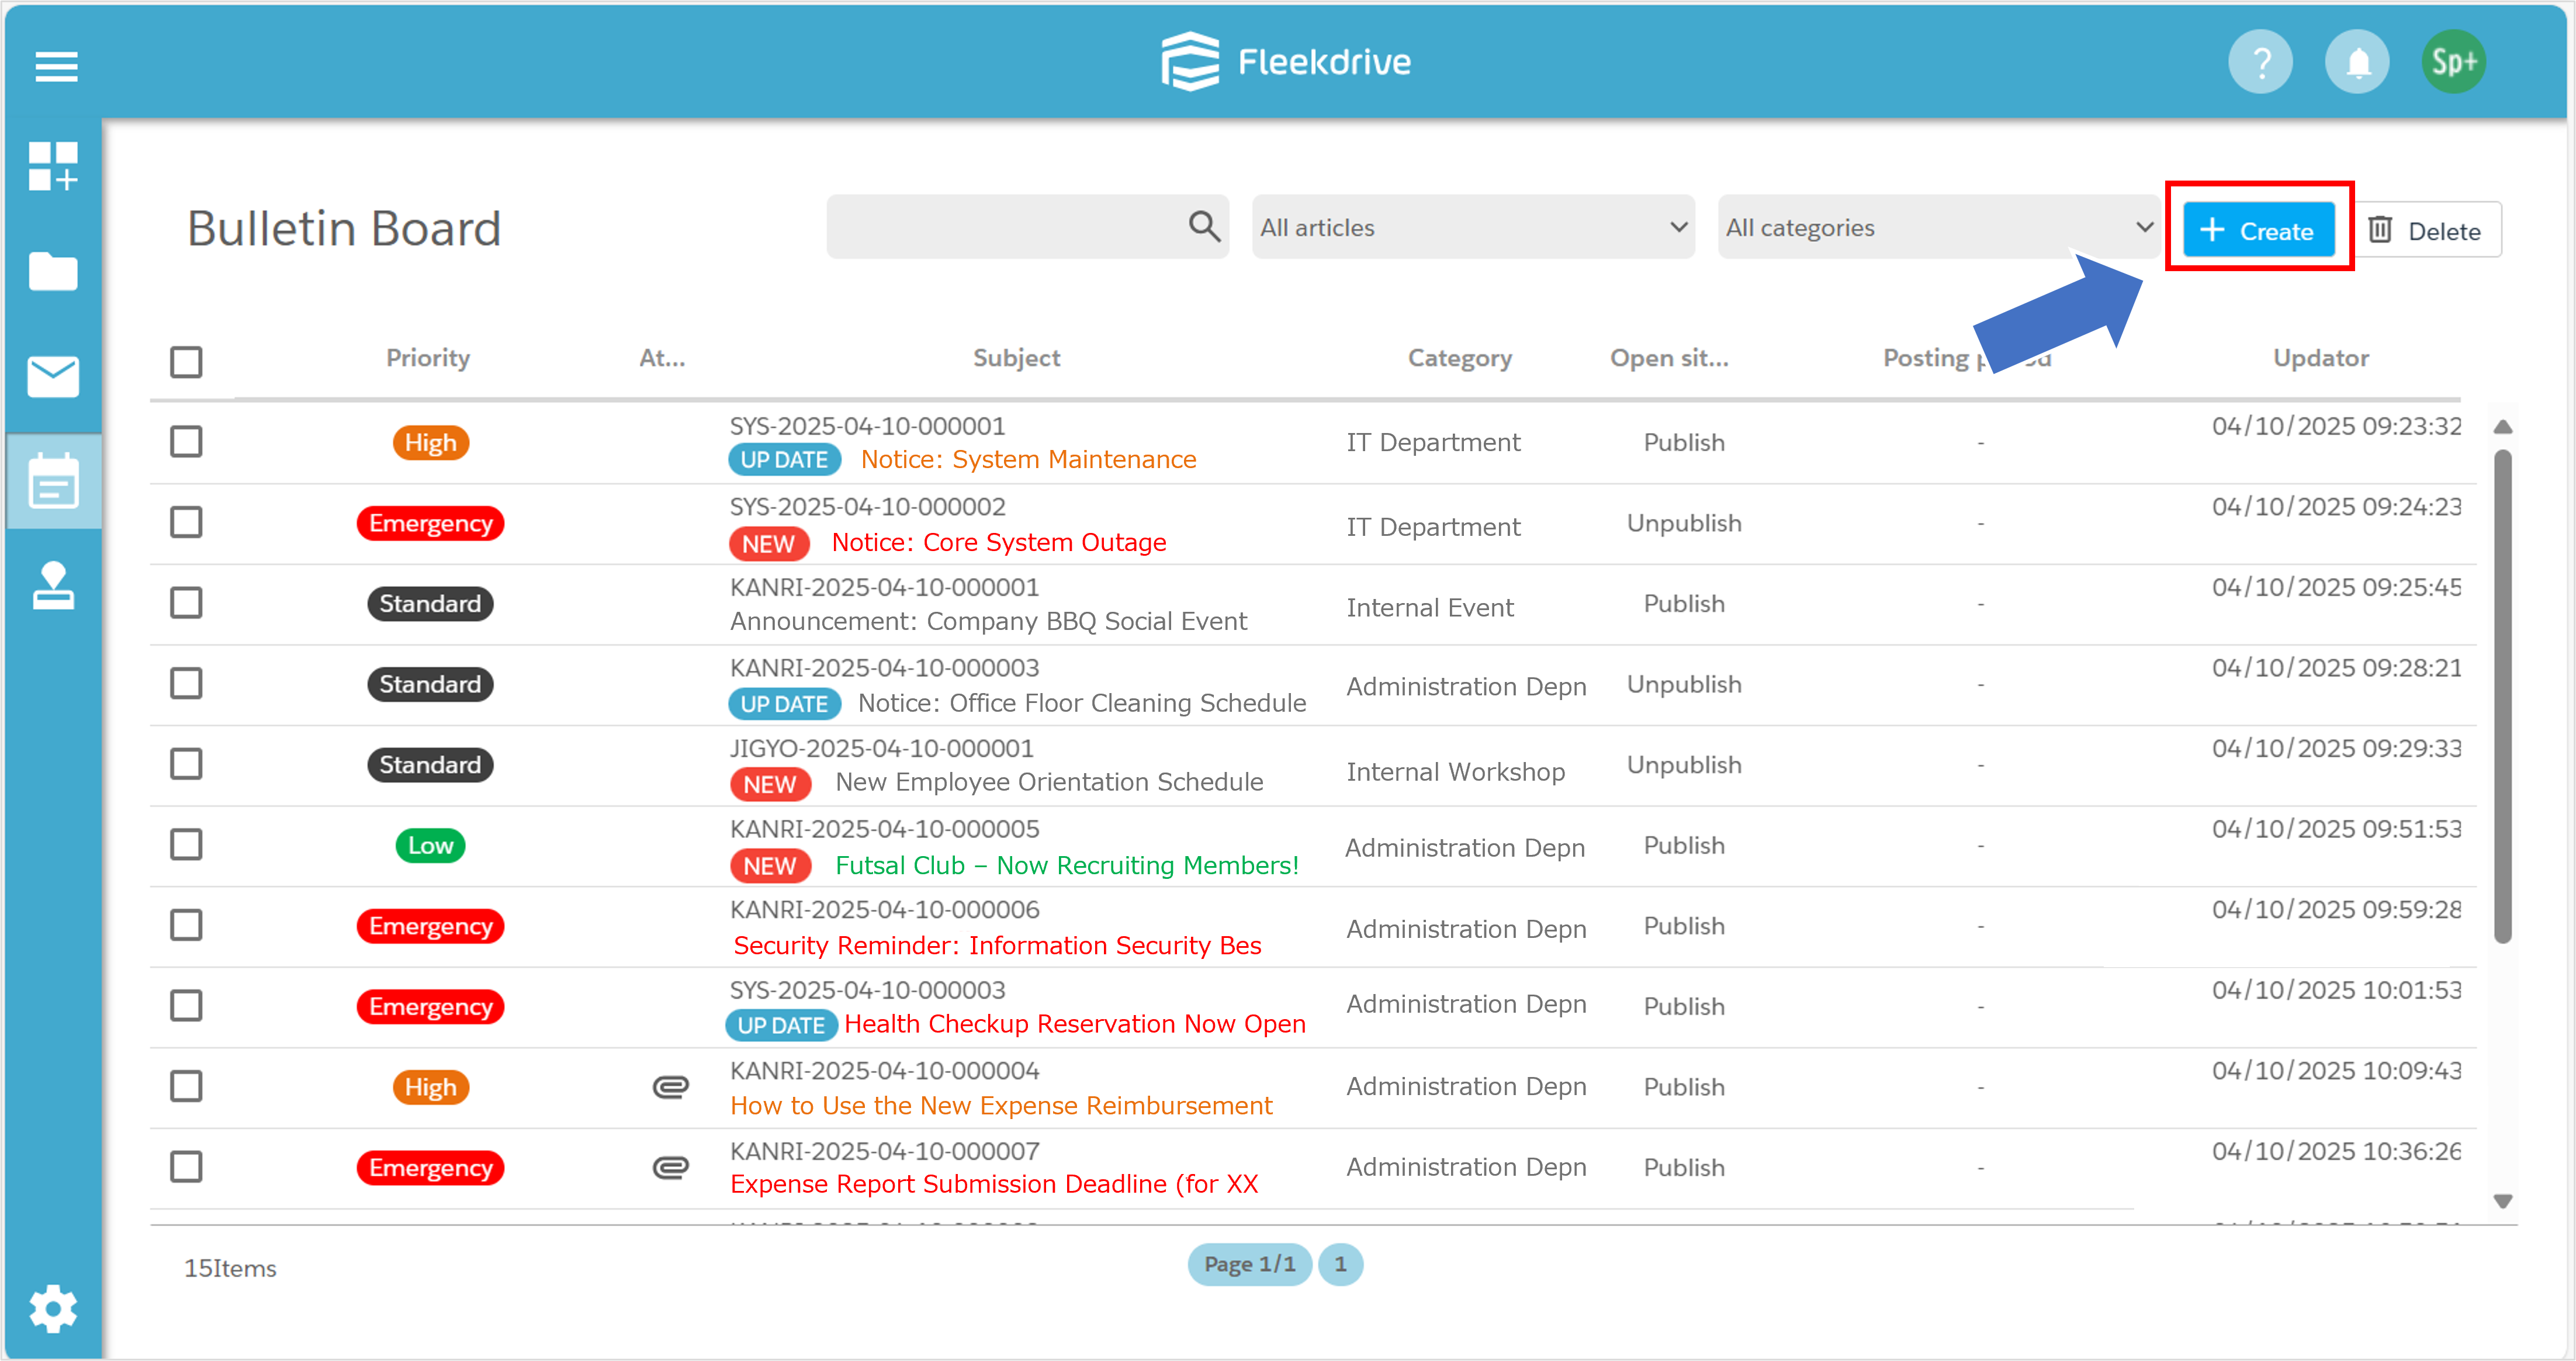
Click the “Create” button at the top right of the screen to open the Post creation screen.
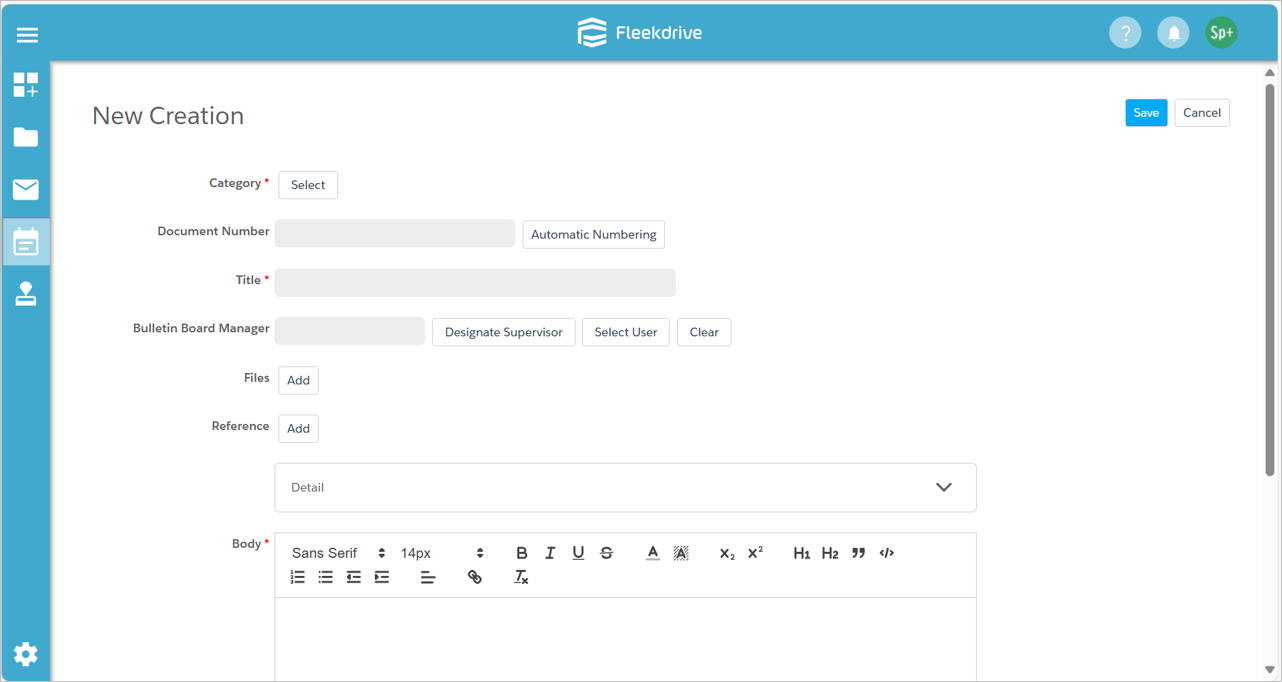
This is the new Post creation screen.
The Post creation screen contains several configuration items.
Fields marked with a * are required fields.
Each configuration item is explained in the following sections.
- To create a Post, you must be granted permission.
- You must have at least Standard Authority for Bulletin Board System Authority.
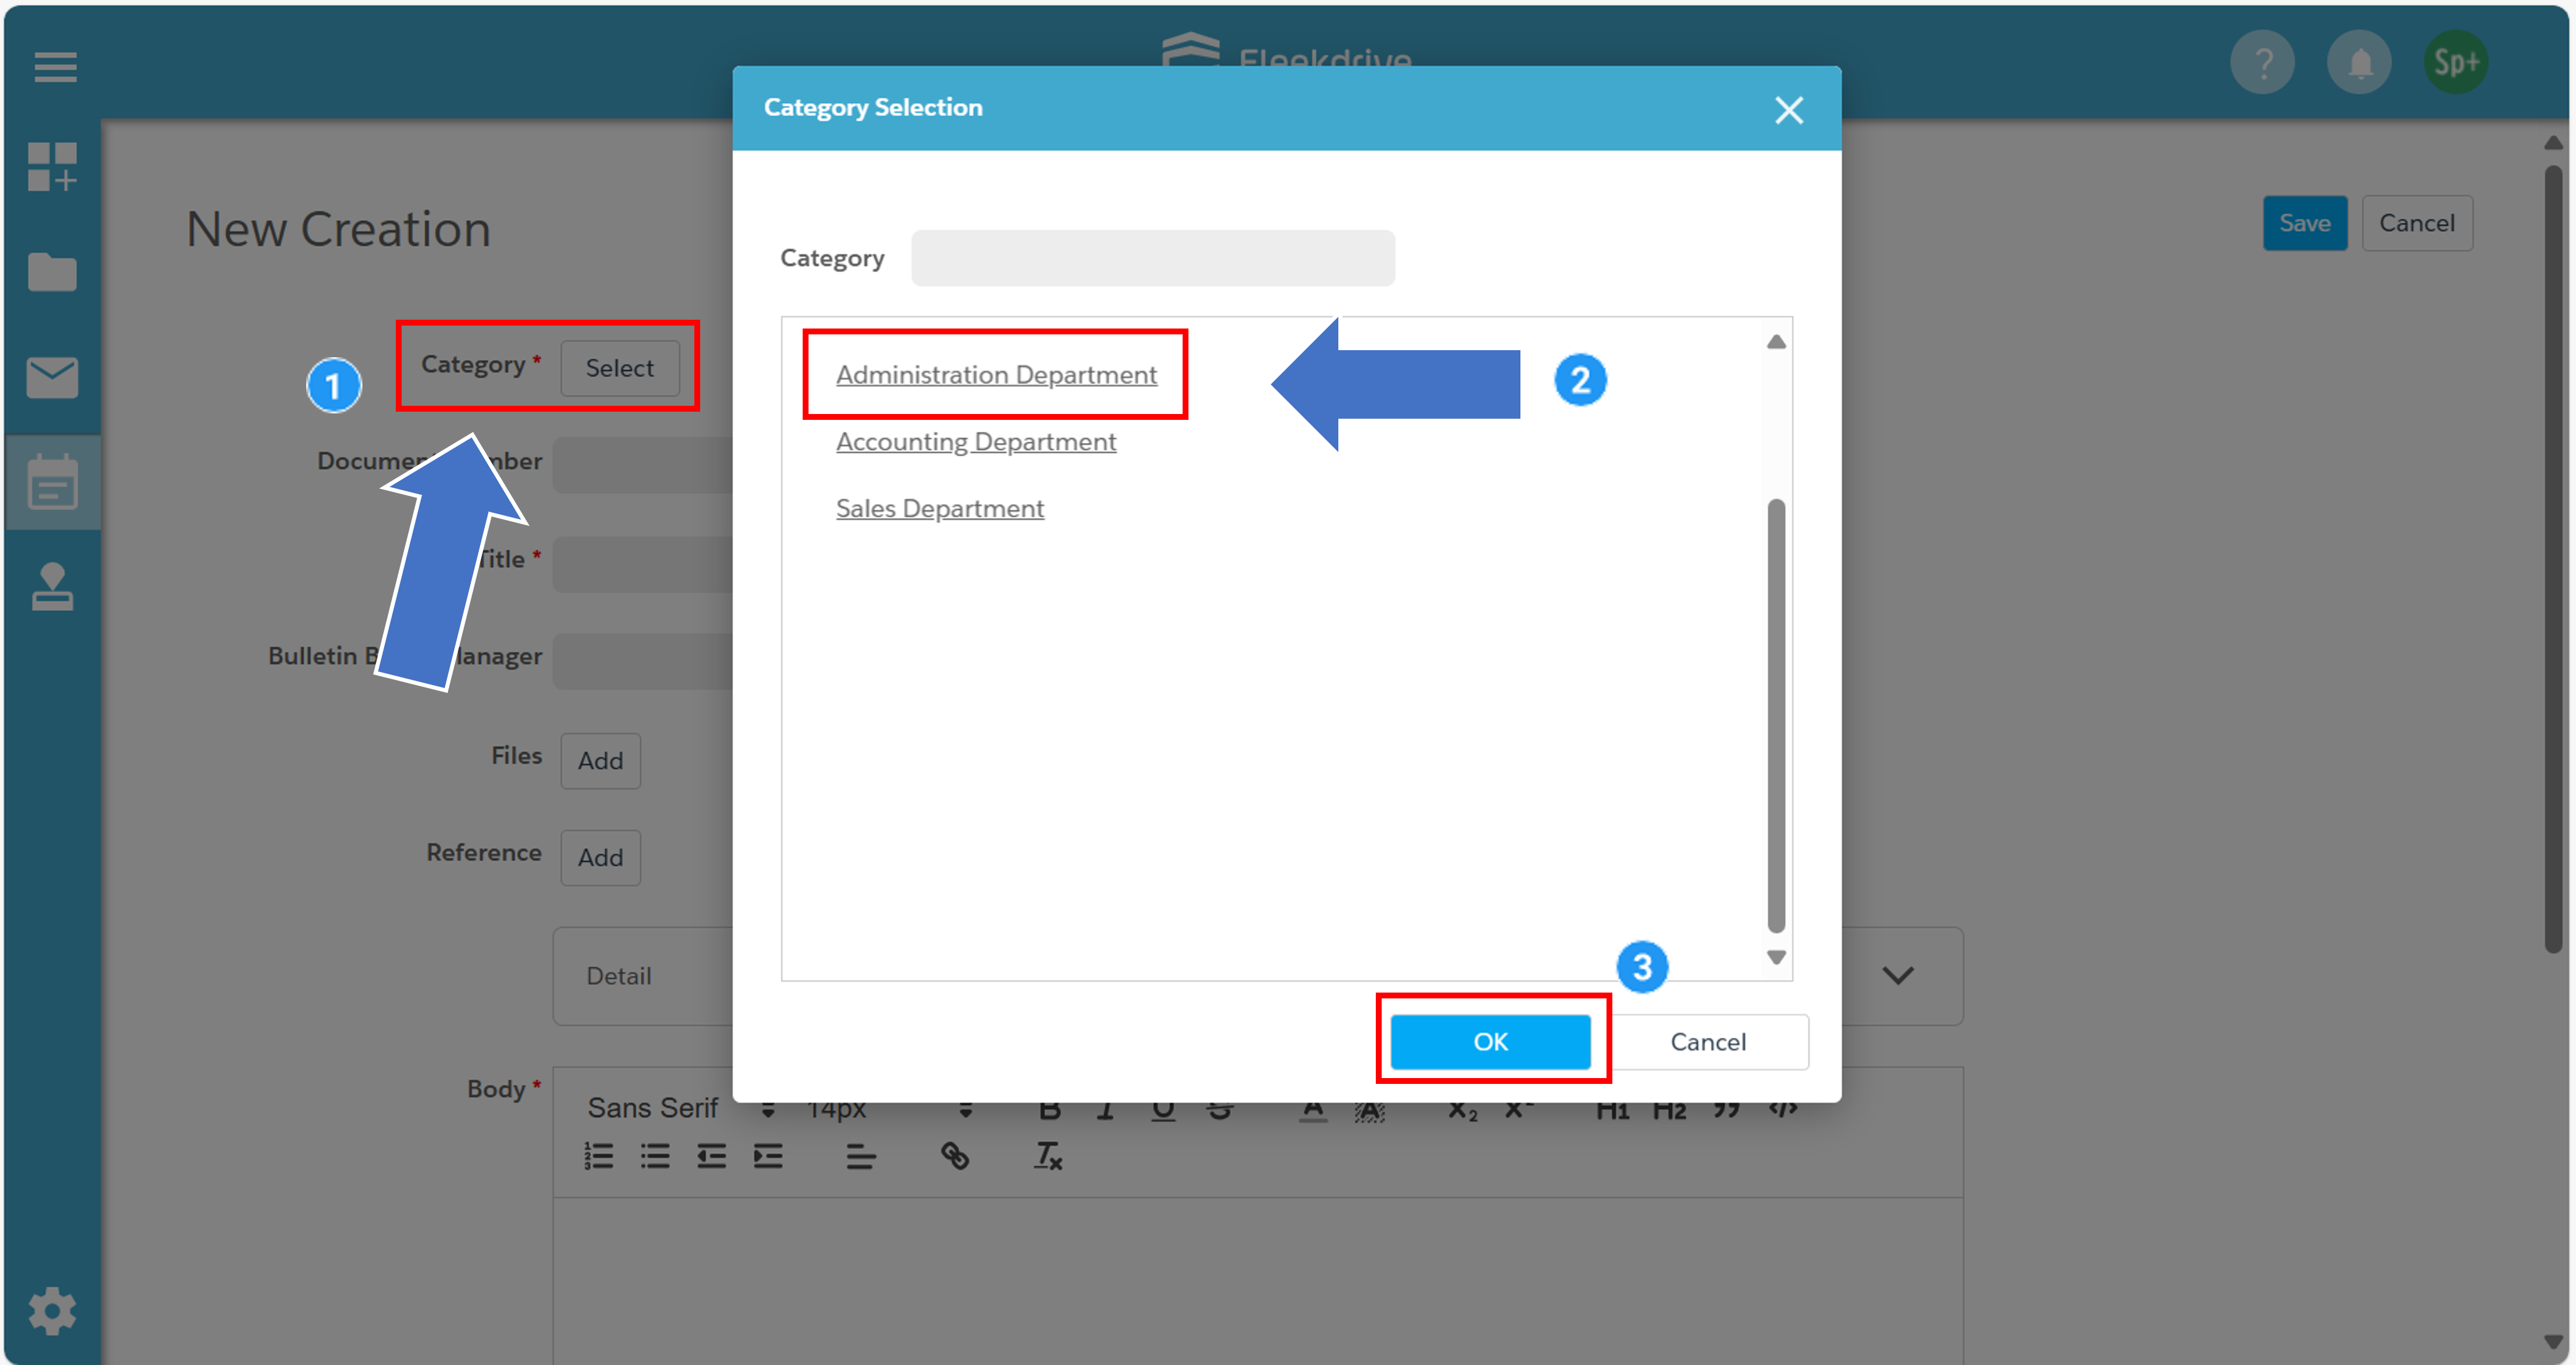
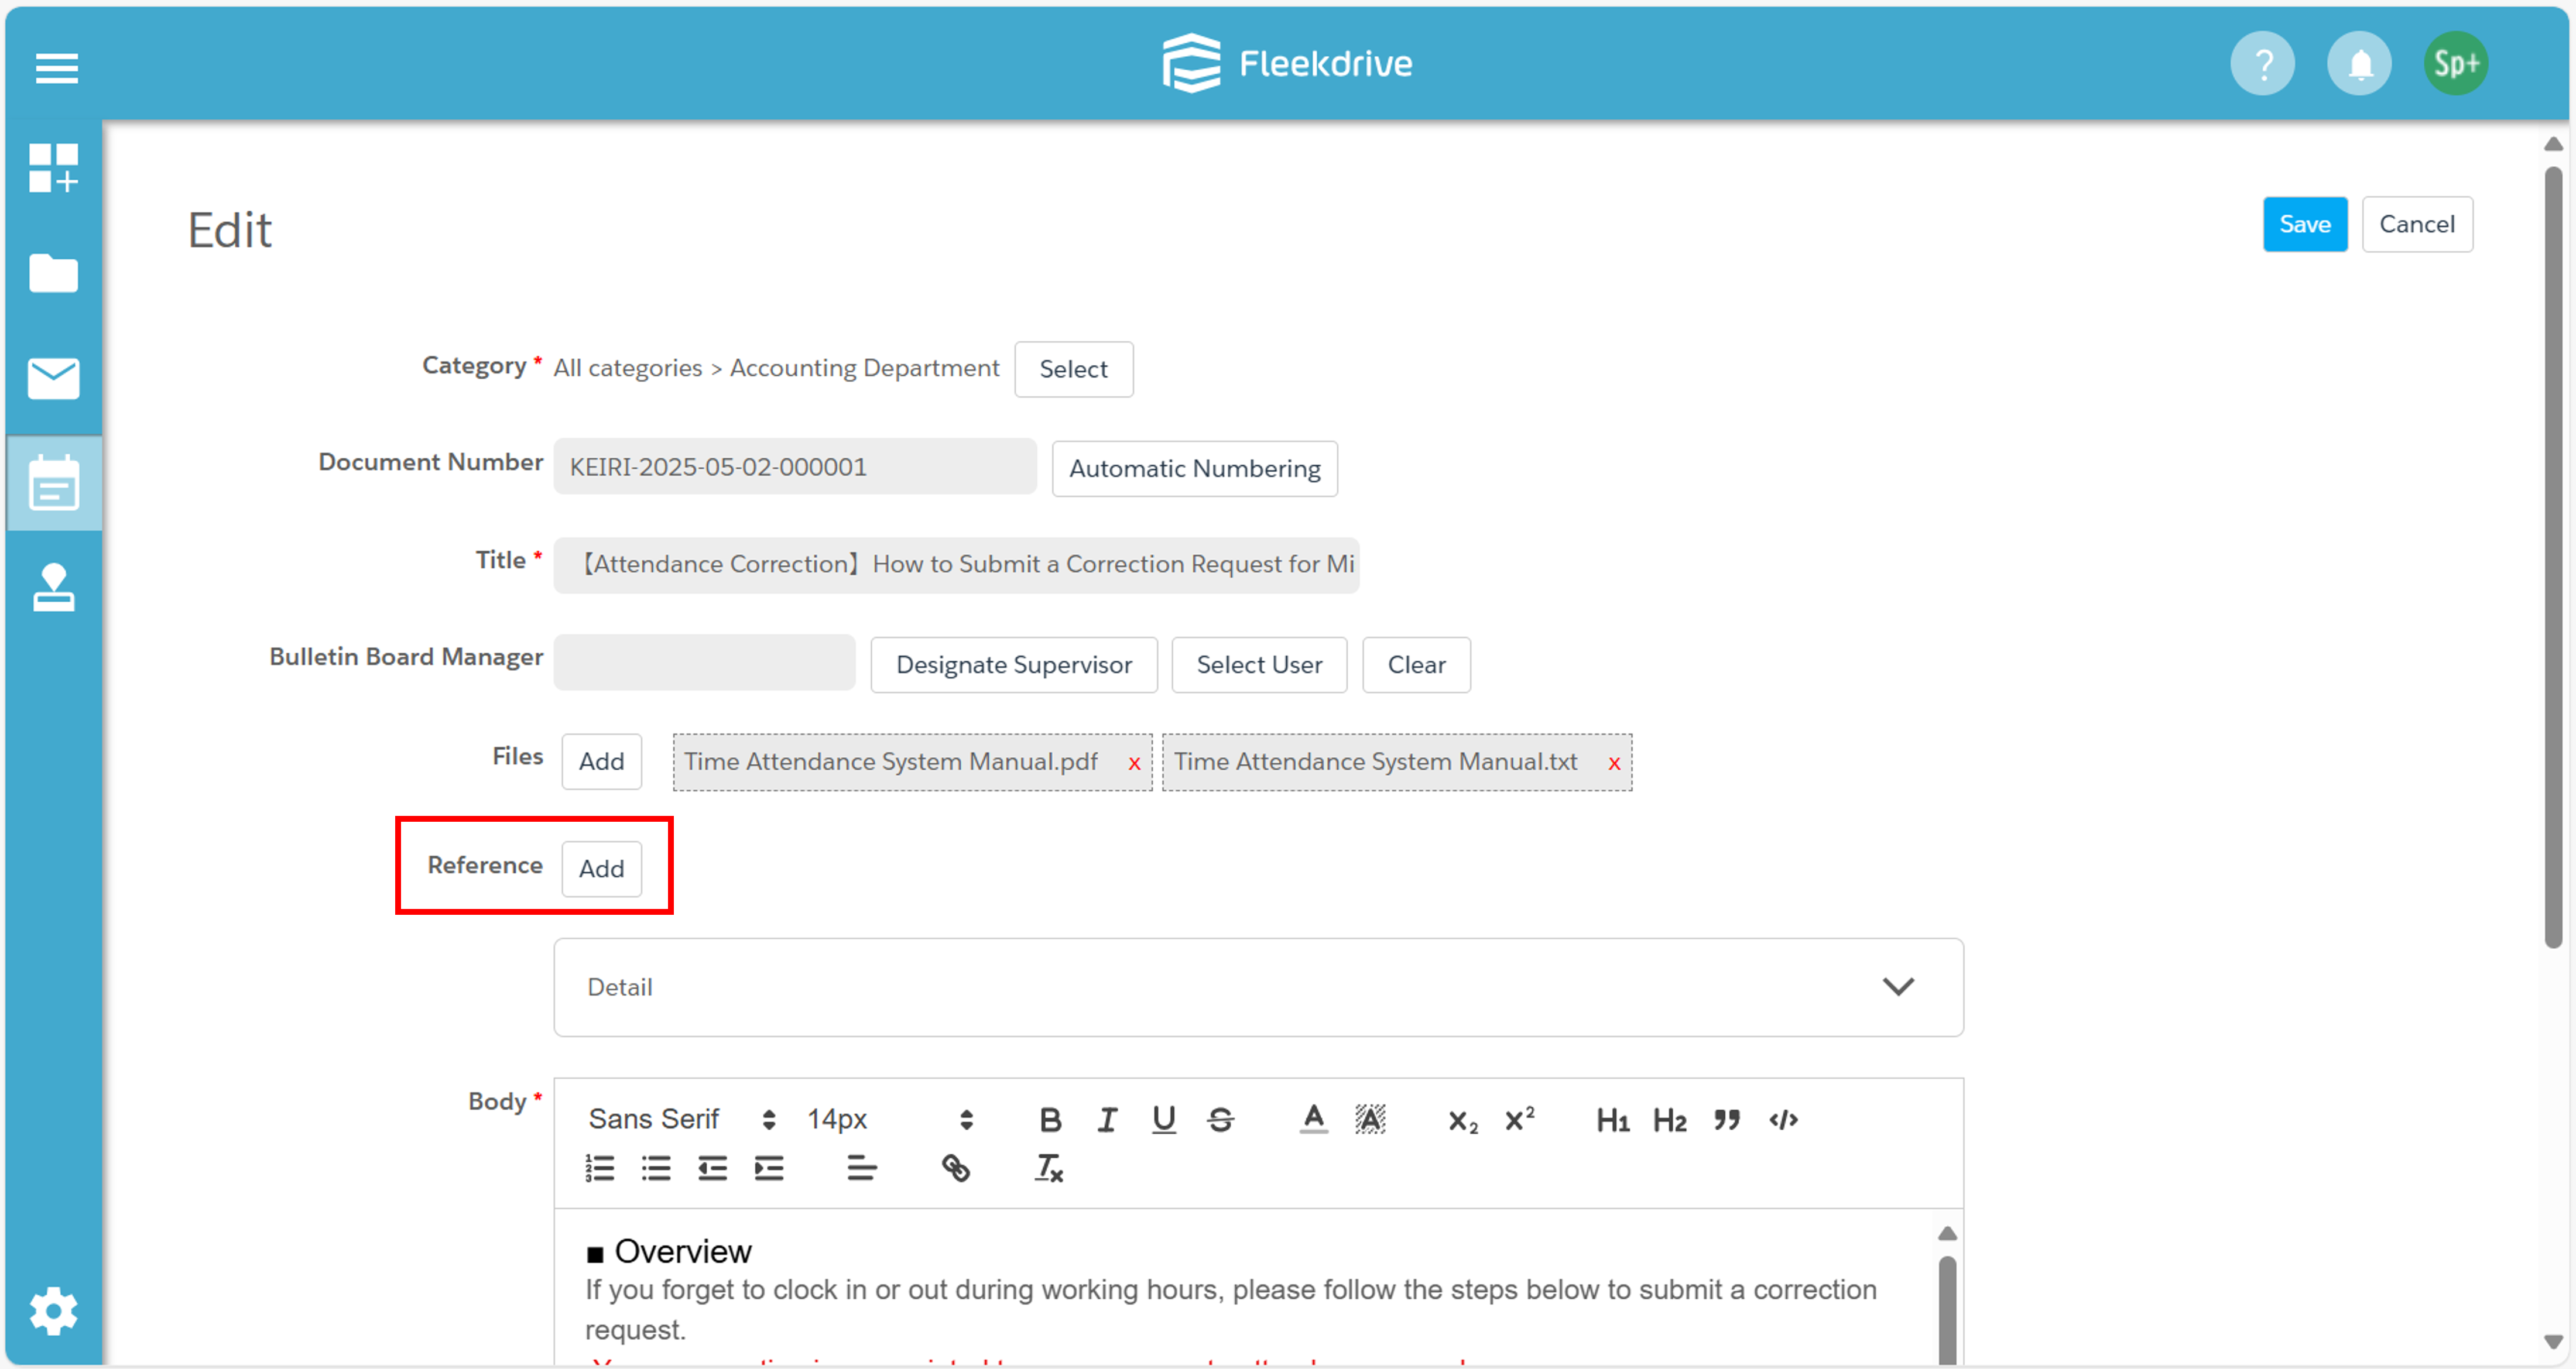
This is a required field.
Click the “Select” button next to Category.
Then choose either “All Categories” or a Category predefined by the administrator.
Click “OK” to confirm.
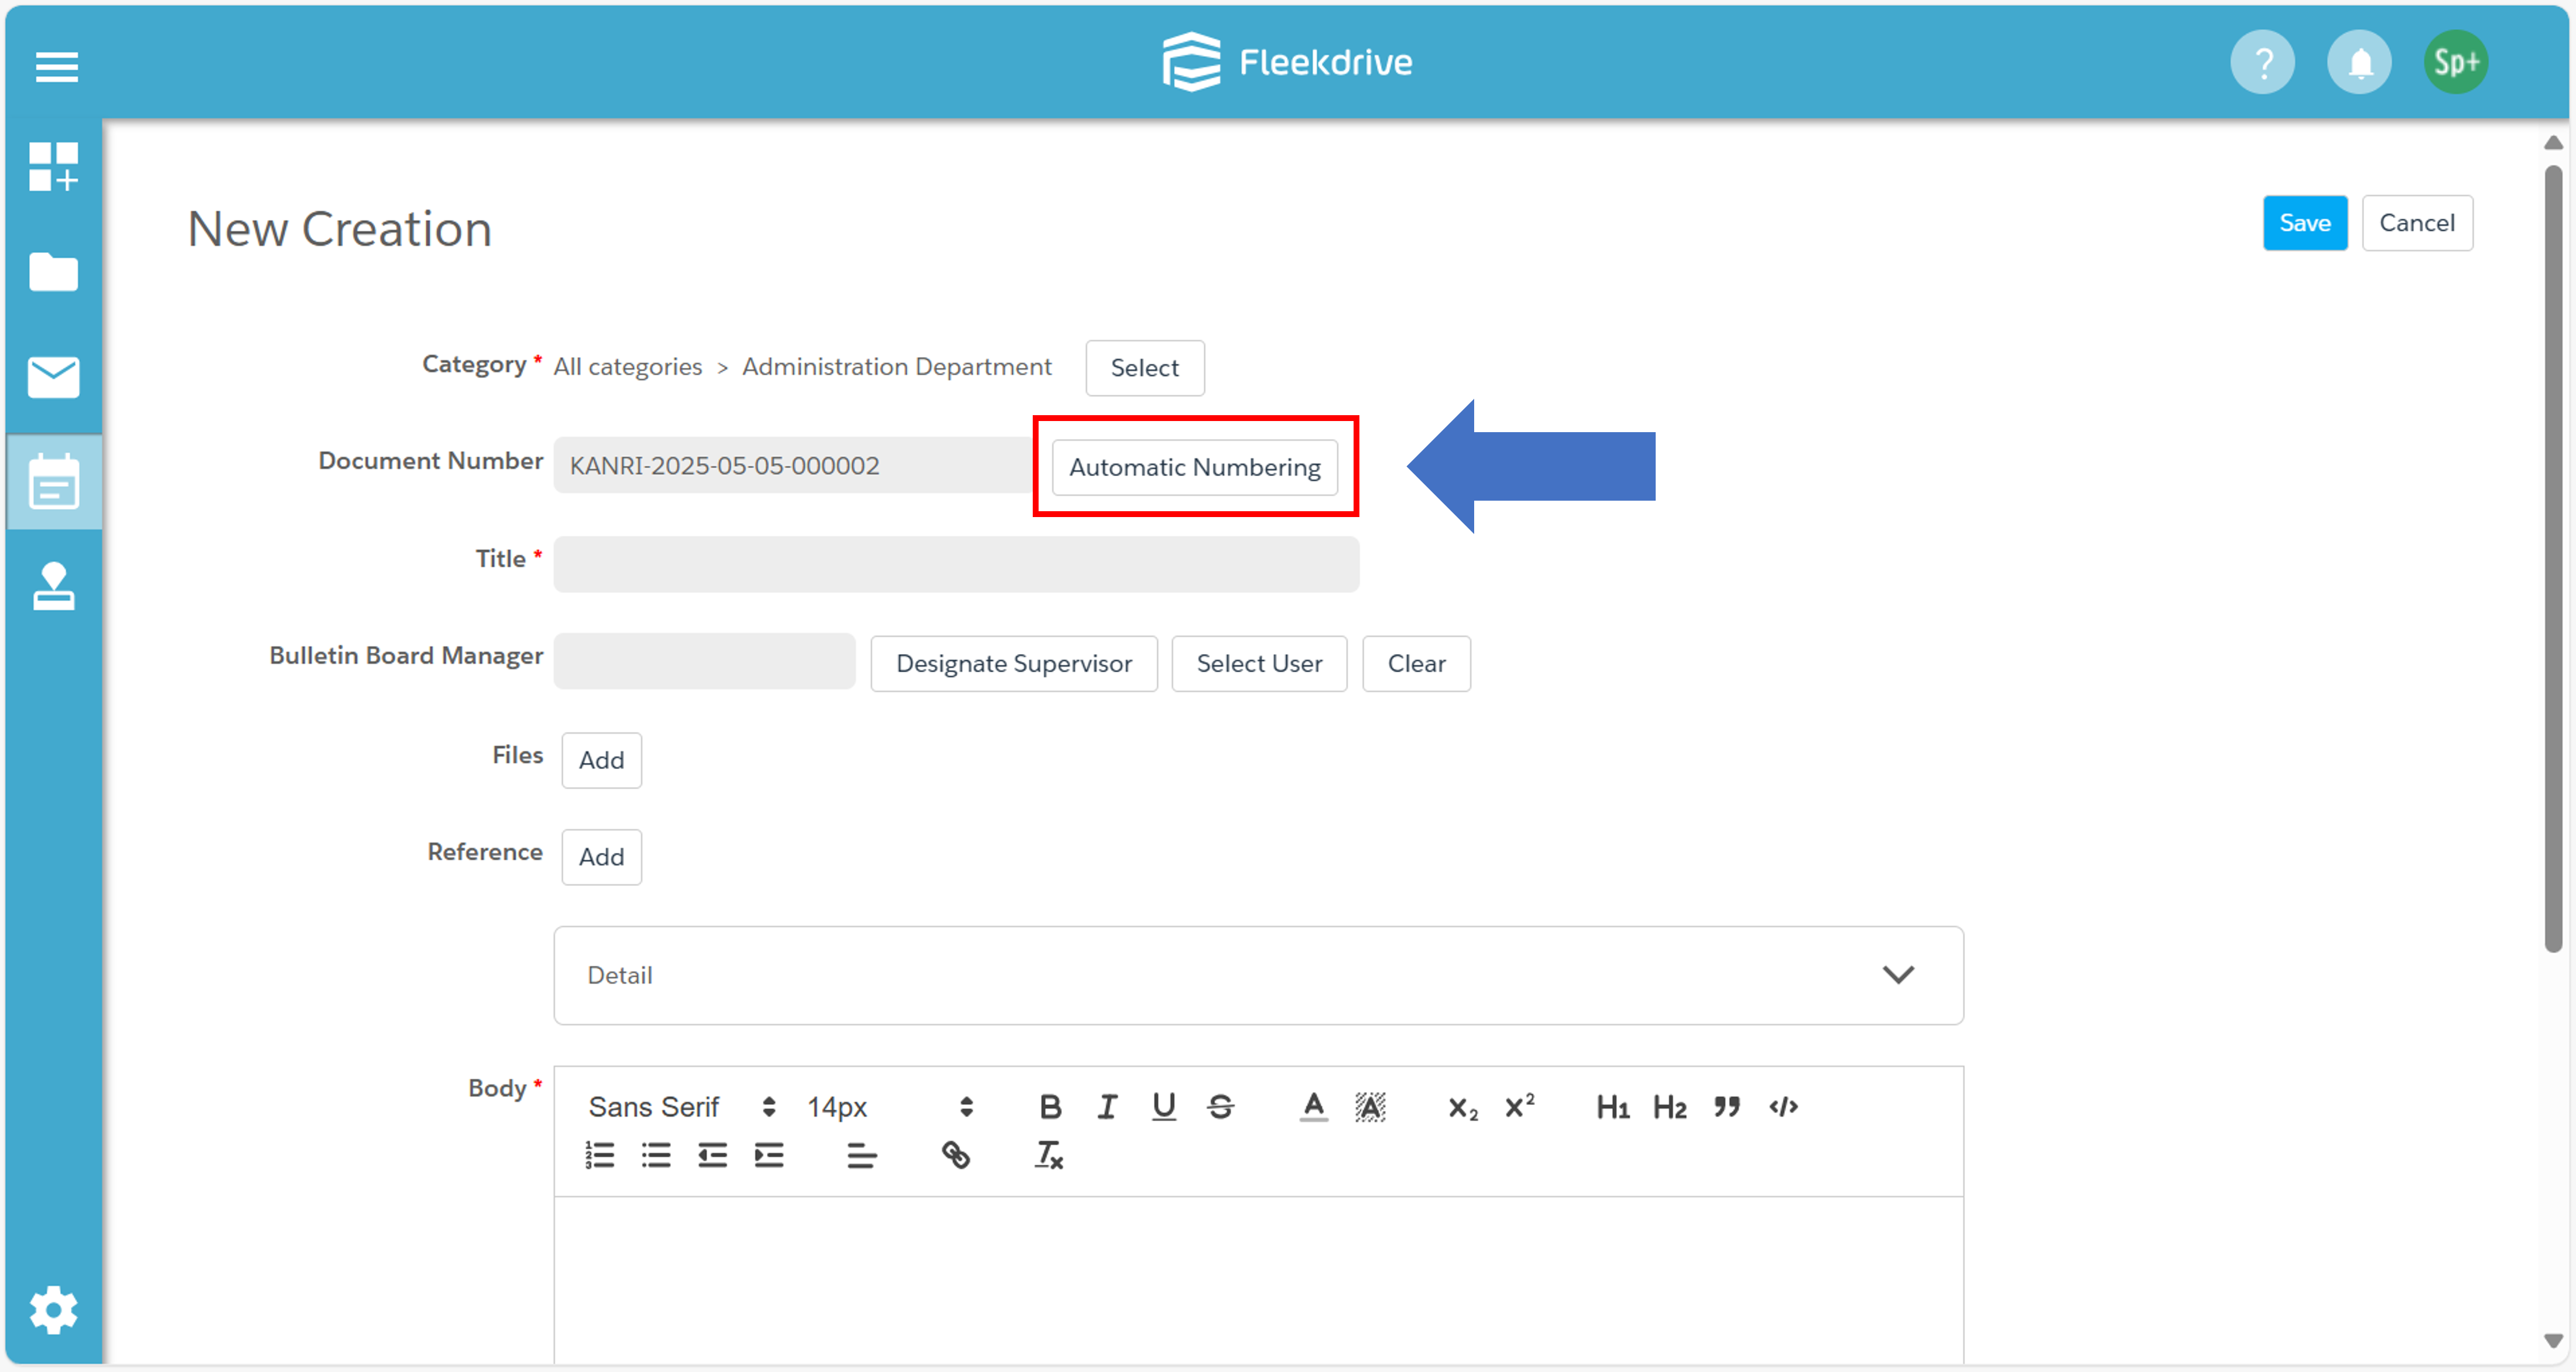
Setting a Posting Number is optional.
If the selected Category already has a predefined format for Posting Numbers,
a number will be auto-generated according to that format.
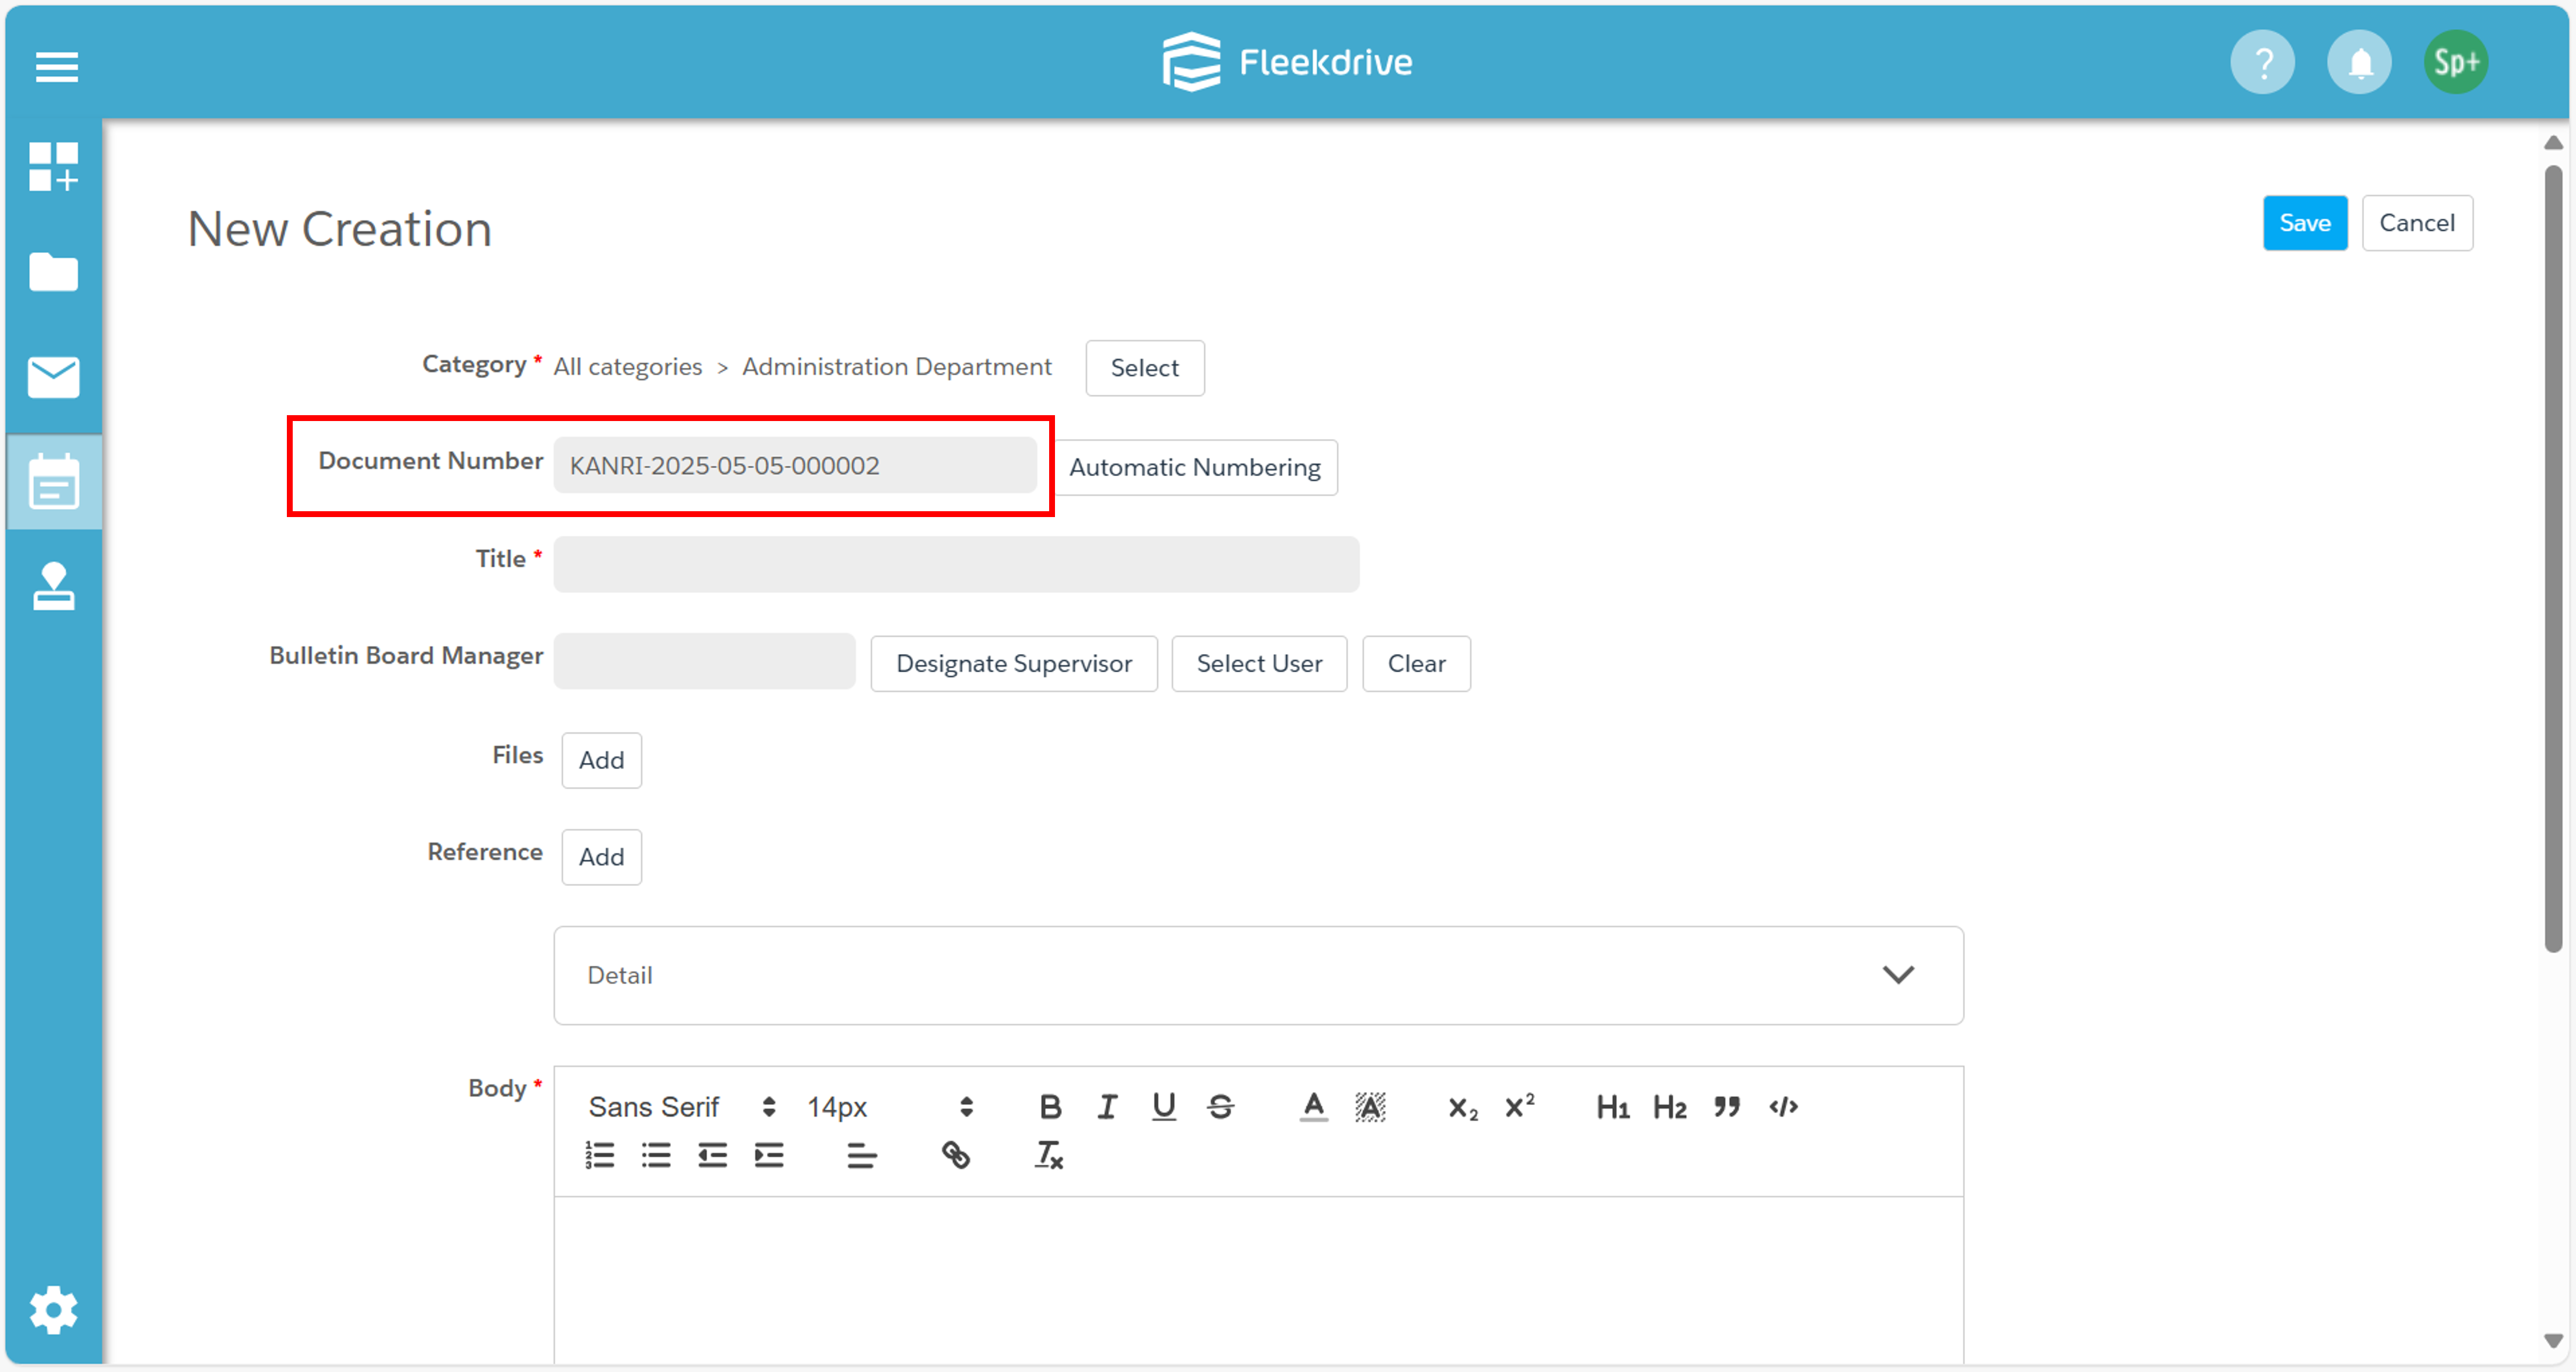
You may also enter the Posting Number manually.
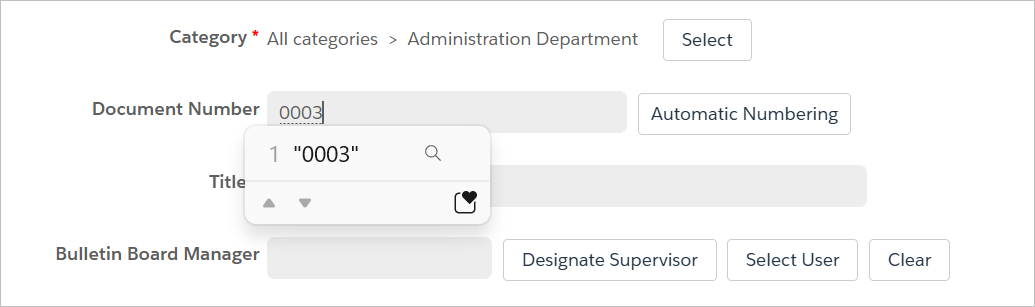
Click the “Automatic Numbering” button to revert to the auto-generated number.
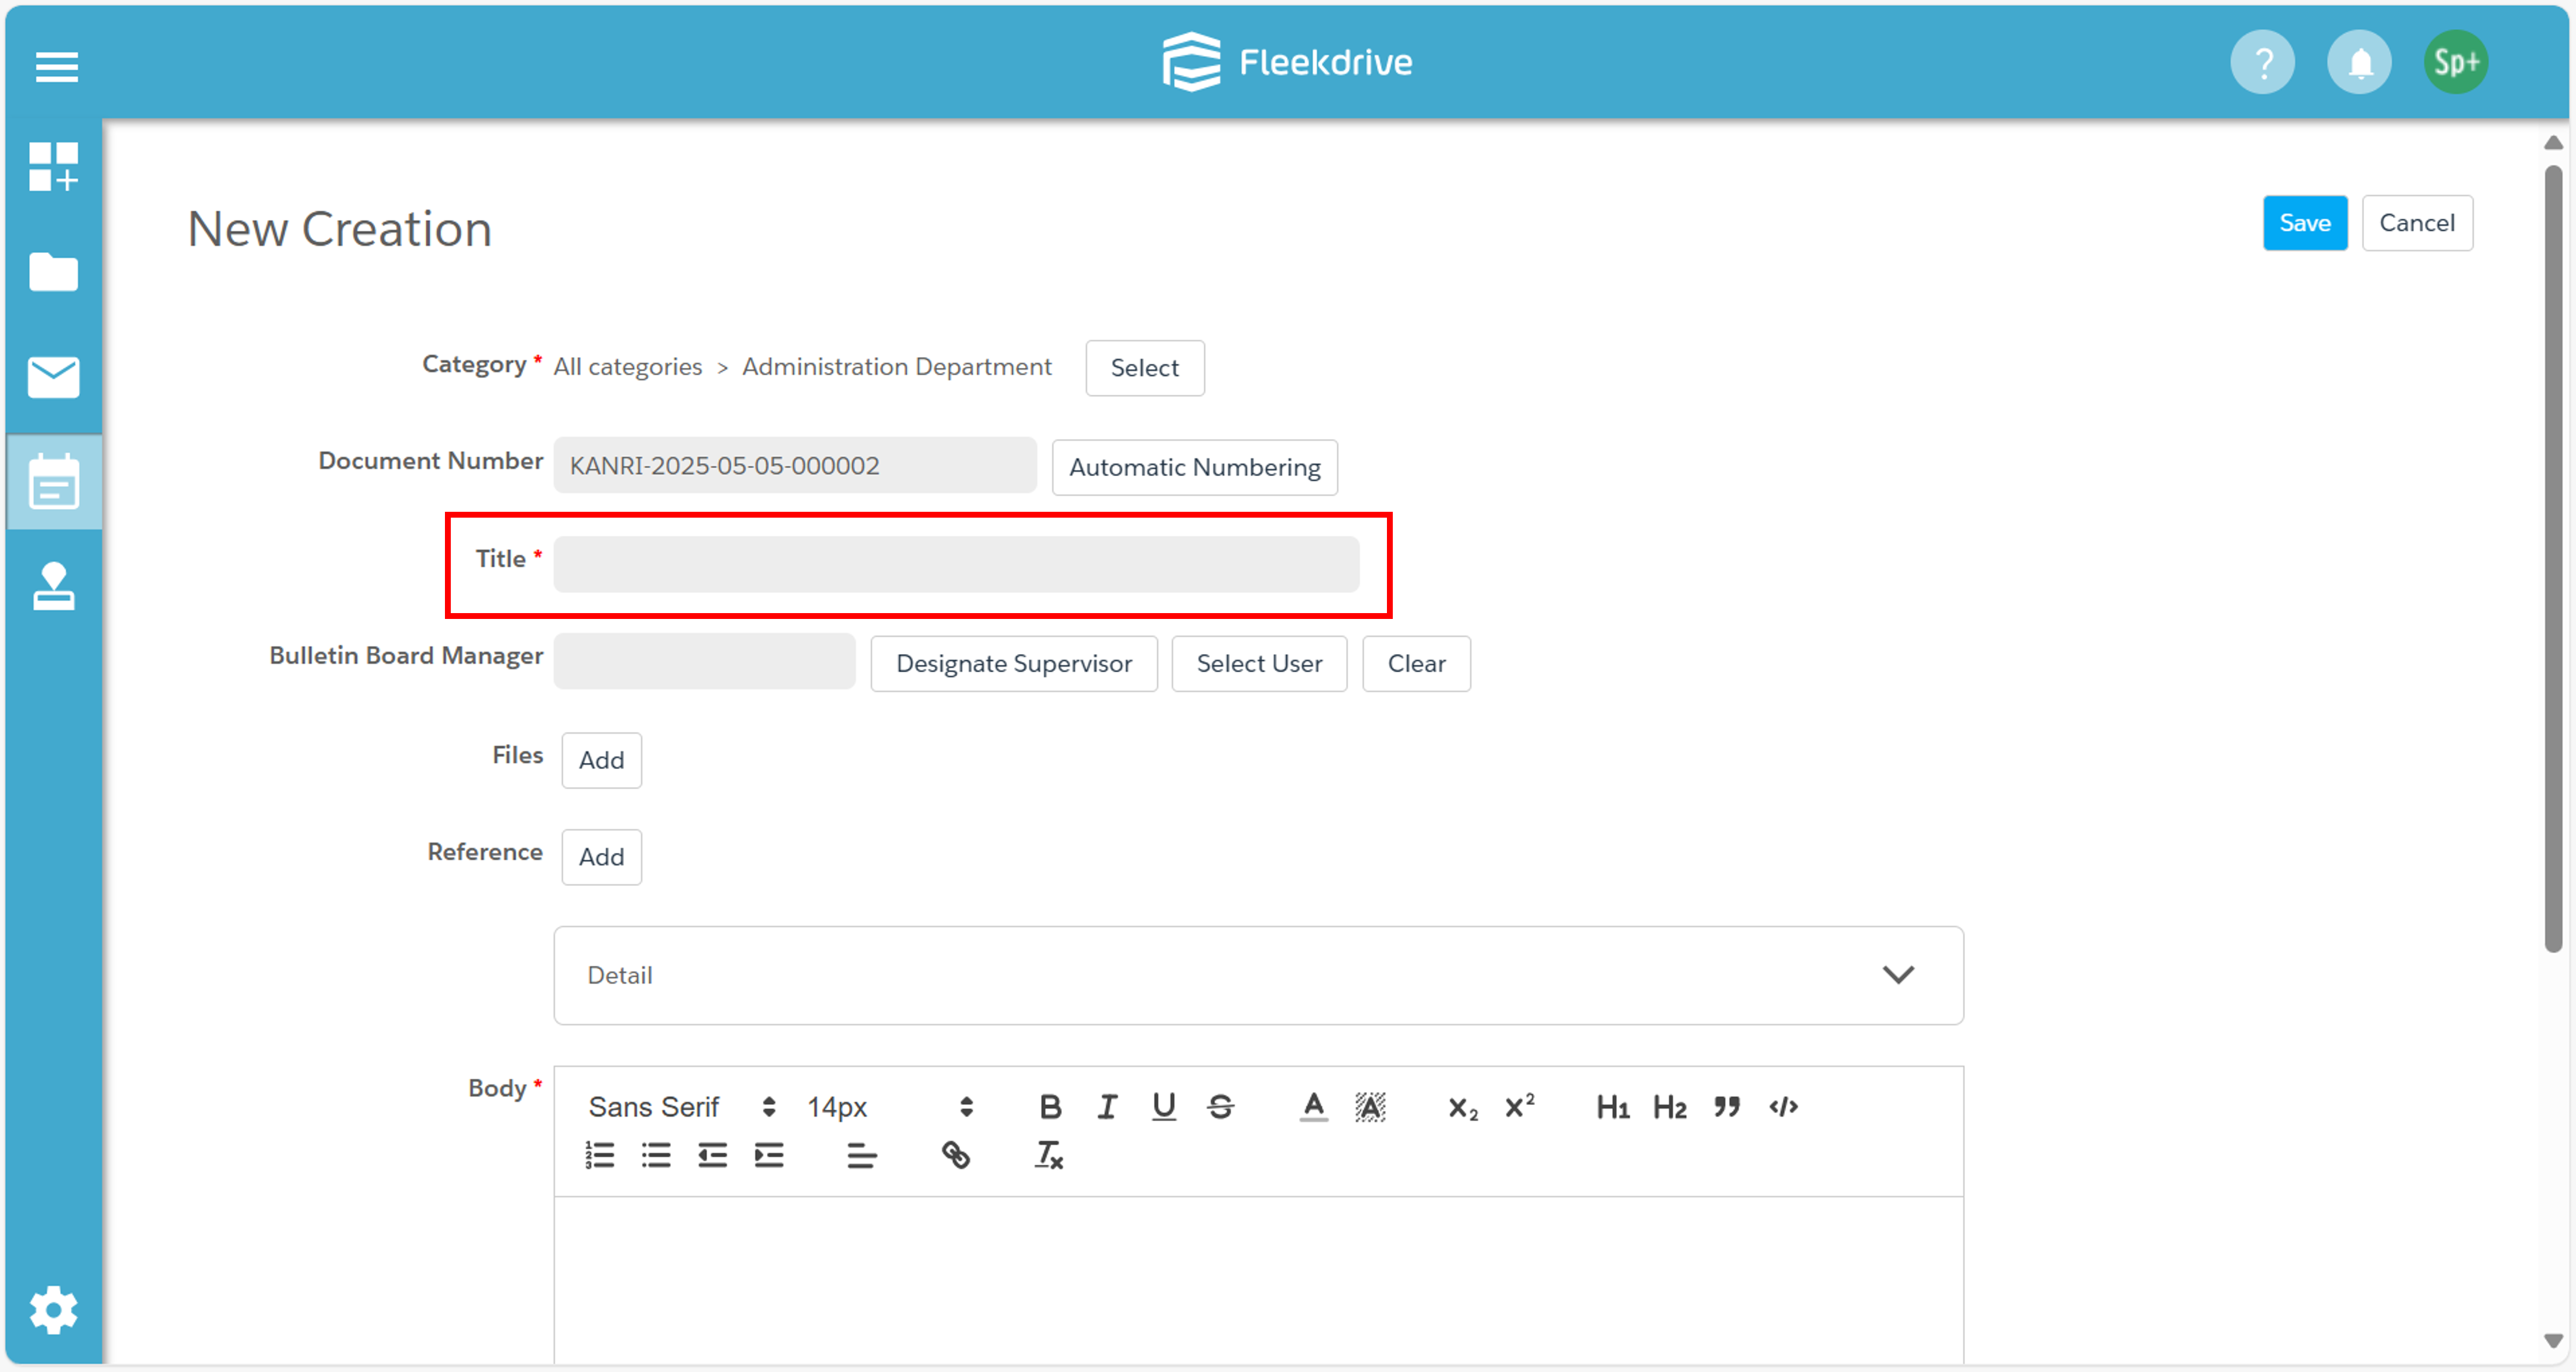
This is a required field.
Enter the title of the Post.
Assigning a Bulletin Board Manager is optional.
A Bulletin Board Manager is a user who can edit the Post, different from the original creator.
You can assign another user as the manager.
Use the “Assign Superior” button or the “Select User” button to make the assignment.
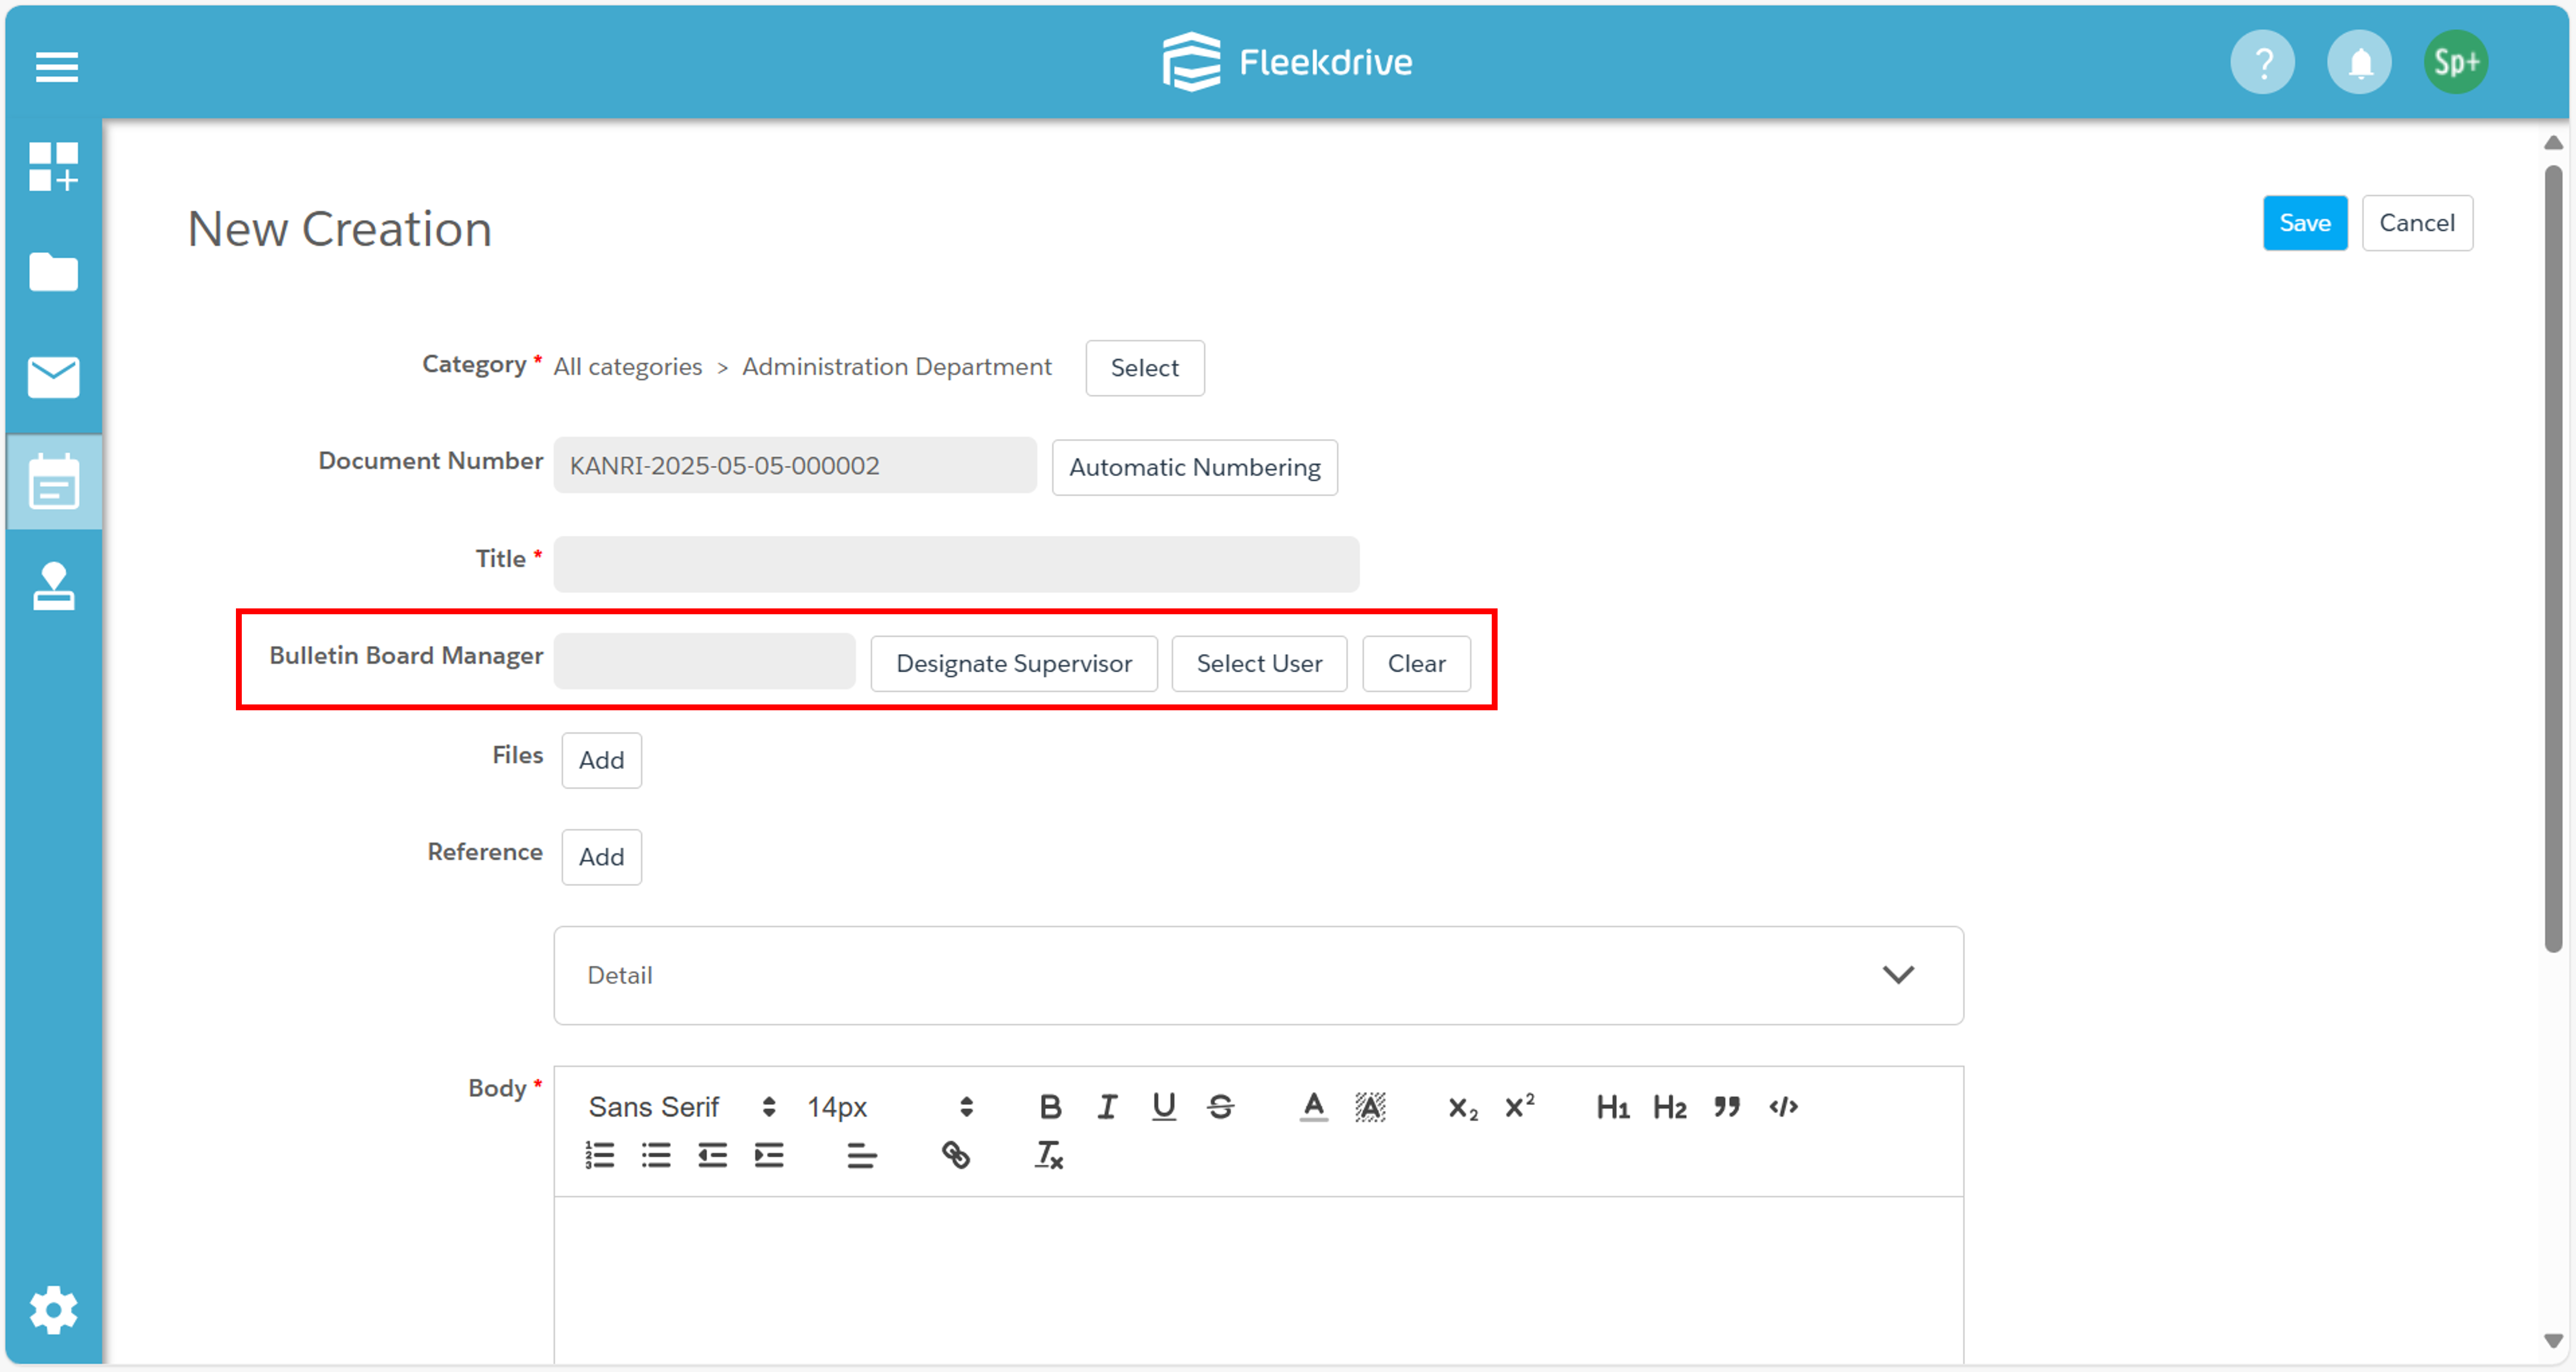
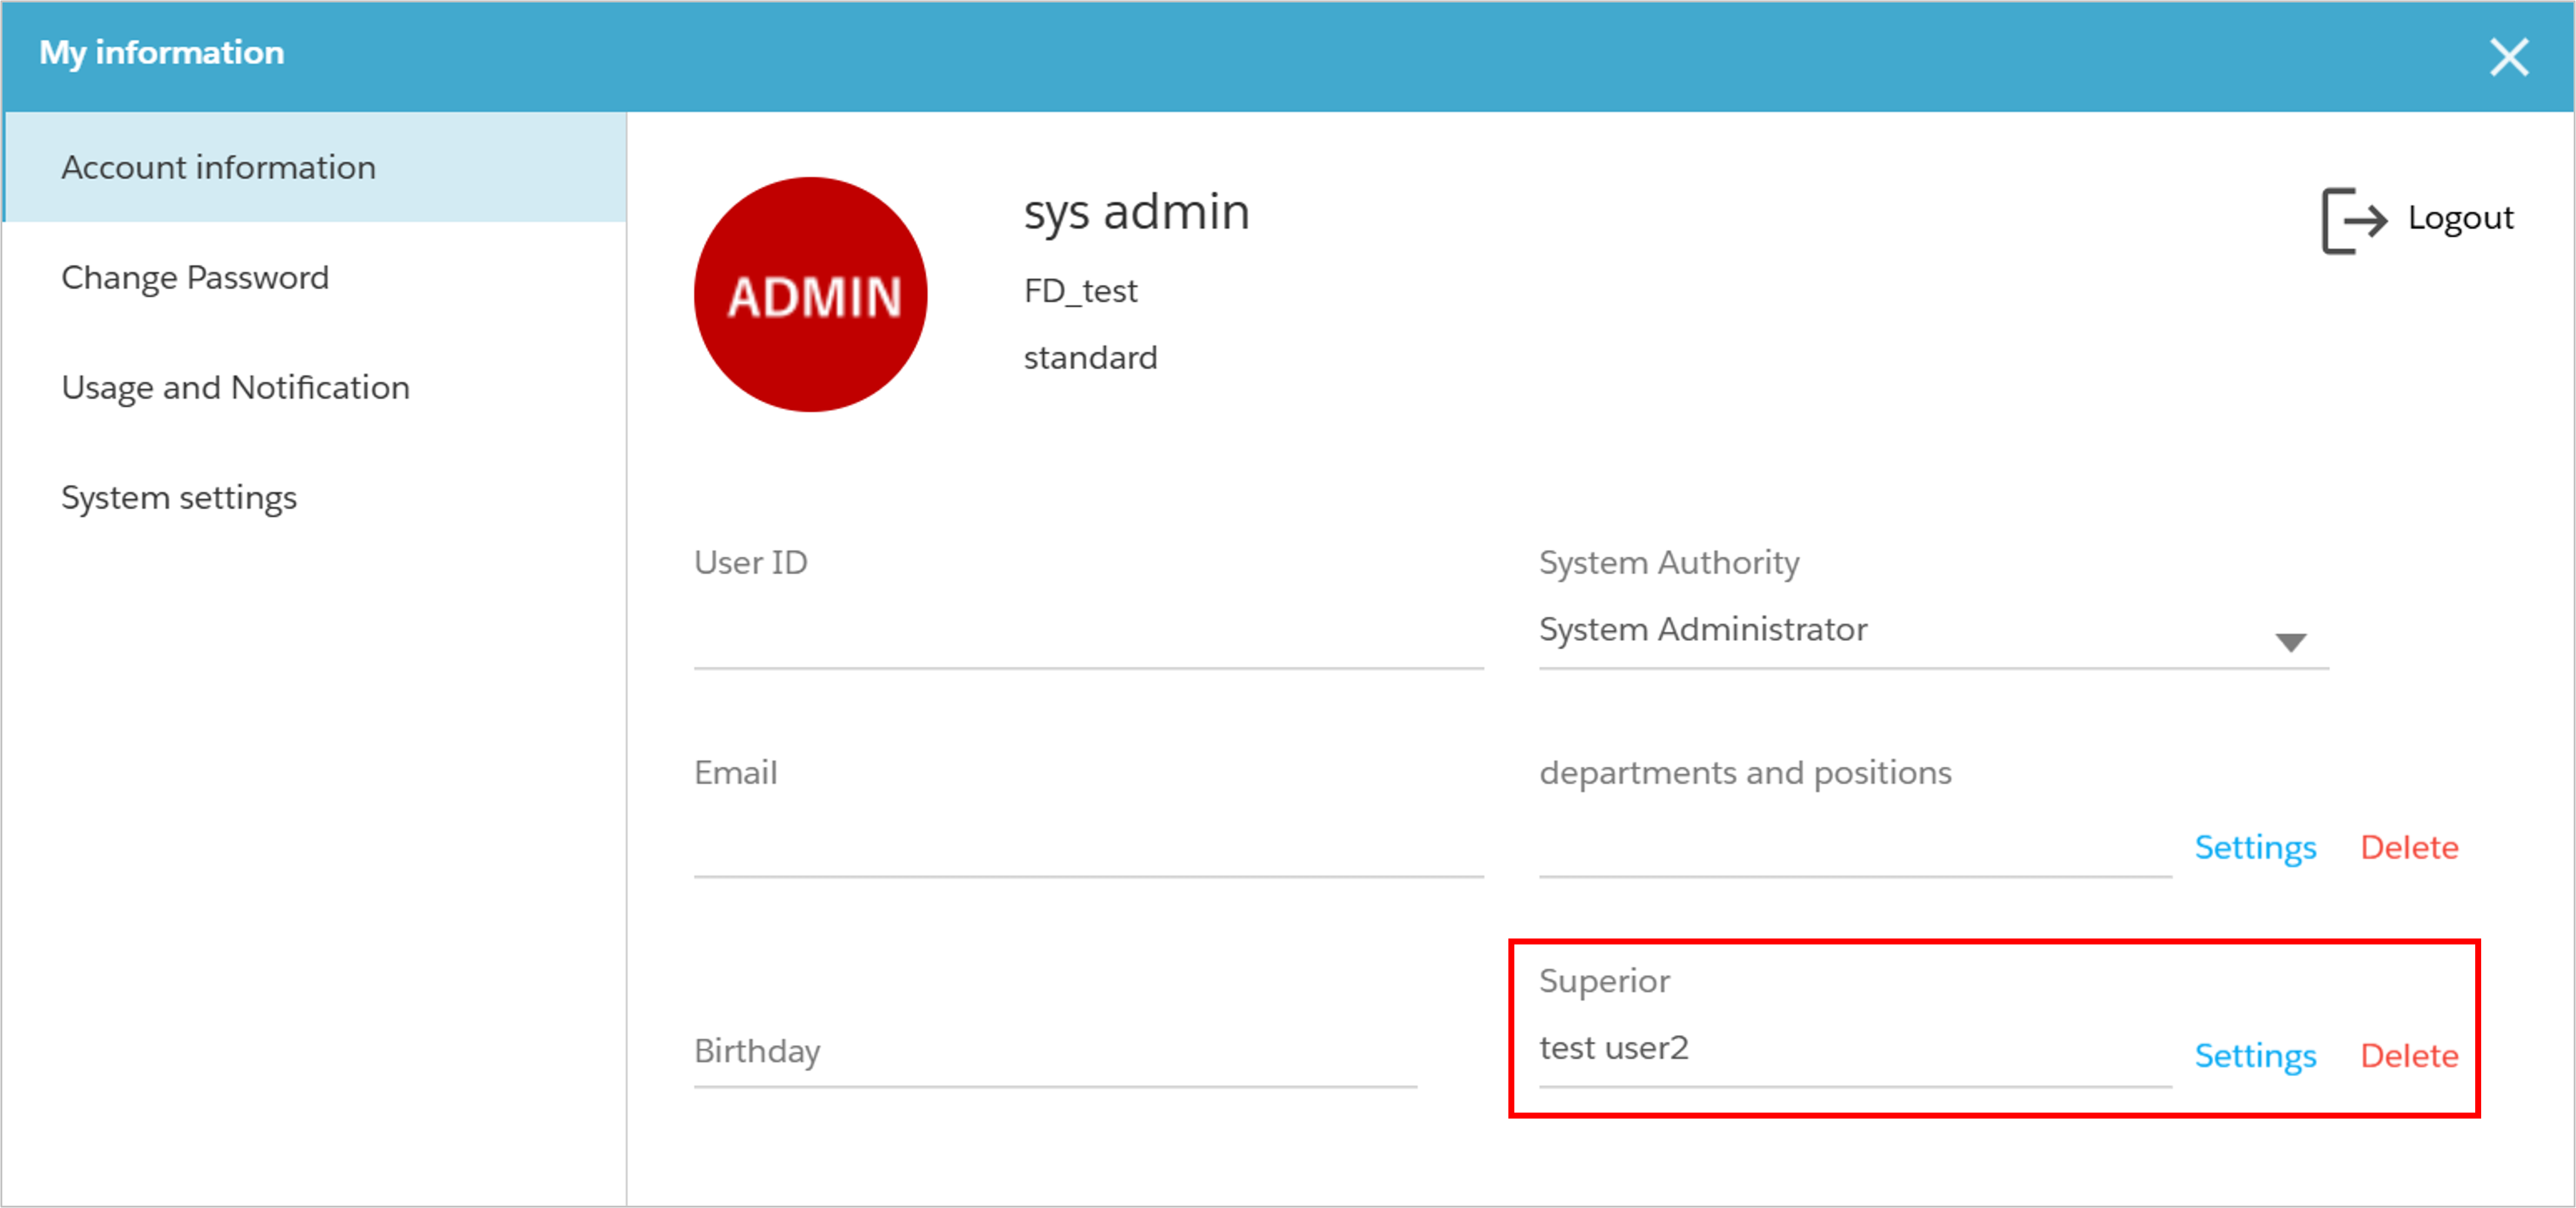
The “Assign Superior” button can be used if the user creating the Post has a Superior registered.
Superior settings can be confirmed via My Information.
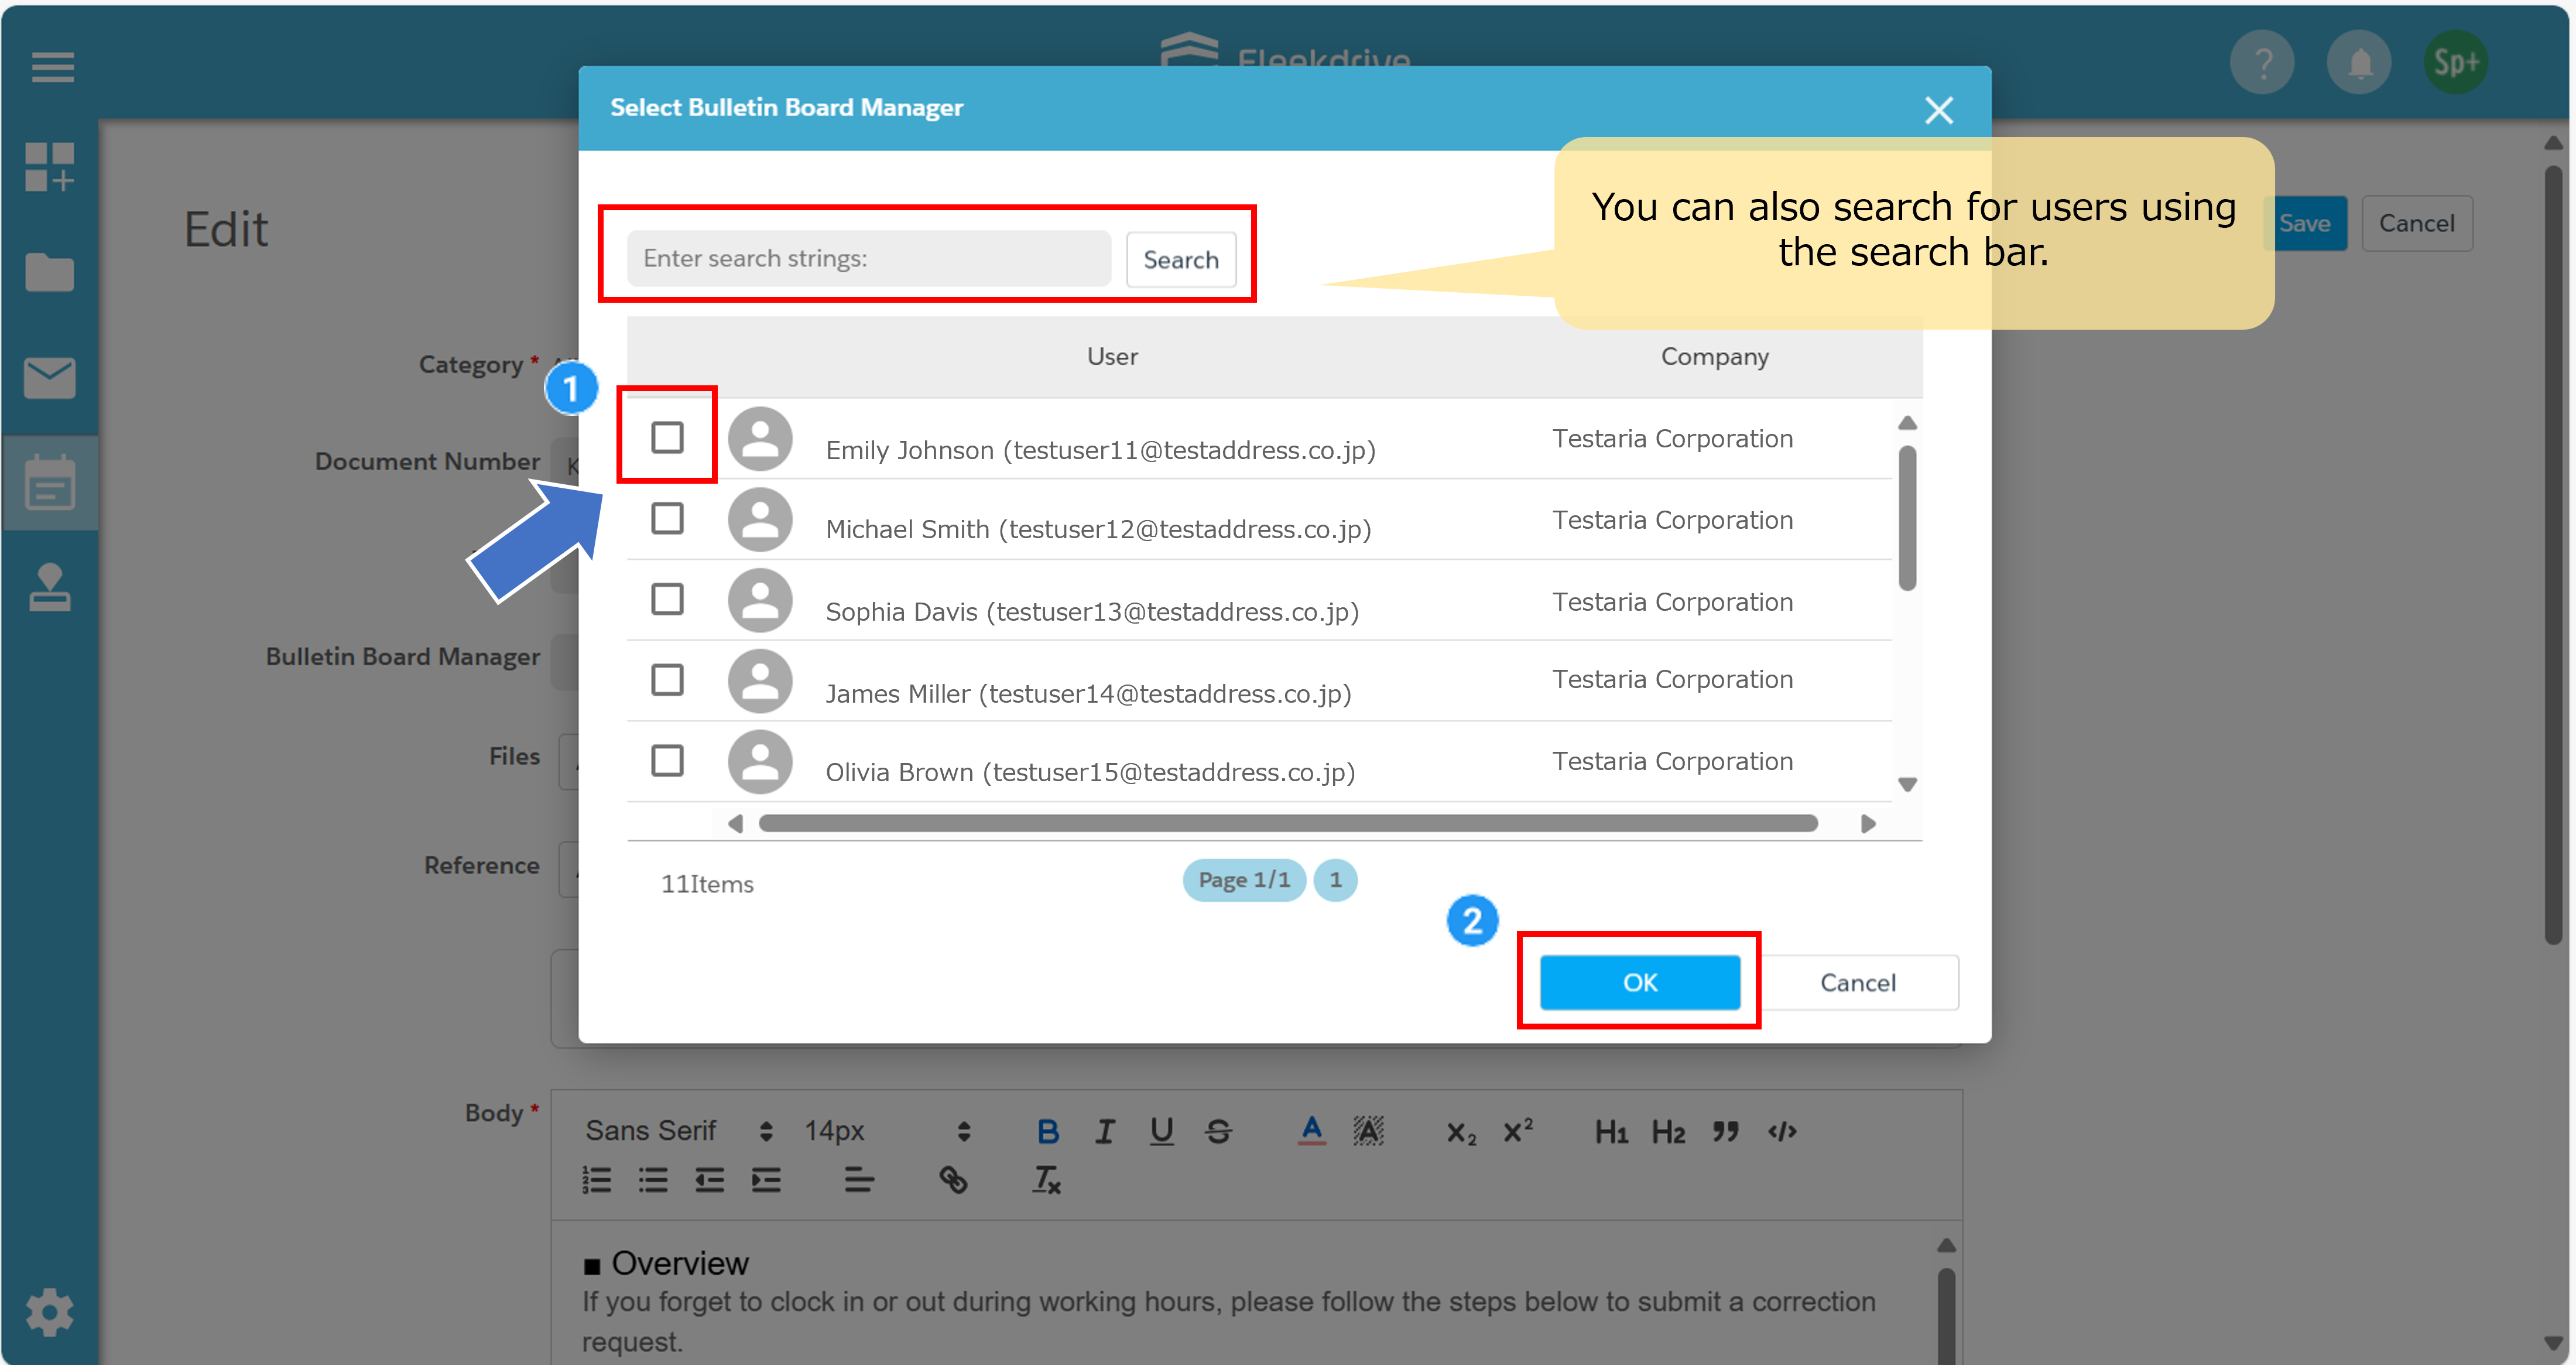
Using the “Select User” button allows you to directly assign a user as the Bulletin Board Manager.
Click the button to open the user selection screen.
Check the box next to the user you wish to assign, and click “OK”.
You can also search for users using the search box at the top of the selection screen.
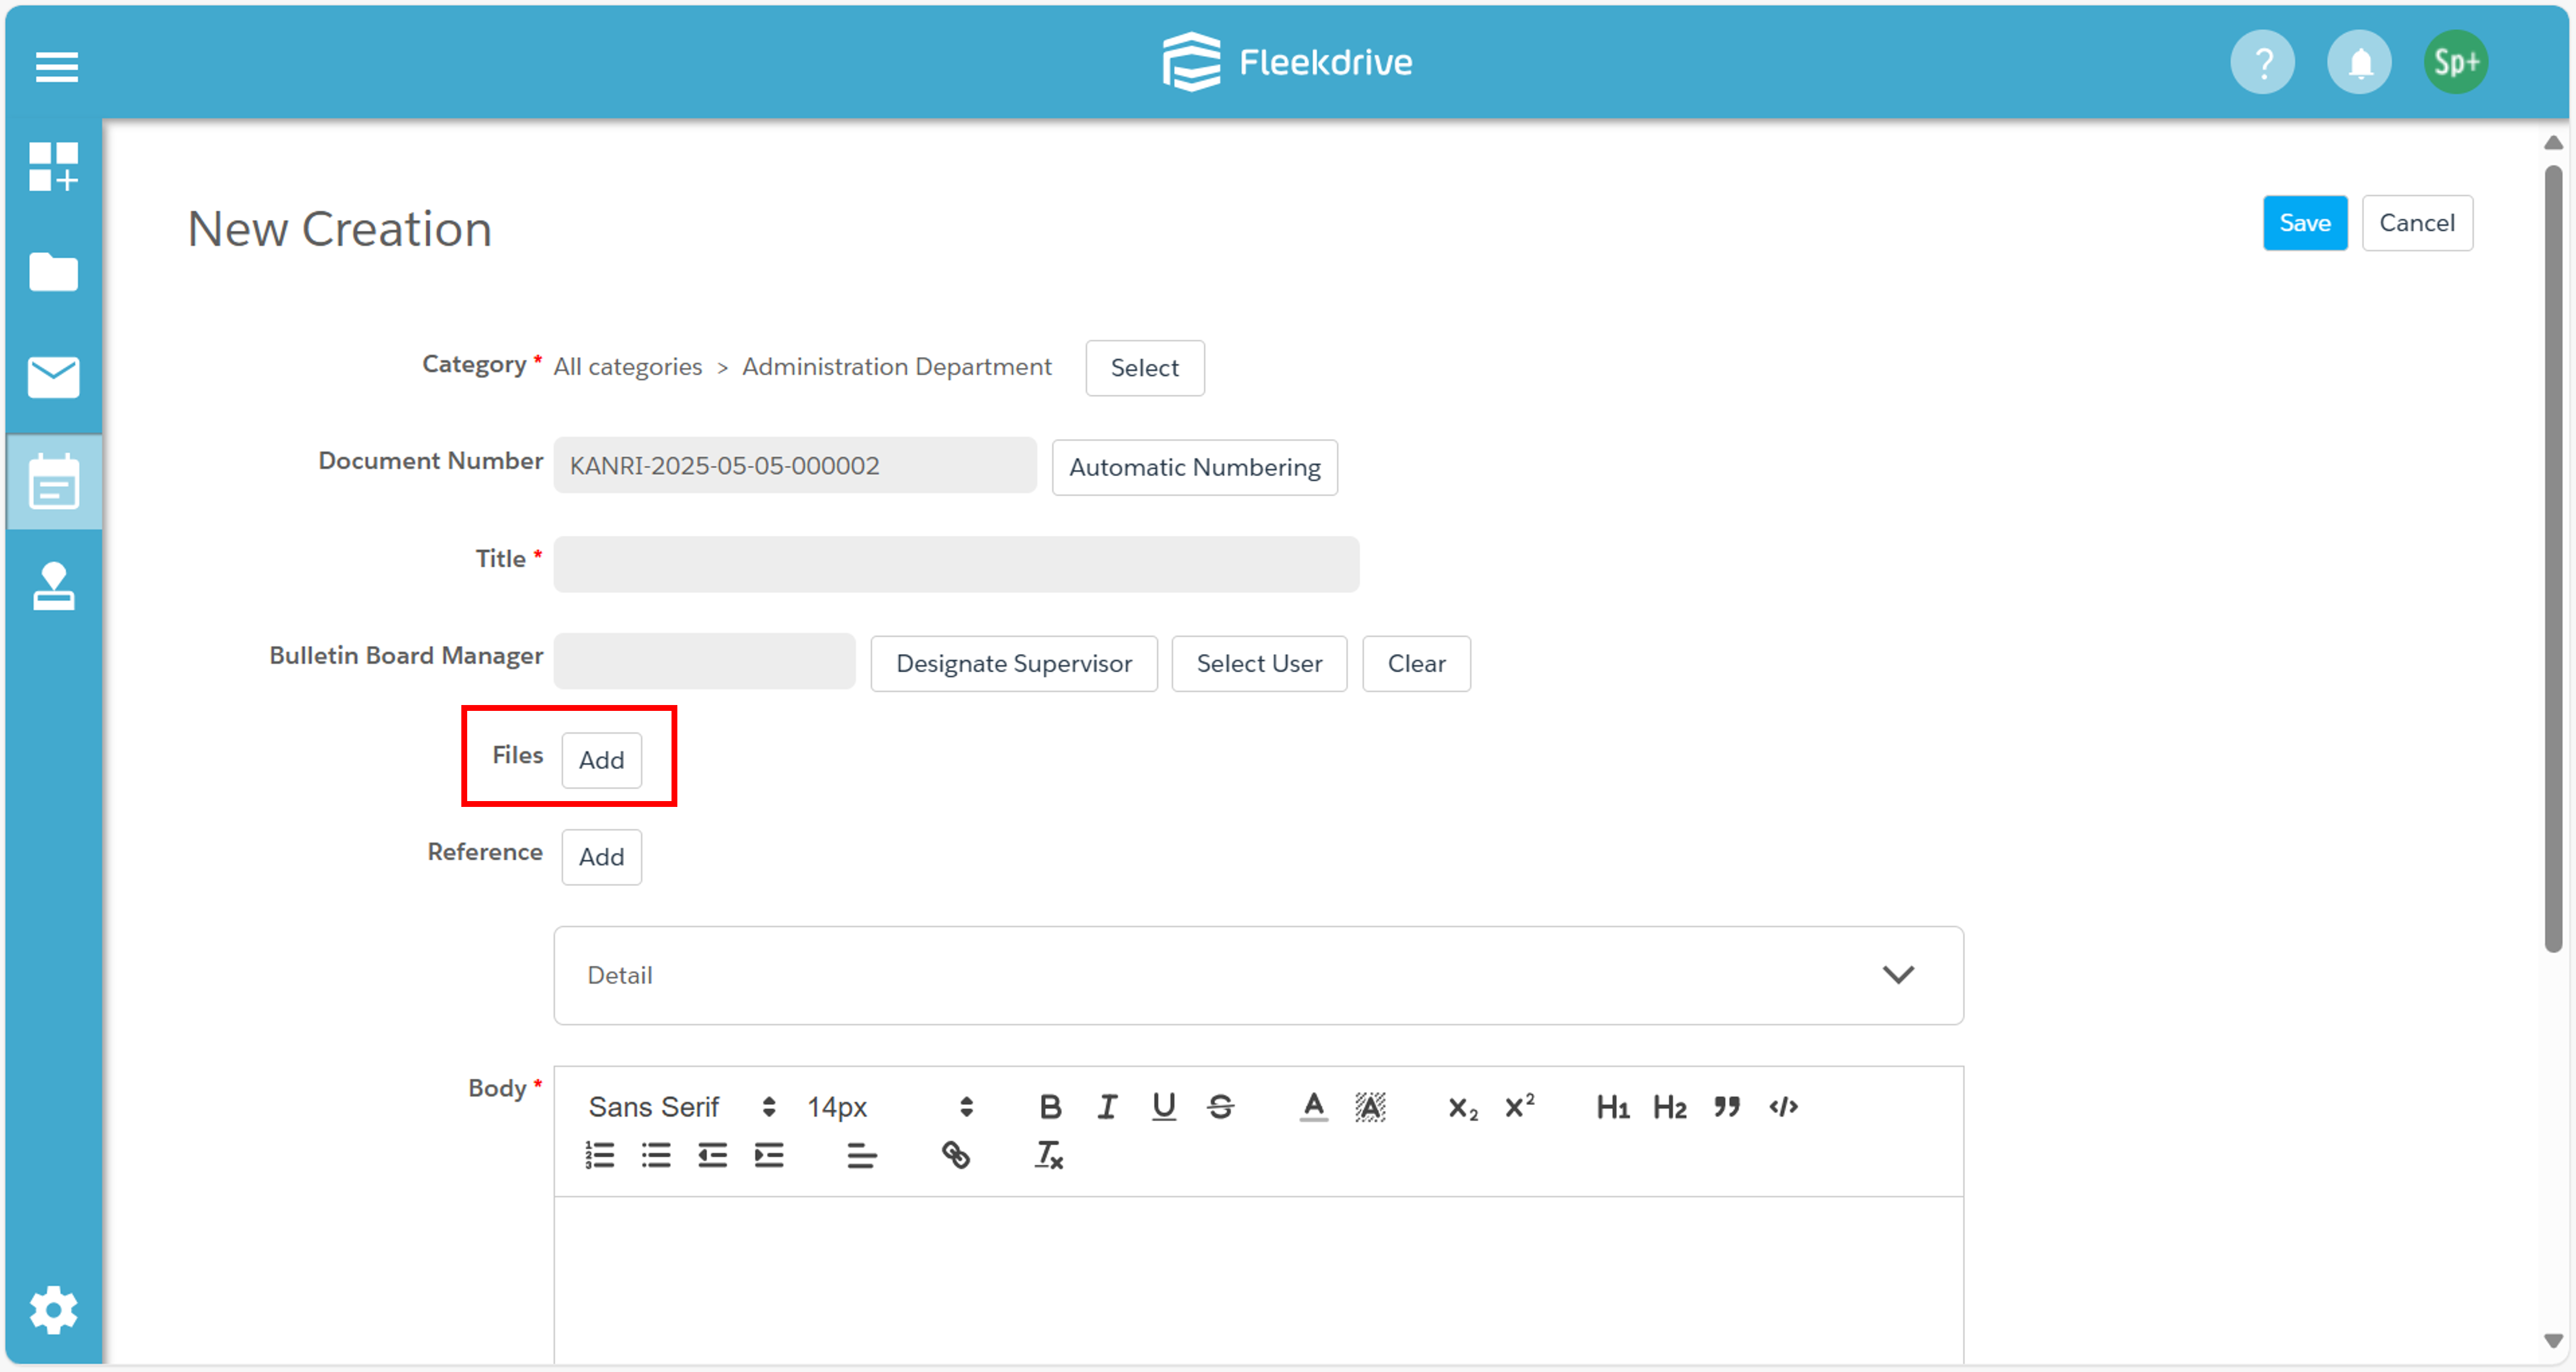
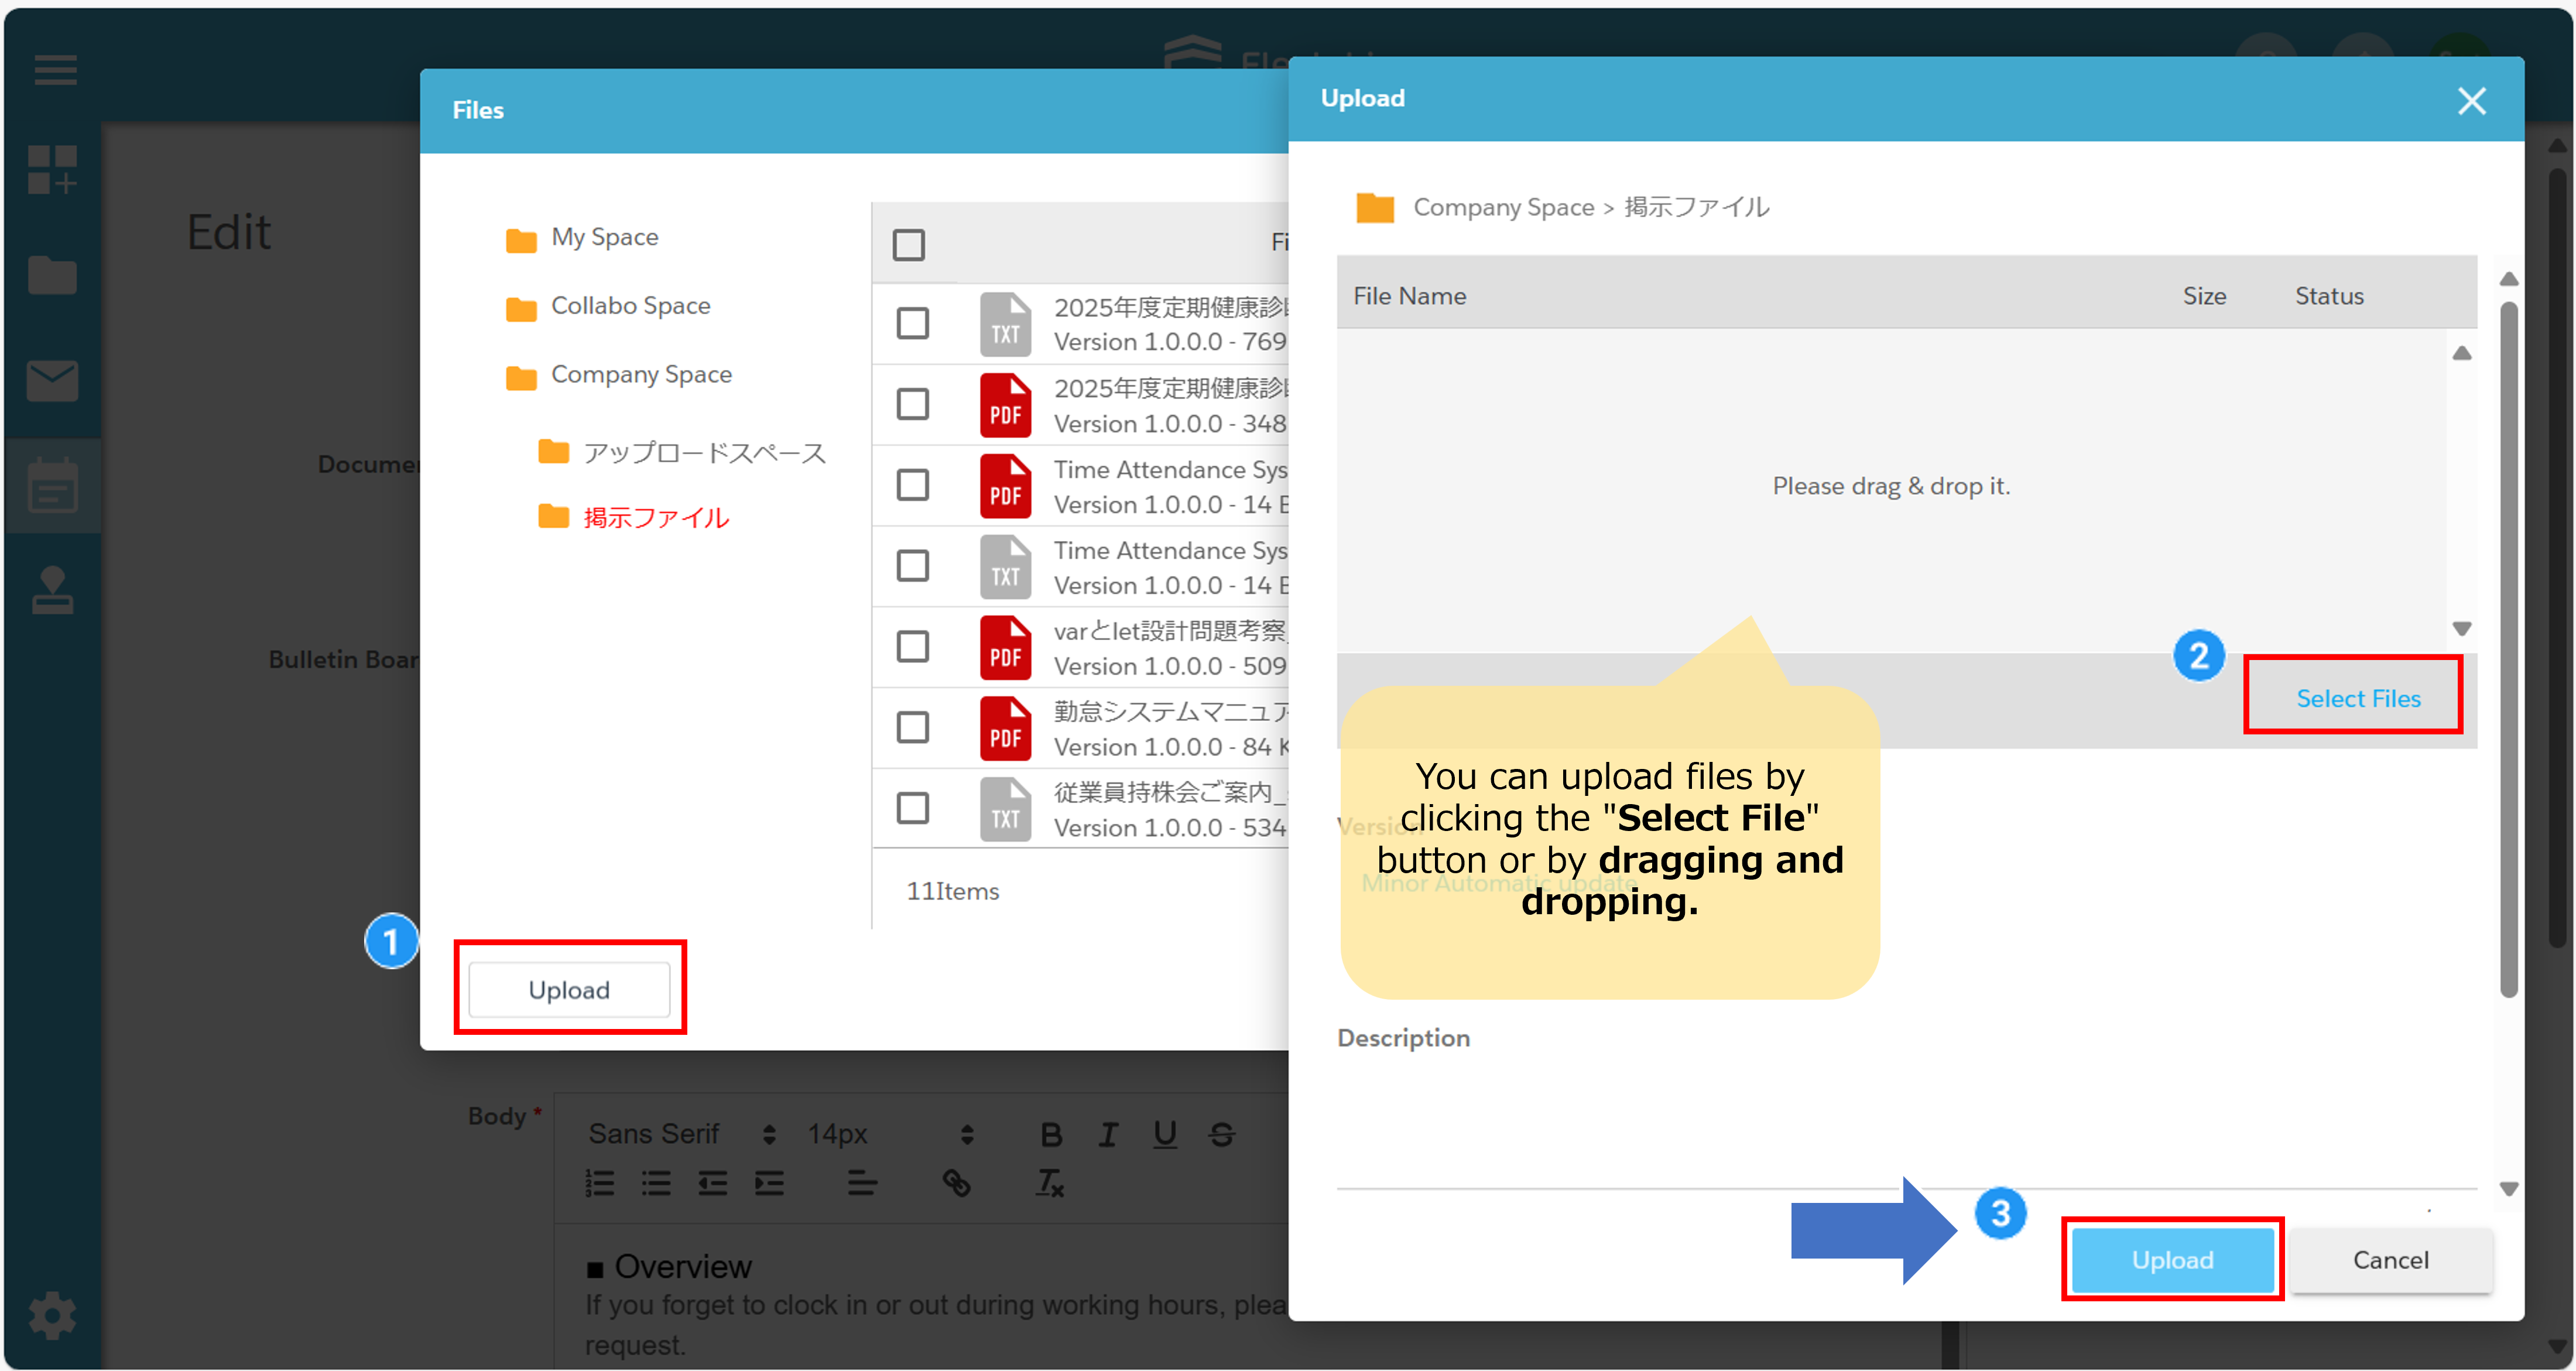
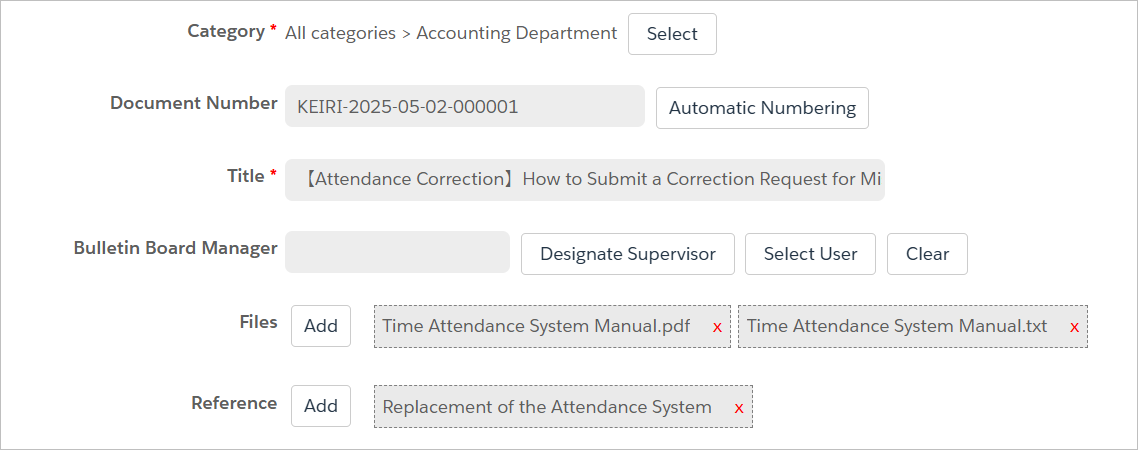
You can attach files to a Post.
Attachments can be either existing files stored within the Space or newly uploaded files.
Click the “Add” button next to Files.
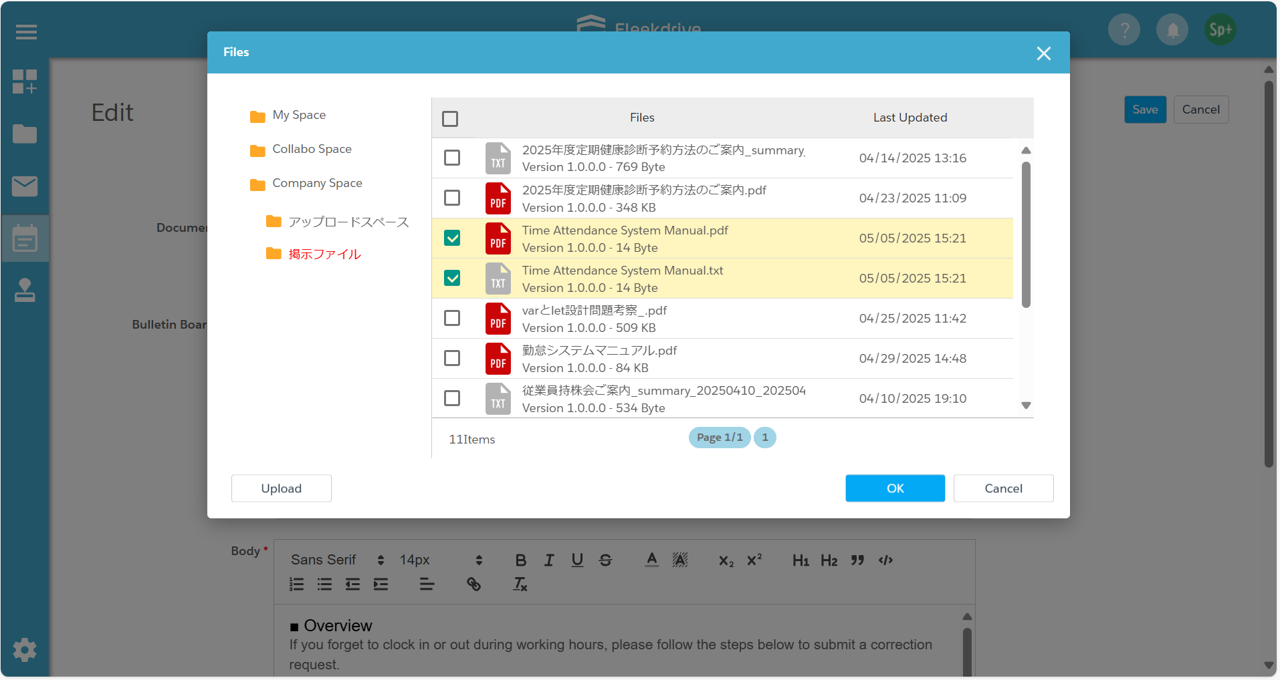
The file selection screen will appear.
To upload a new file, click the “Upload” button.
Then either click the “Select File” button or drag and drop a file from your local device.
Click “Upload” to complete the attachment process.
You can also attach an existing file stored in the Space.
To do so, click on the desired Space from the Space Tree in the following order.
From the list of files displayed in the selected Space, check the box next to the file you want to attach and click “OK”.
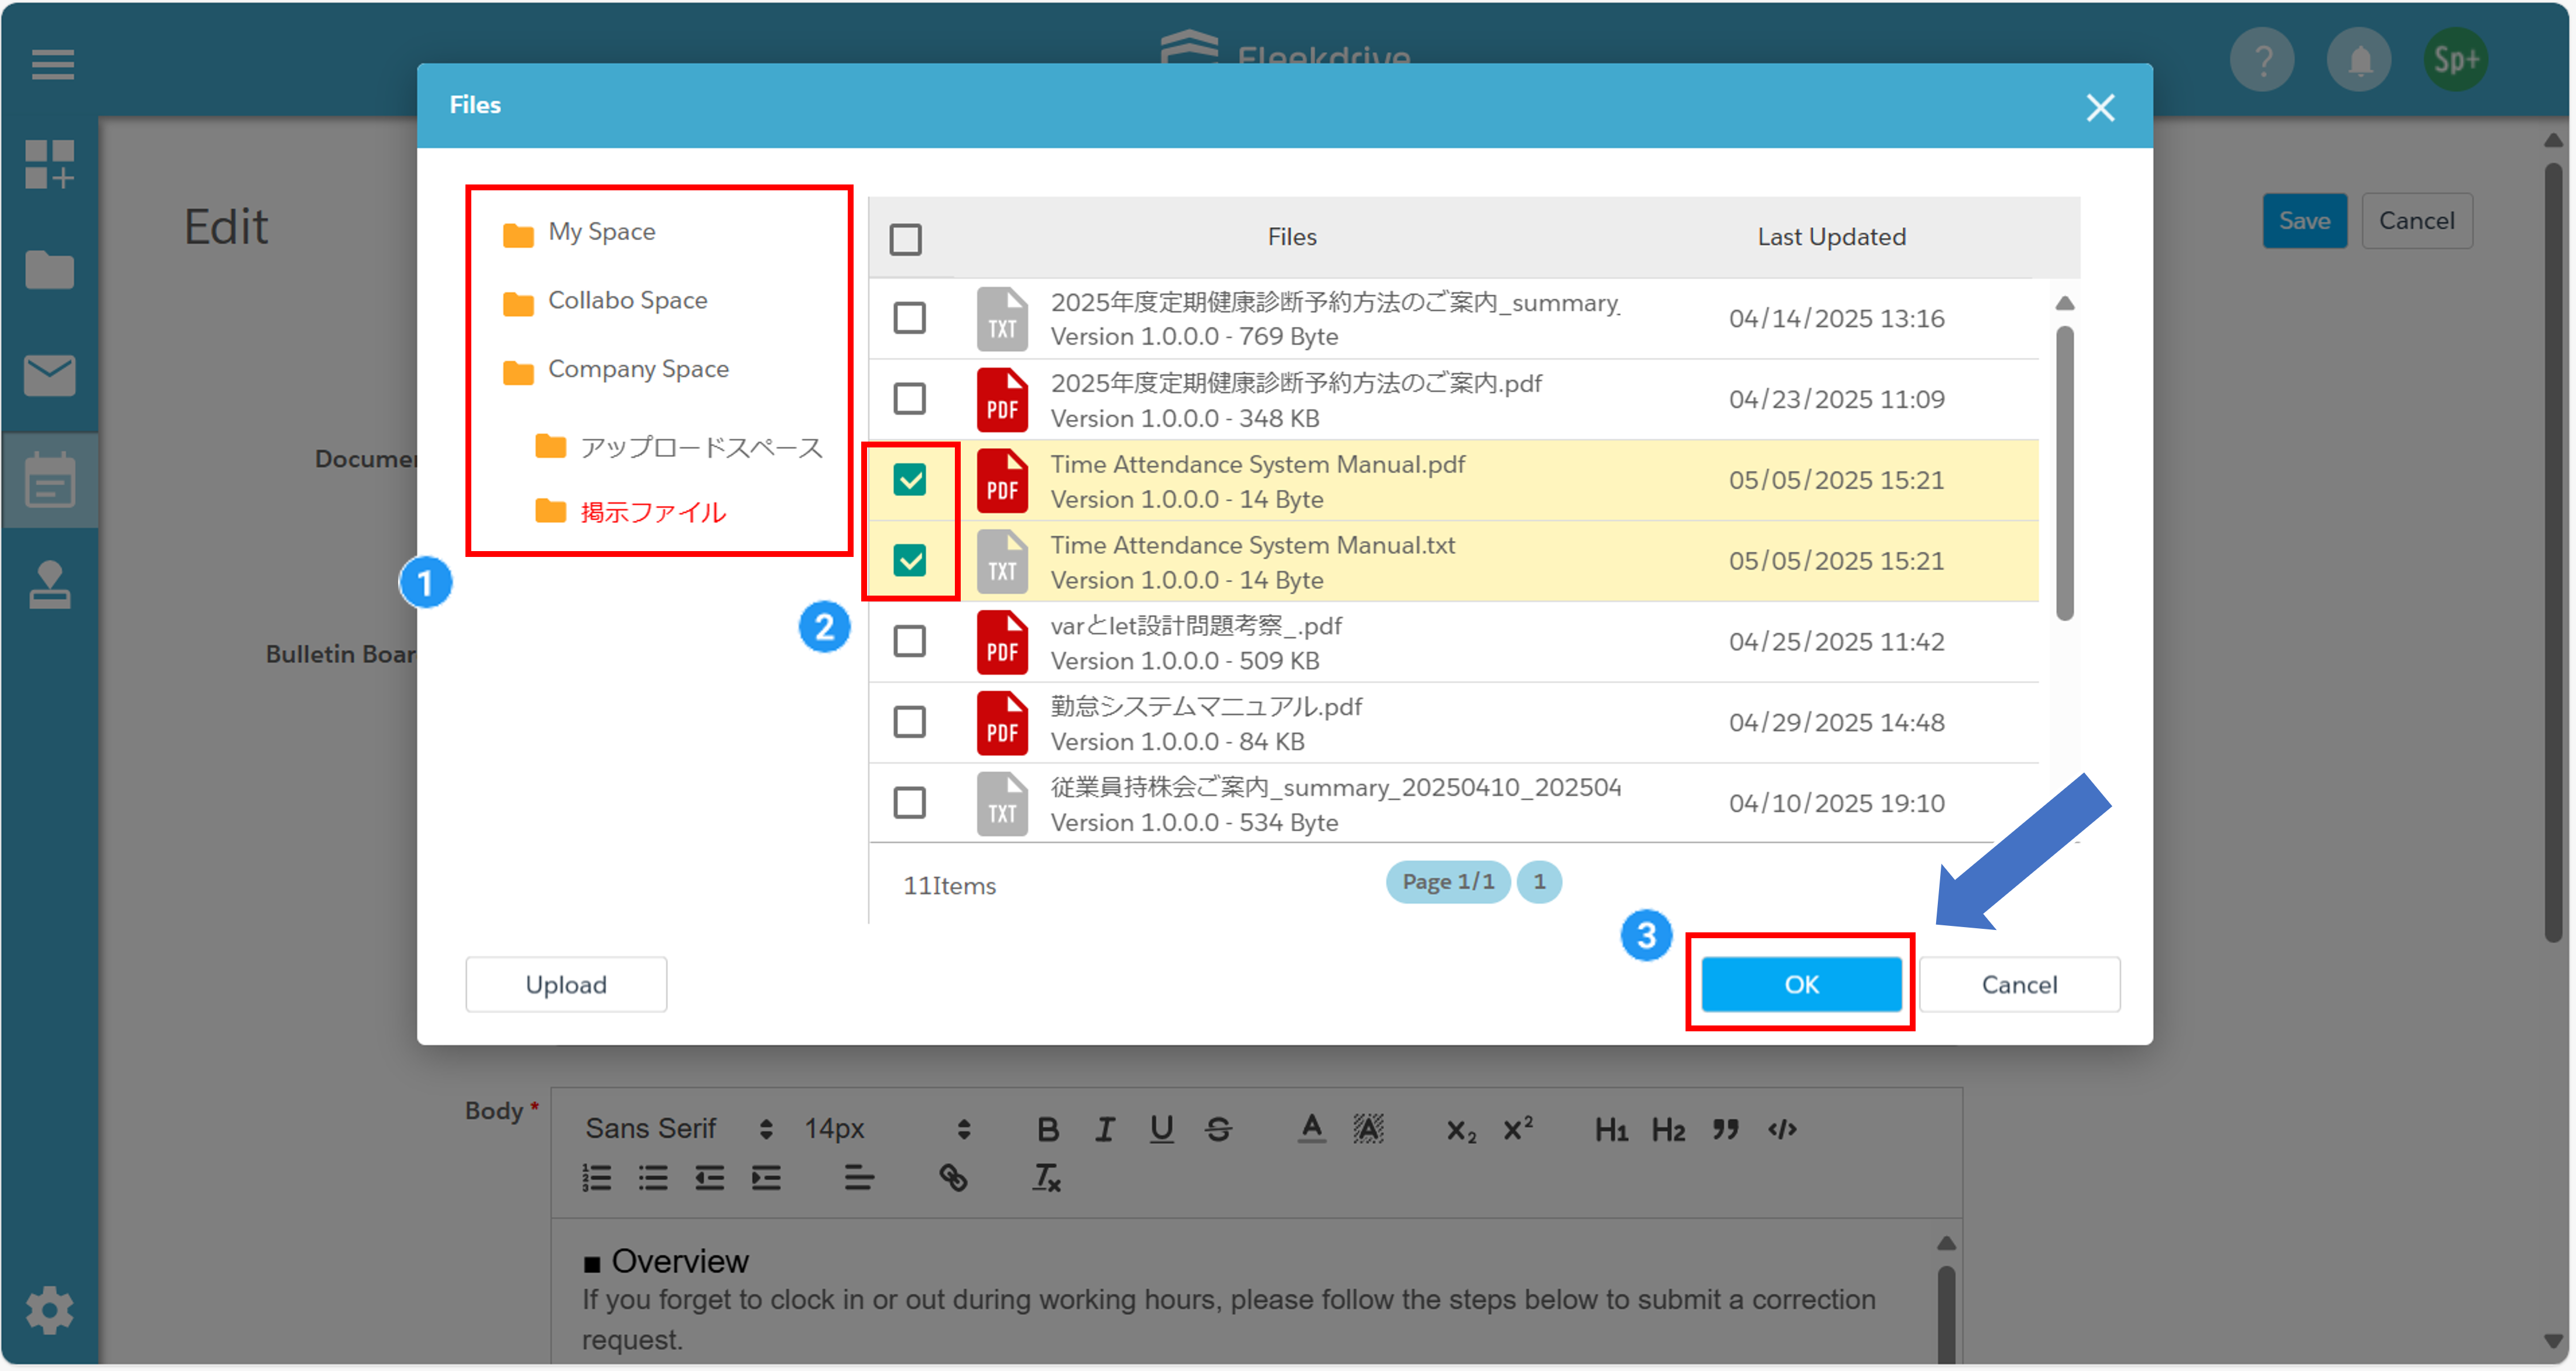
Once the file has been attached, the file name will be displayed on the post creation screen.
- To view attached files, the Space in which the files are stored must be shared with the Reference users.
You can link related Posts to the current Post.
To allow Reference users to view the linked Posts, those Posts must be published to them.
Click the “Add” button next to Reference.
Check the box for the Post you wish to link and click “OK”.
You can filter Posts by Category using the dropdown in the top left of the screen.
You can also search for Posts using the search box at the top right.
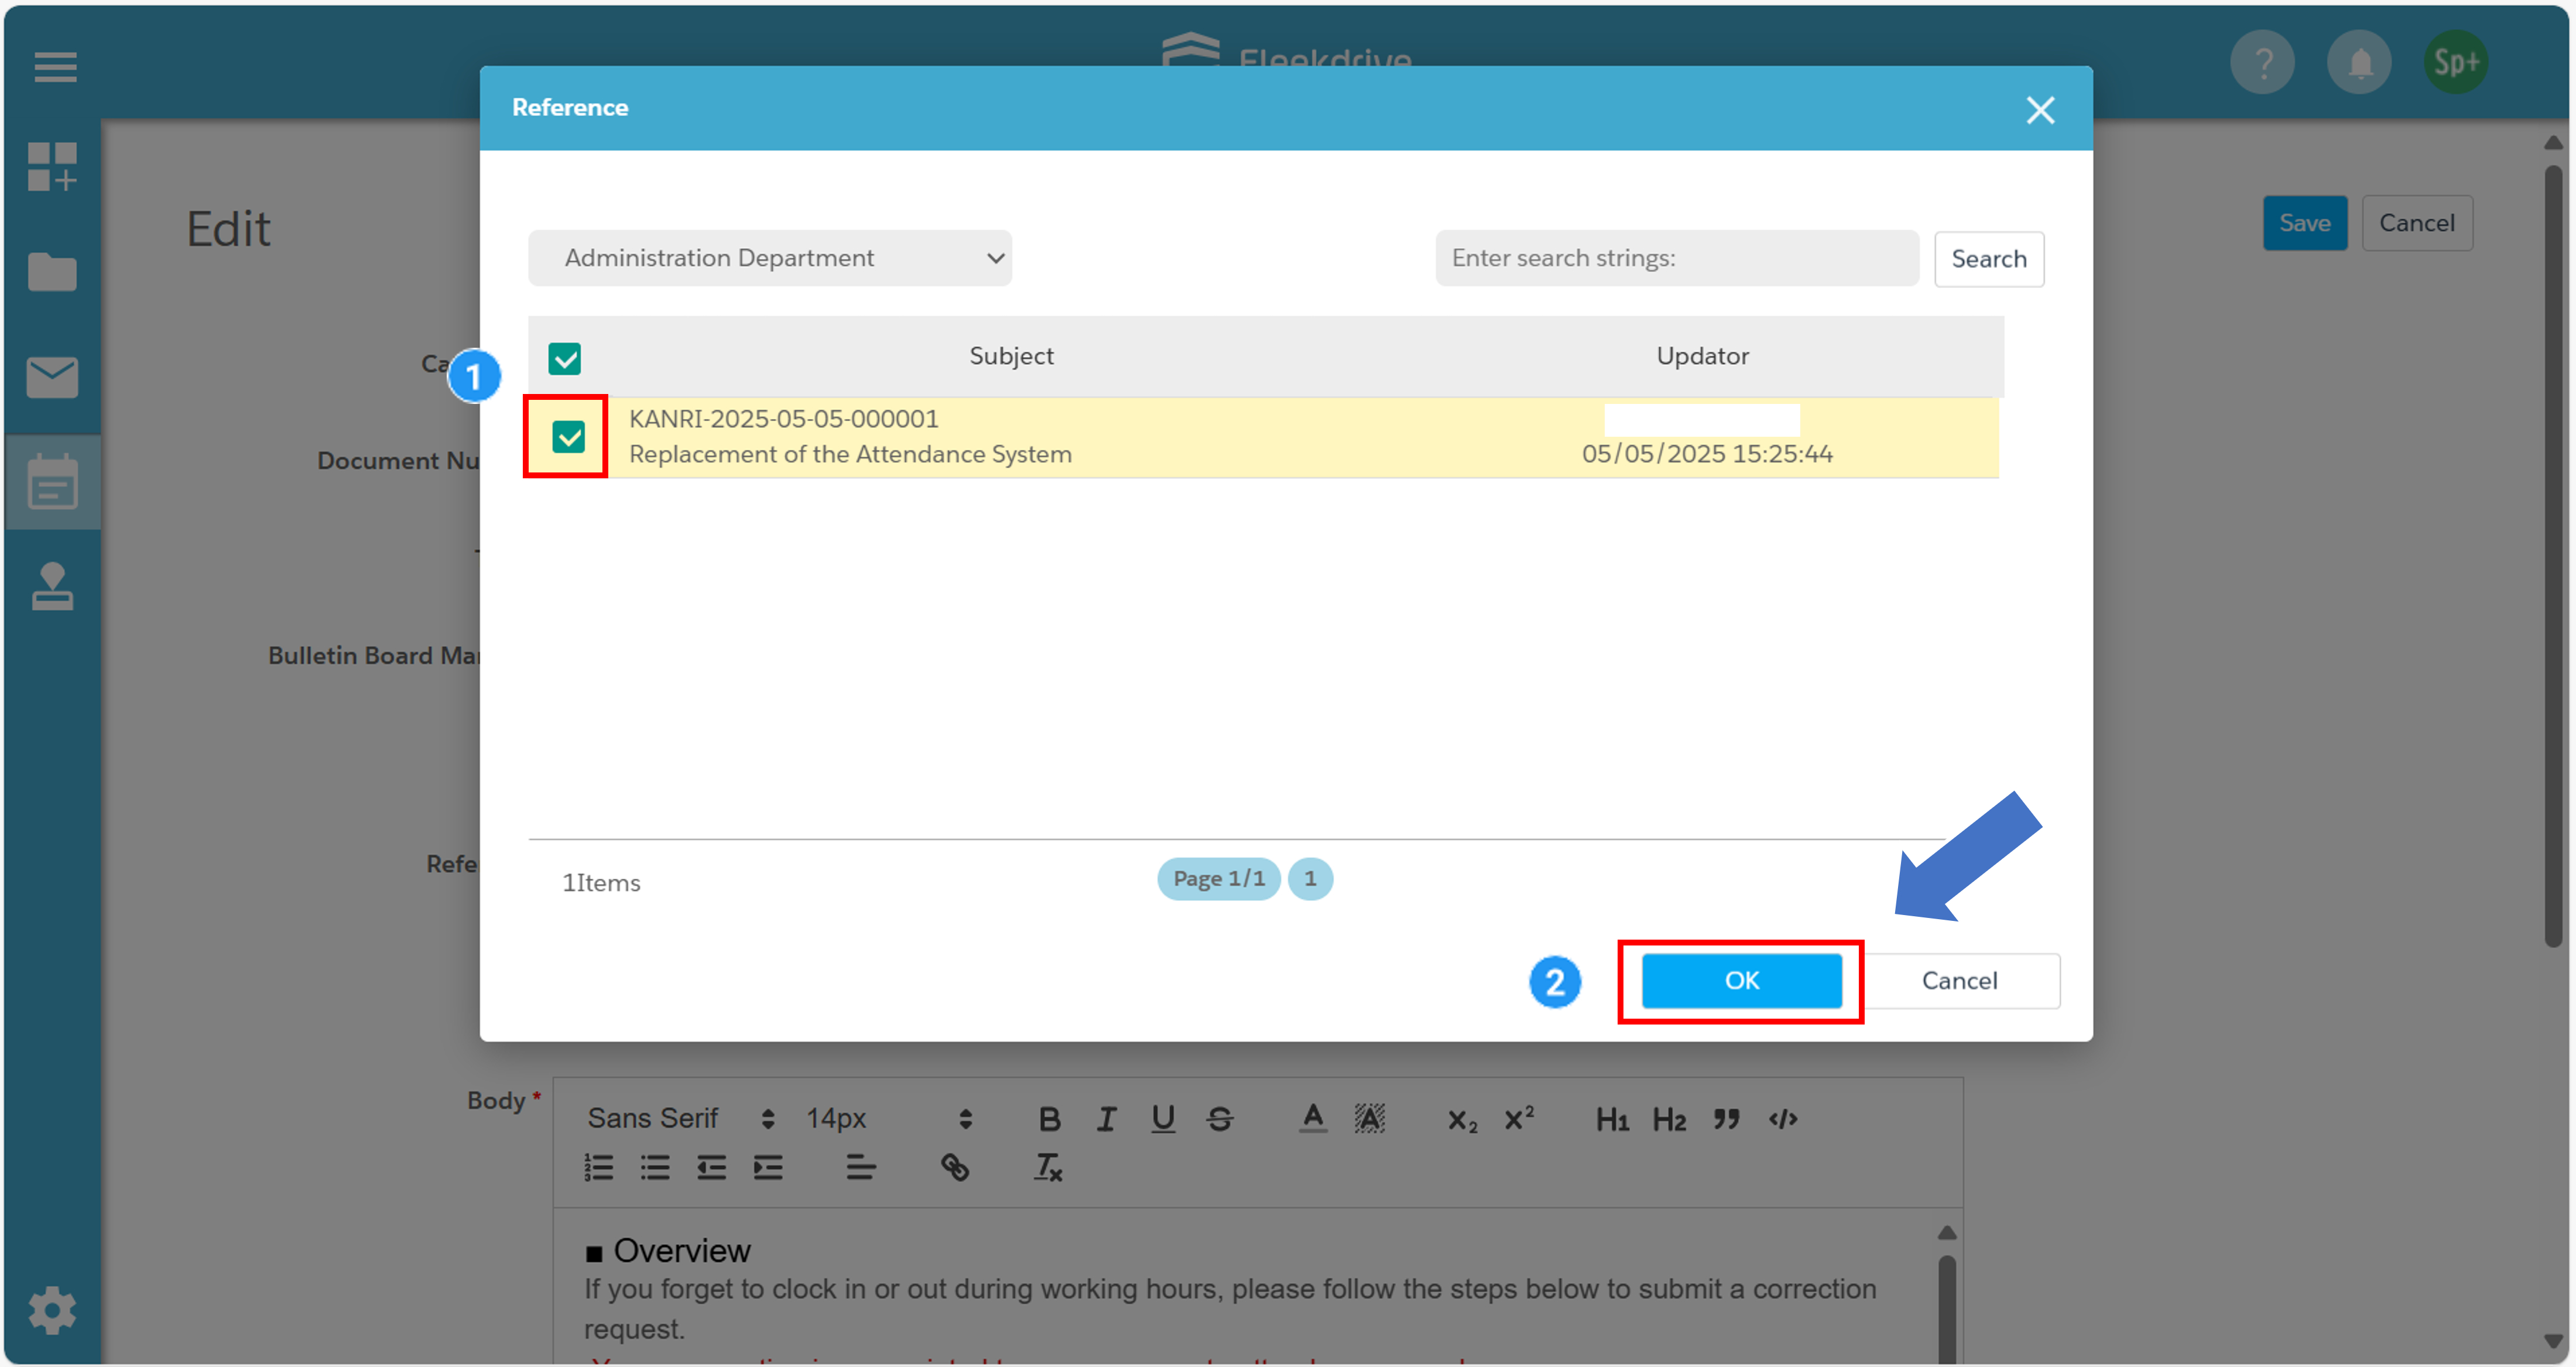
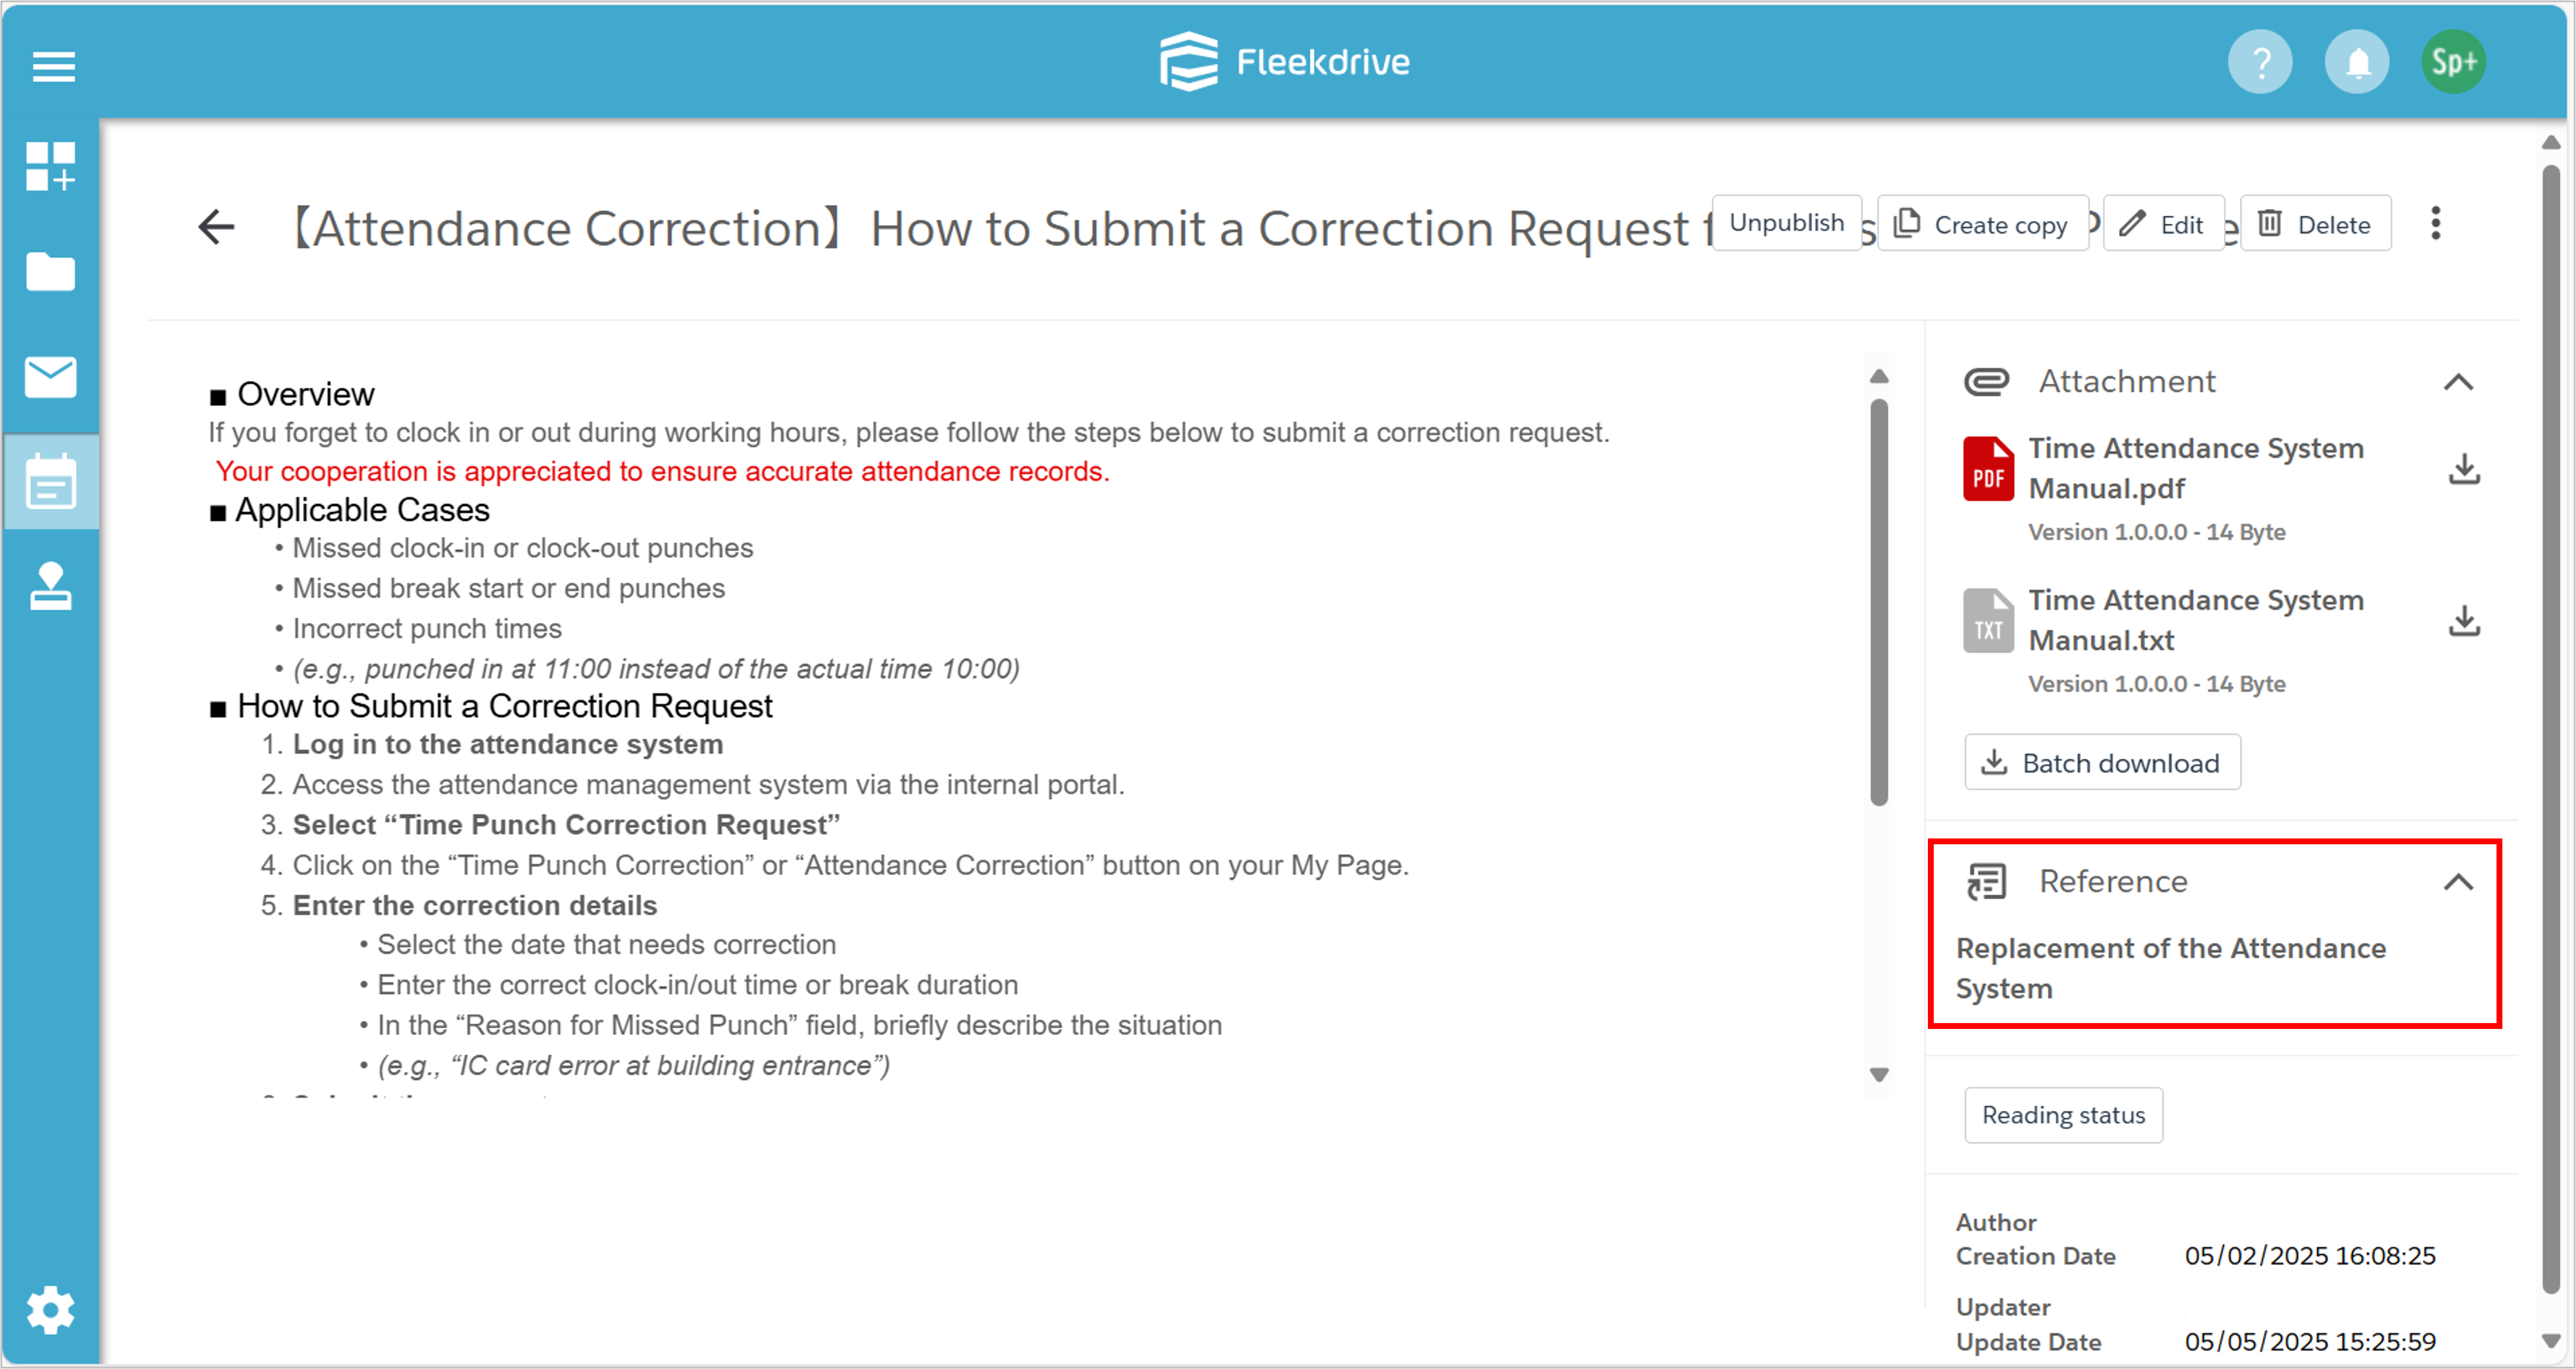
The linked Posts will appear under the “Reference” section on the Post detail page.
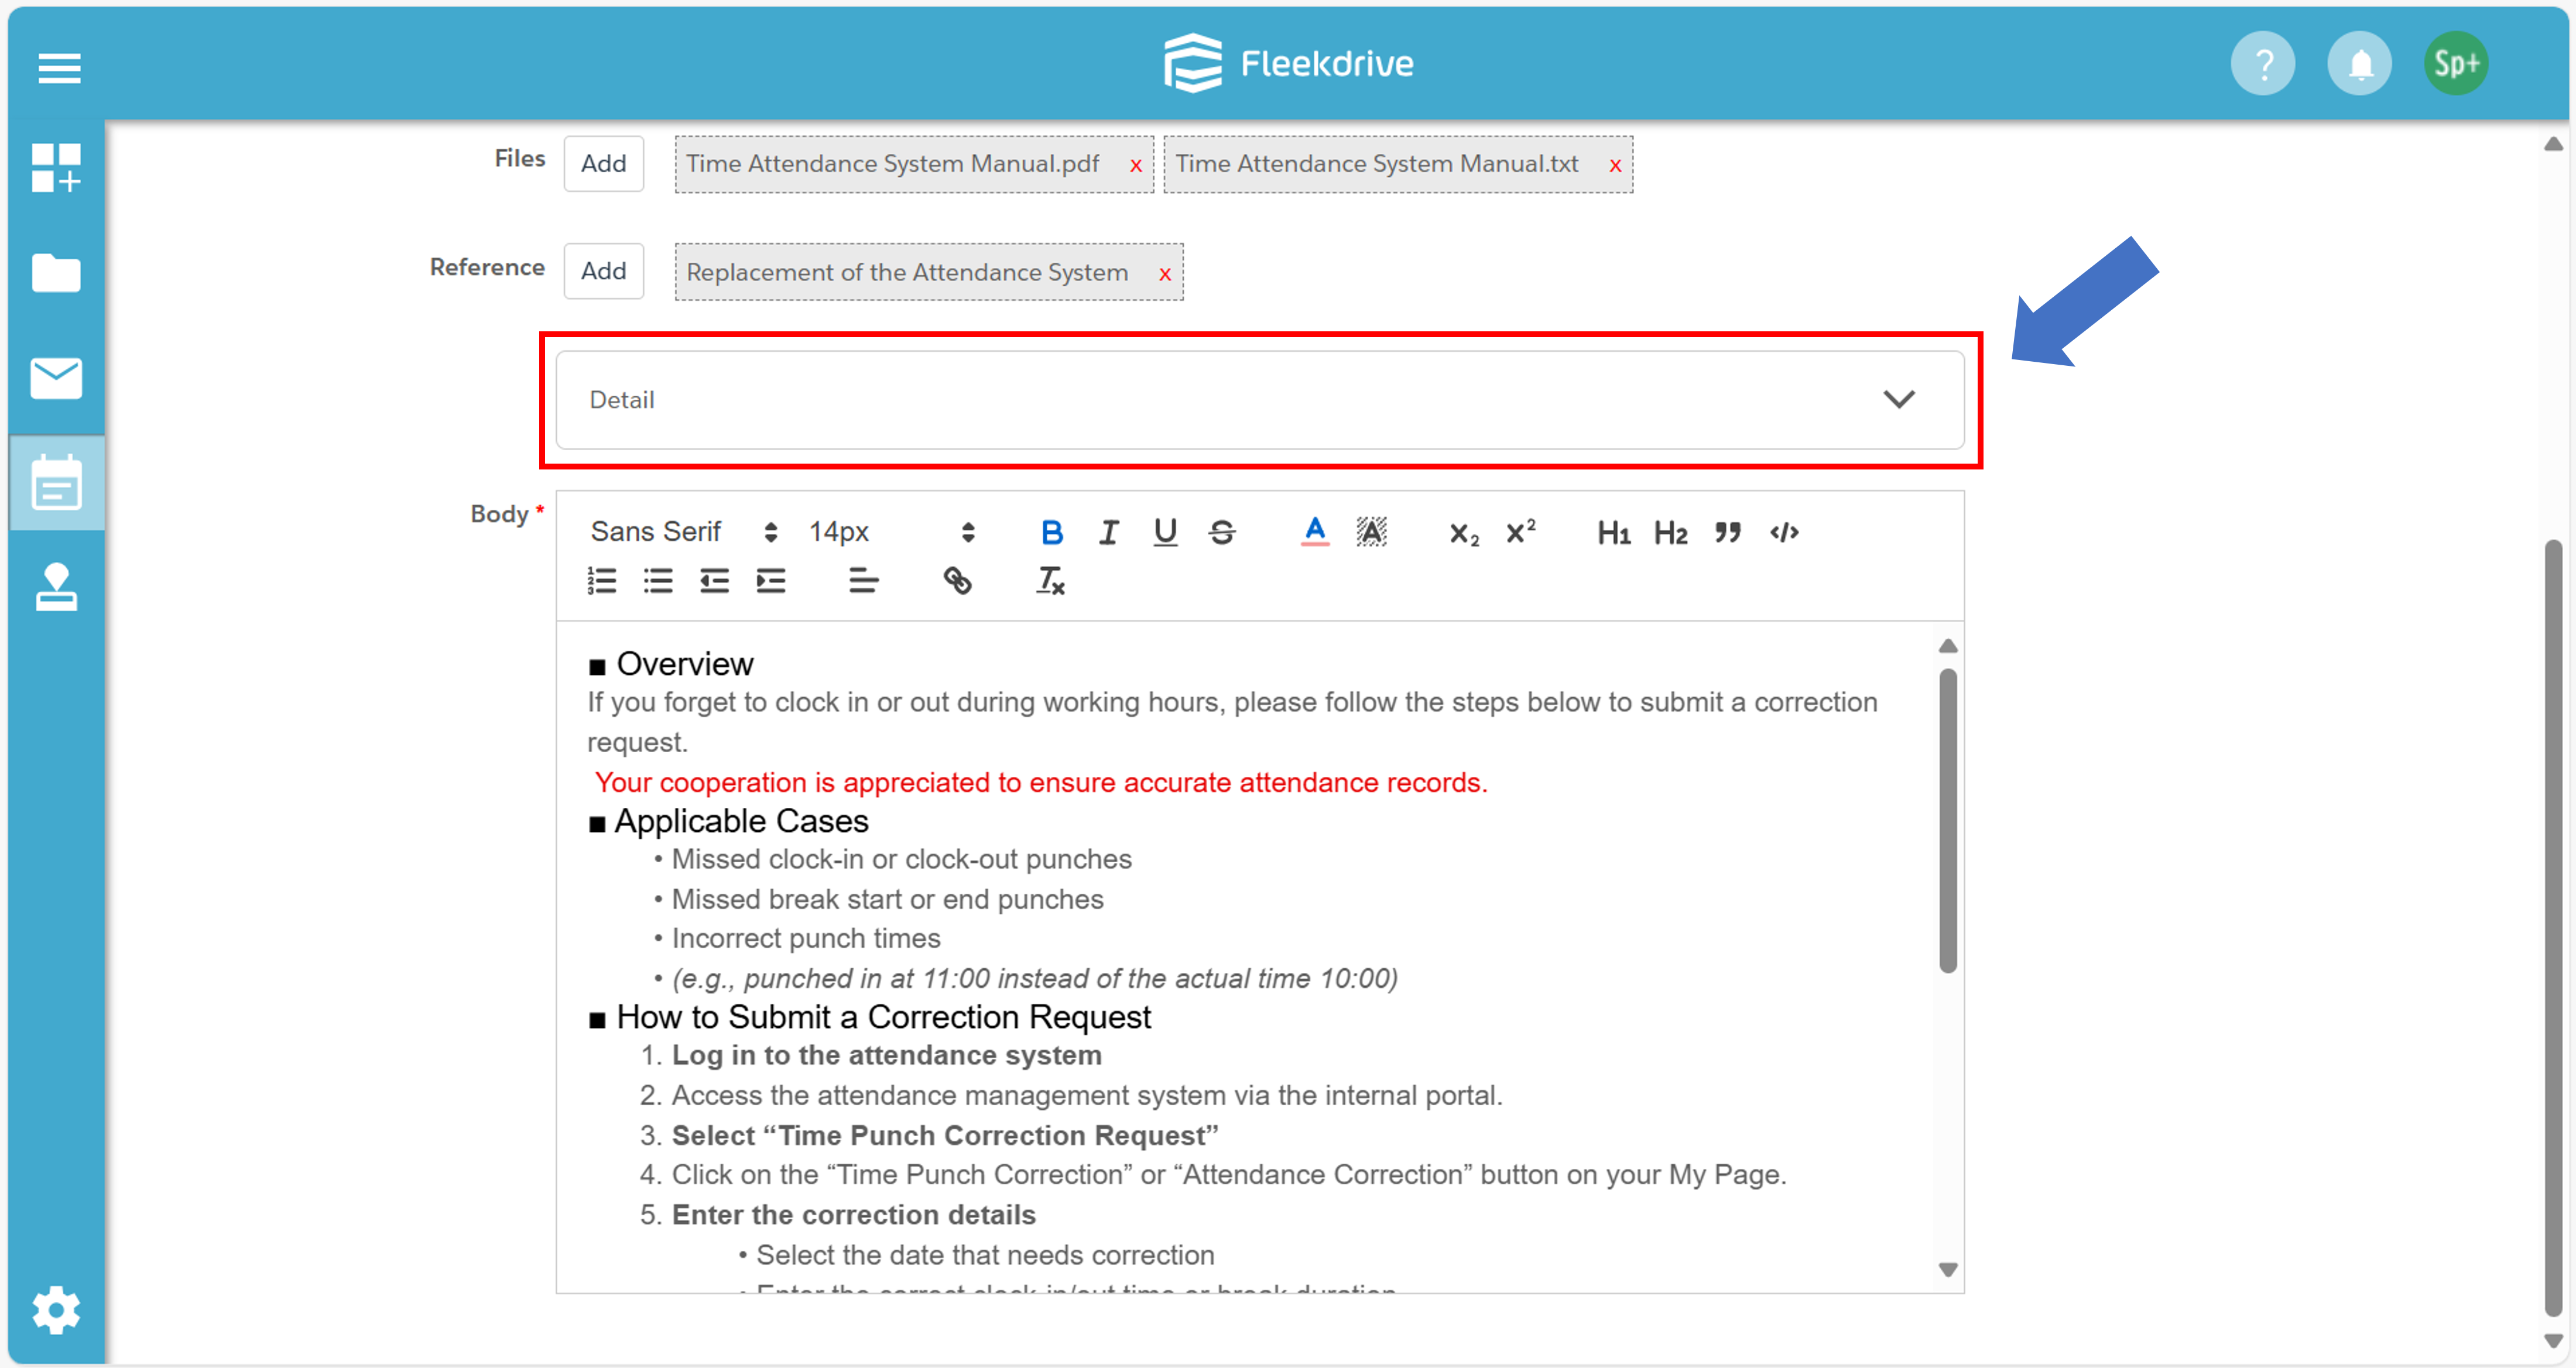
Click the dropdown arrow for “Detailed Settings” to display the configuration options.
Here, you can configure the following: View Restrictions, Post Duration, Priority, and Email Notification.
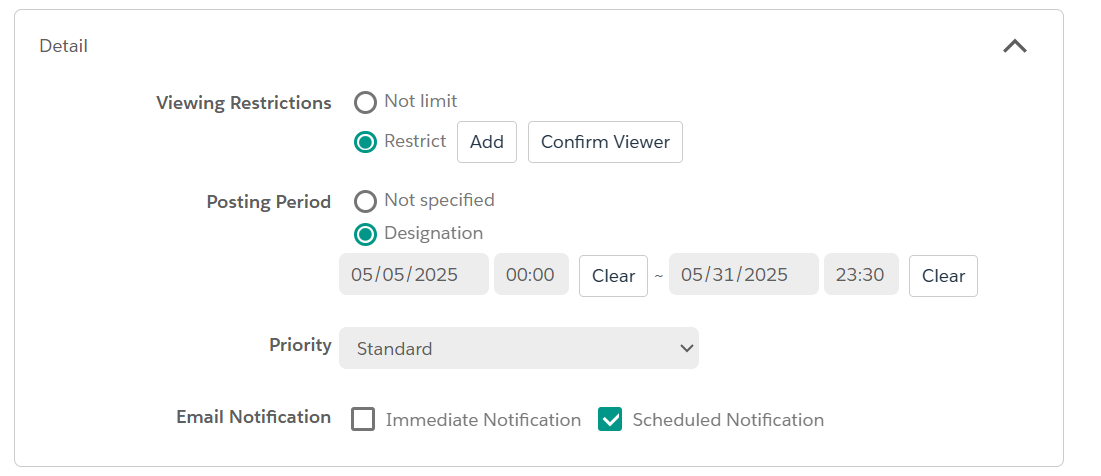
The available settings are as follows:
| Setting Item | Description |
|---|---|
| Viewing Restrictions |
You can control who can view the Post. ・If “Not limit” is selected, the Post will be published to all users in the organization. ・If “Restrict” is selected, the visibility will be limited. ・When “Restrict” is selected, setting viewers is mandatory. ・By default, viewers will be users in the same department as the Post creator. How to set viewers: ・Check the checkbox next to each target to designate them as viewers. |
| Post Duration |
You can specify the publication period for the Post. ・Select “Specify” and enter the start and end date/time. ・Outside the specified period, the Post will not be displayed on the viewer’s screen. |
| Priority | Select the Priority from the dropdown. |
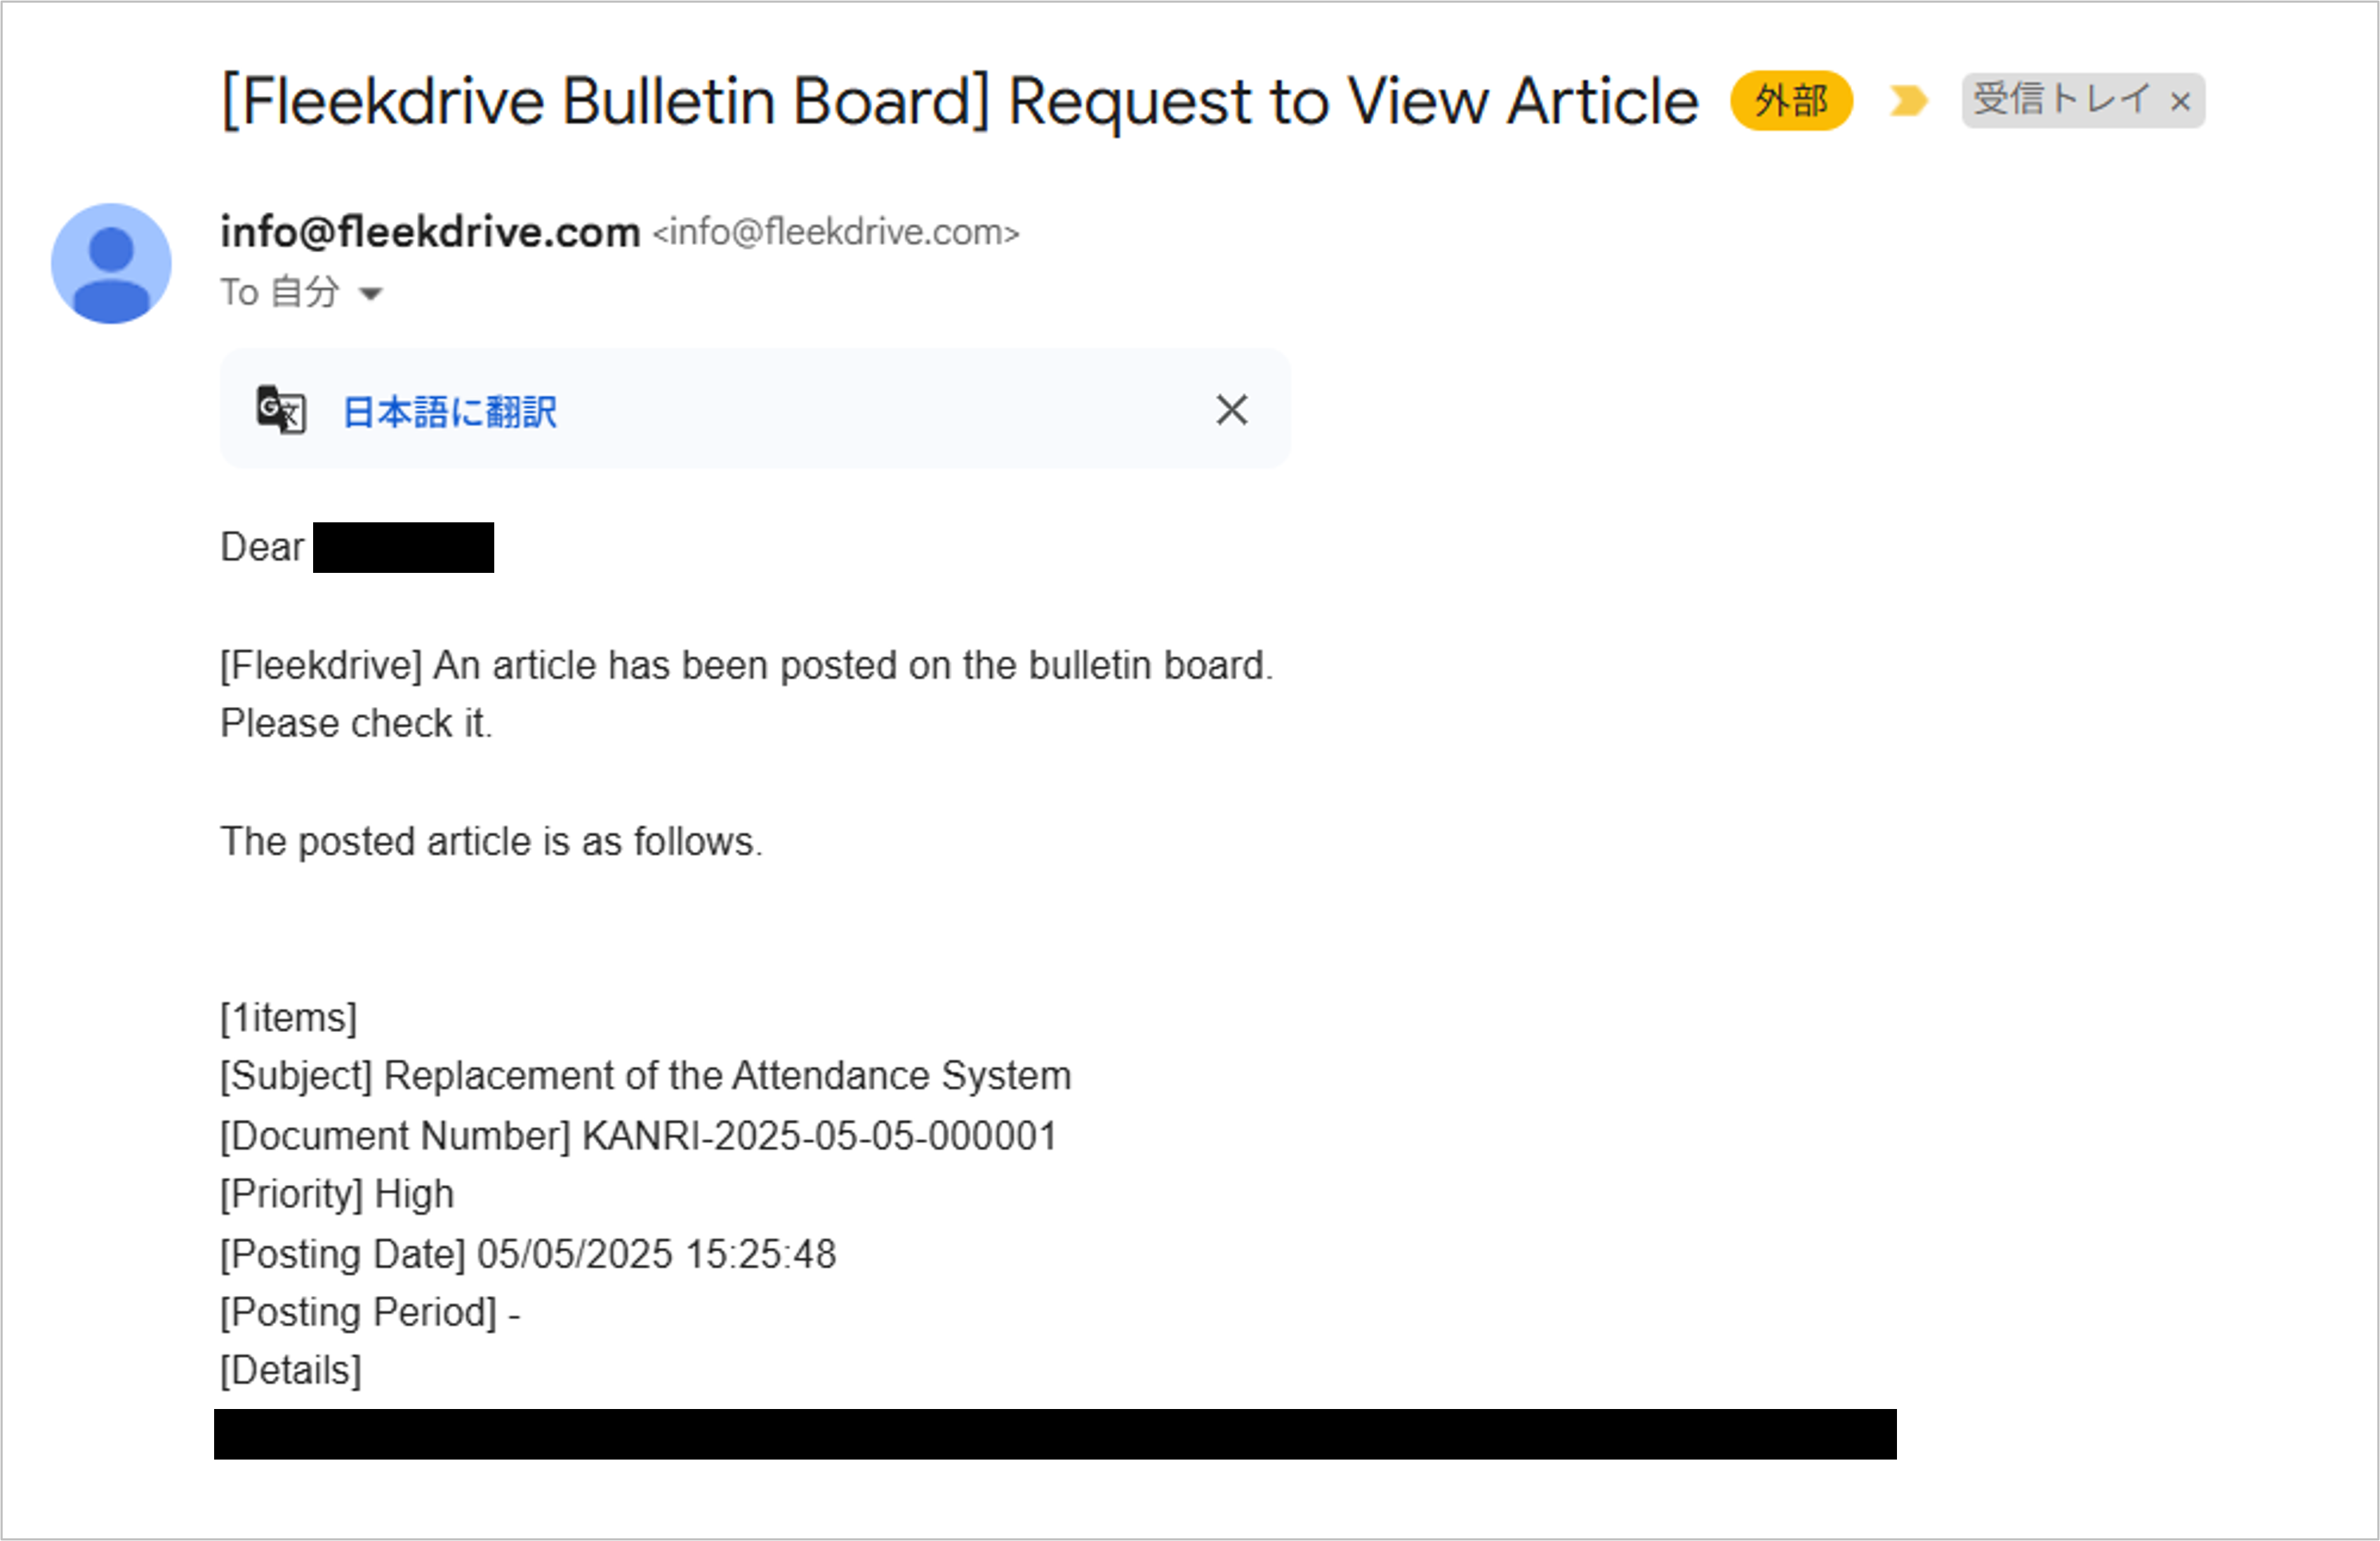
| Email Notification |
There are two types of email notifications: ・Immediate Notification: Notifies viewers immediately when the Post is published. ・Scheduled Notification: Notifies viewers at a scheduled time set by the administrator. ※ Additional notes on actual email notifications may apply. |
*Note on Email Notifications:
The following type of email notification will be sent.
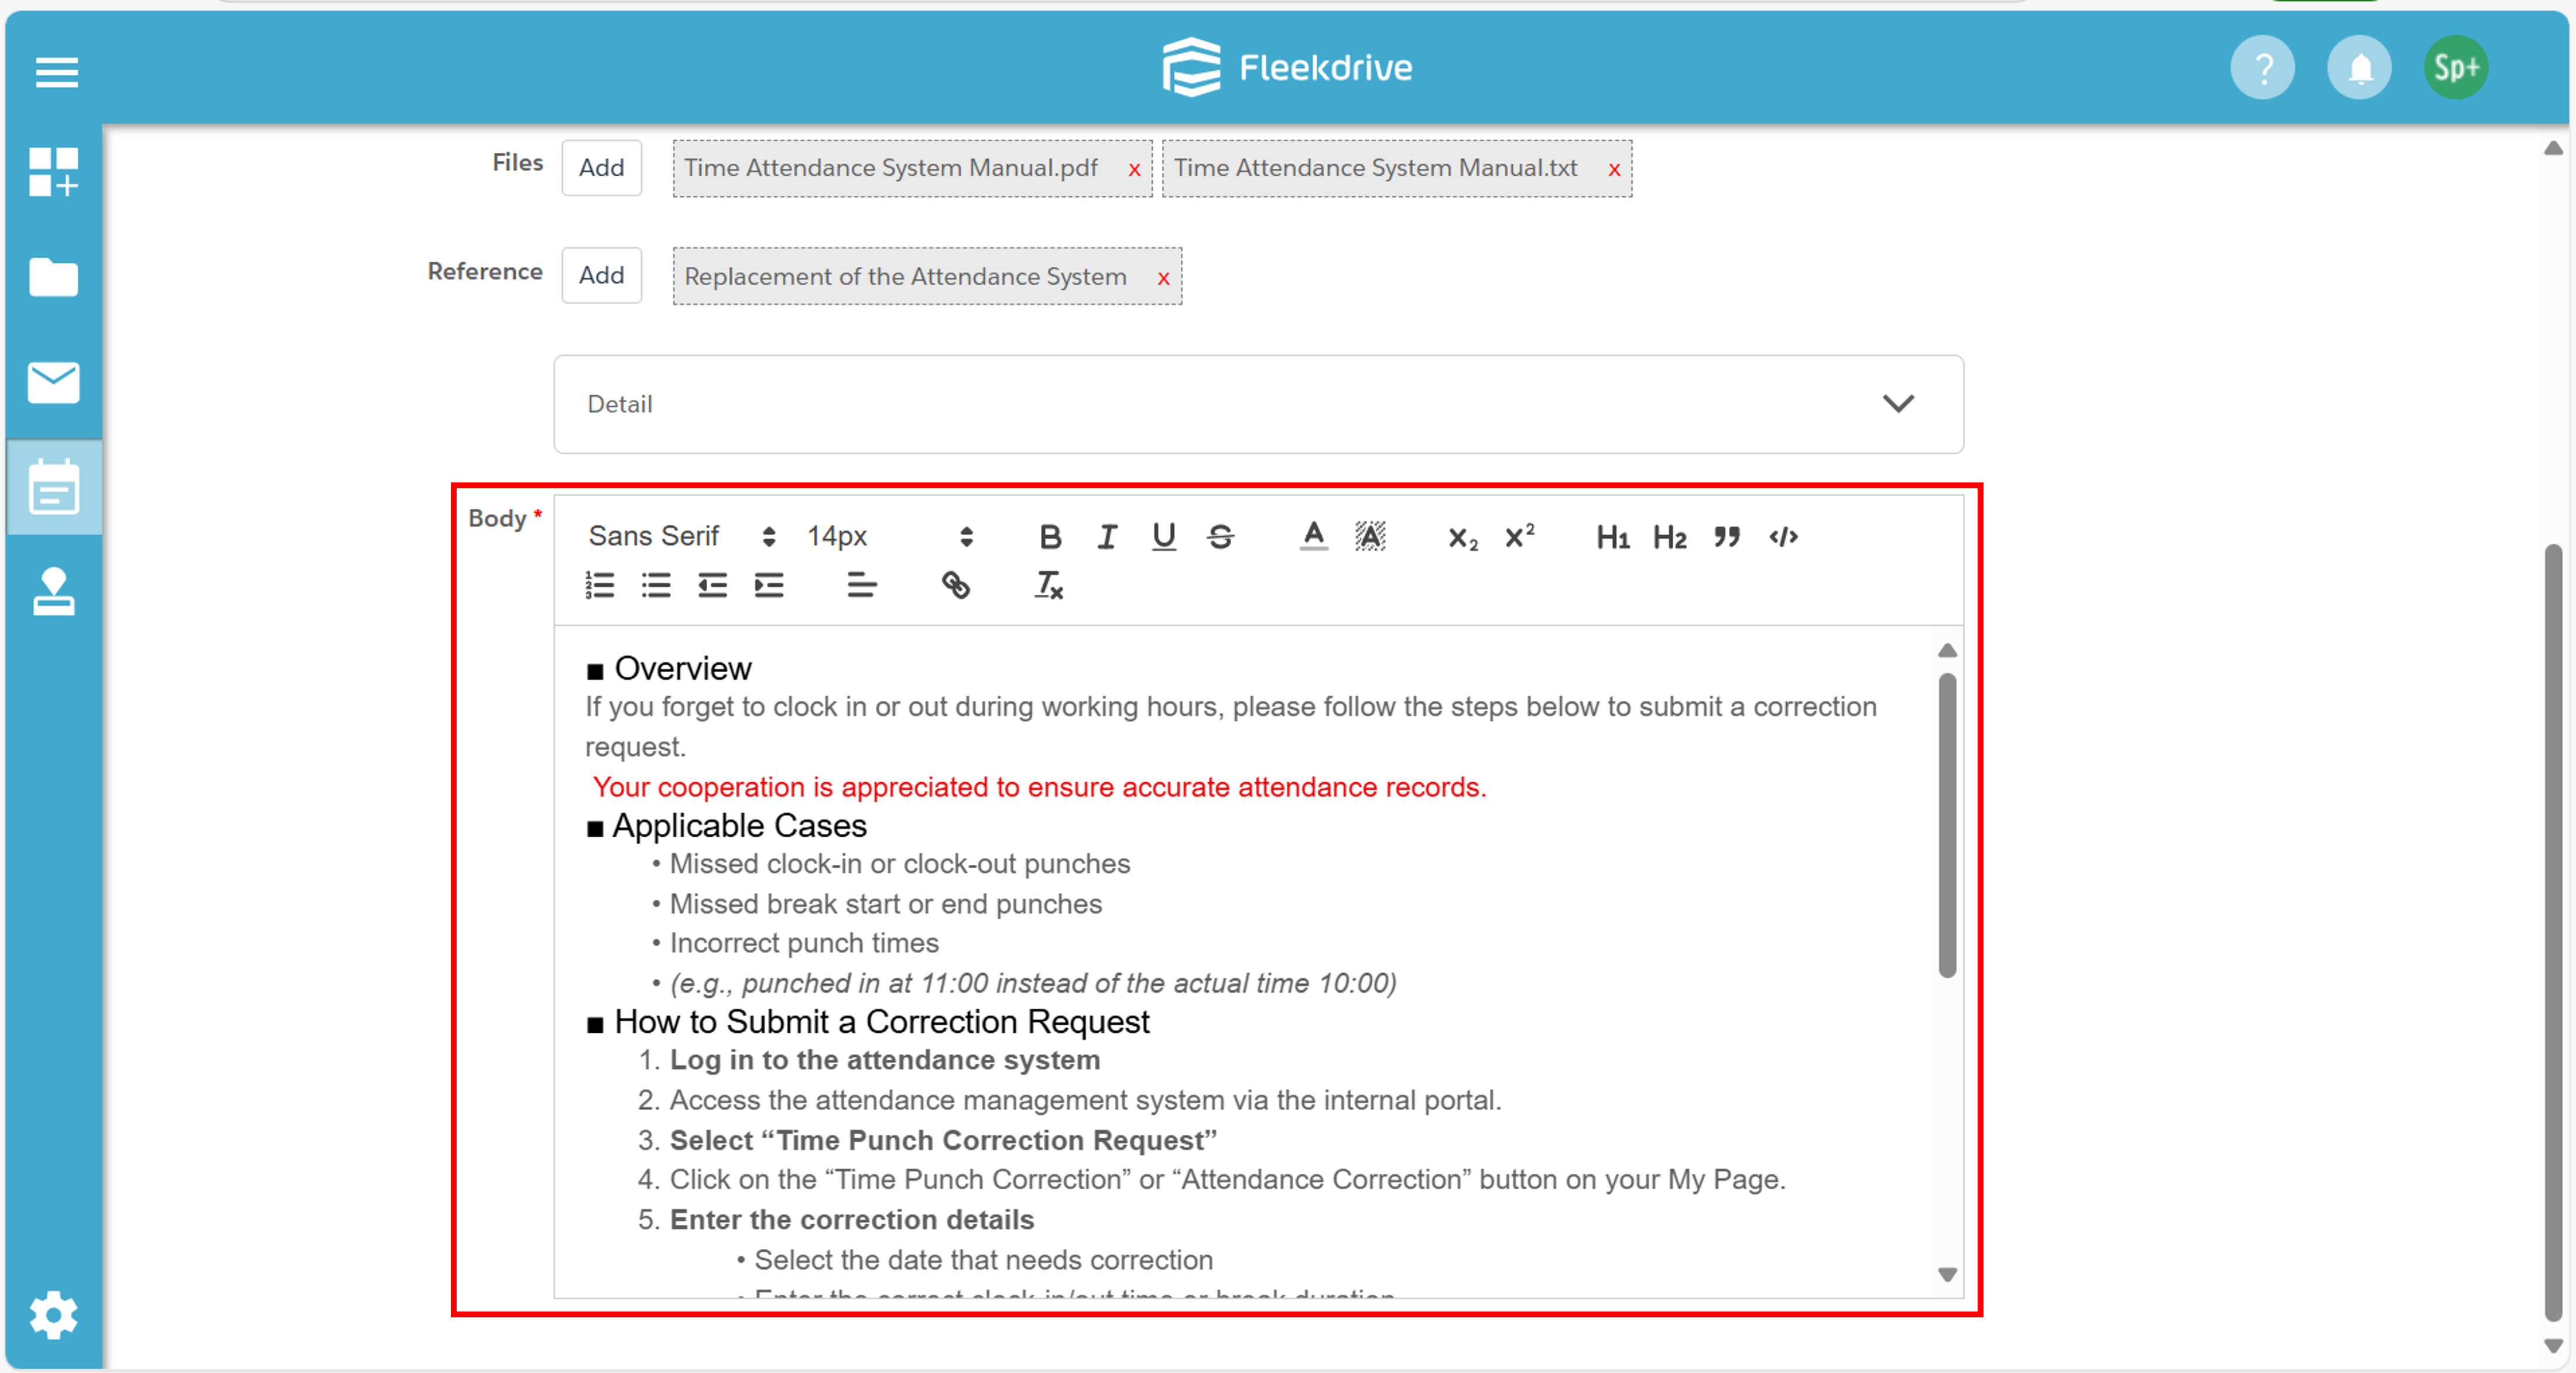
You can use the simple editor to create and format the Post content, as well as apply text styling.
For more details, please refer to this page.
Last Updated : 20 Jun 2025