Use Webhooks with Smart Rules to Integrate with External Web Applications
The following is a guide on how to use Webhooks with Smart Rules for integration with external web applications.
-This feature is not available for the Team plan.
Webhook is a mechanism that sends real-time notifications to linked external applications when an event occurs in a web application like Fleekdrive.
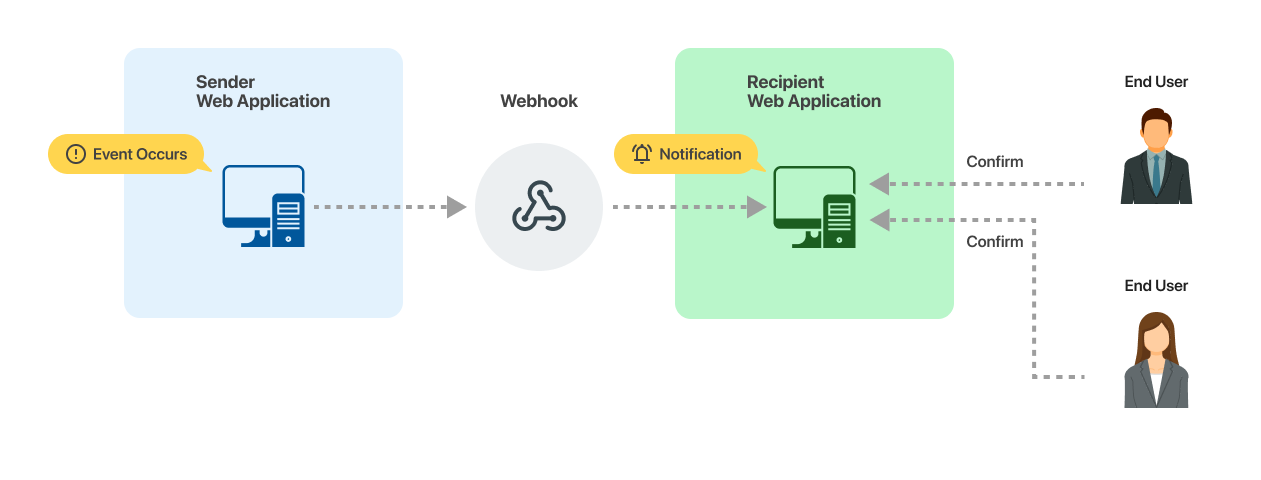
A common webhook feature is the ability to send HTTP requests to other external services (web applications) when an event occurs in a web application.
Fleekdrive uses Webhooks in its Smart Rules.
Webhook is available as one of the Smart Rule actions.
(Click here for more information on Smart Rules.)
An action configured in advance by the user triggers the Webhook action, and notifications are sent to the linked external application.
Note: It is a prerequisite that a Web API is available on the external web application to be linked.
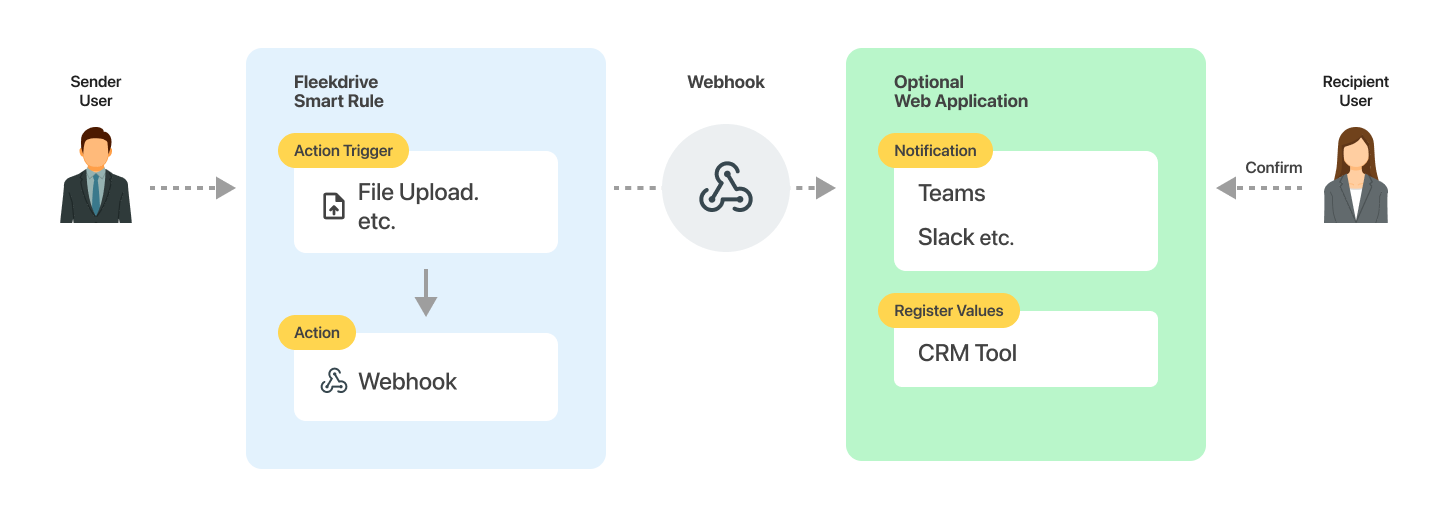
The following diagram illustrates the use of Webhooks with Fleekdrive’s Smart Rules.
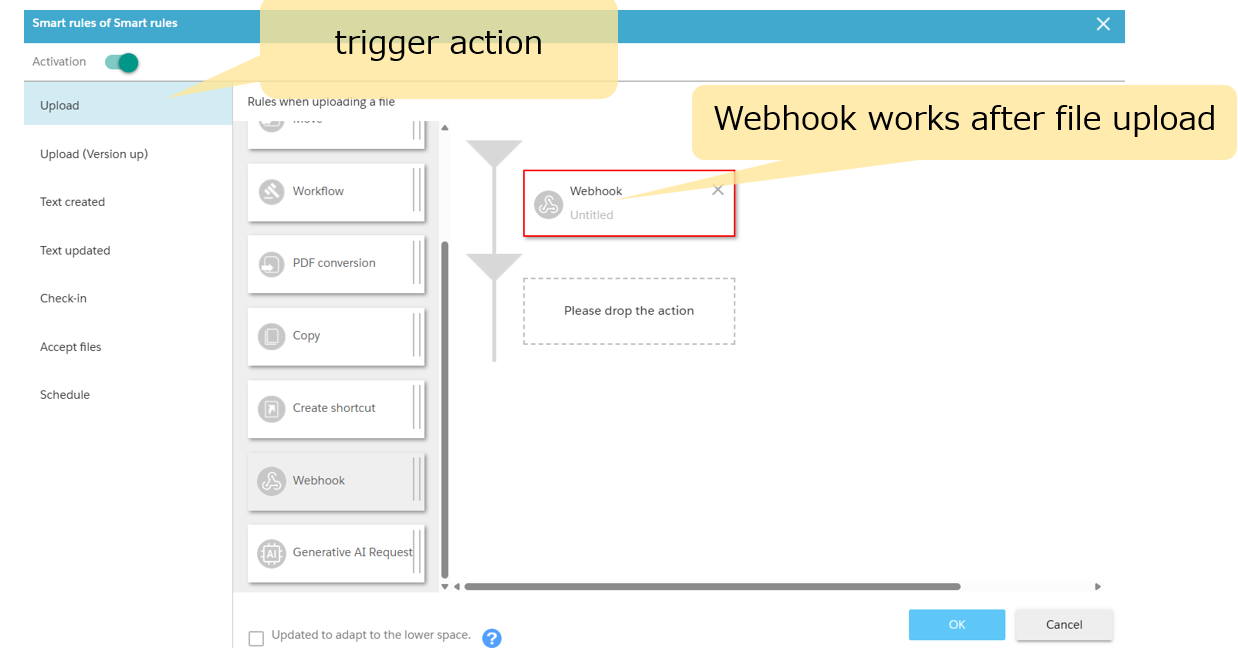
Example: When a file is uploaded, a notification is sent to a specified external application configured in the Webhook settings.
– Configure the following settings for the Smart Rule:
Trigger: File upload
Action following trigger: Webhook
- This function requires a certain level of web knowledge and understanding of the specifications of the external web application to be linked.
- External web applications to be linked are out of the scope of Fleekdrive’s support.
- It is recommended to configure this with a technical contact or a development company that has the necessary web knowledge and understanding of the external application’s specifications.

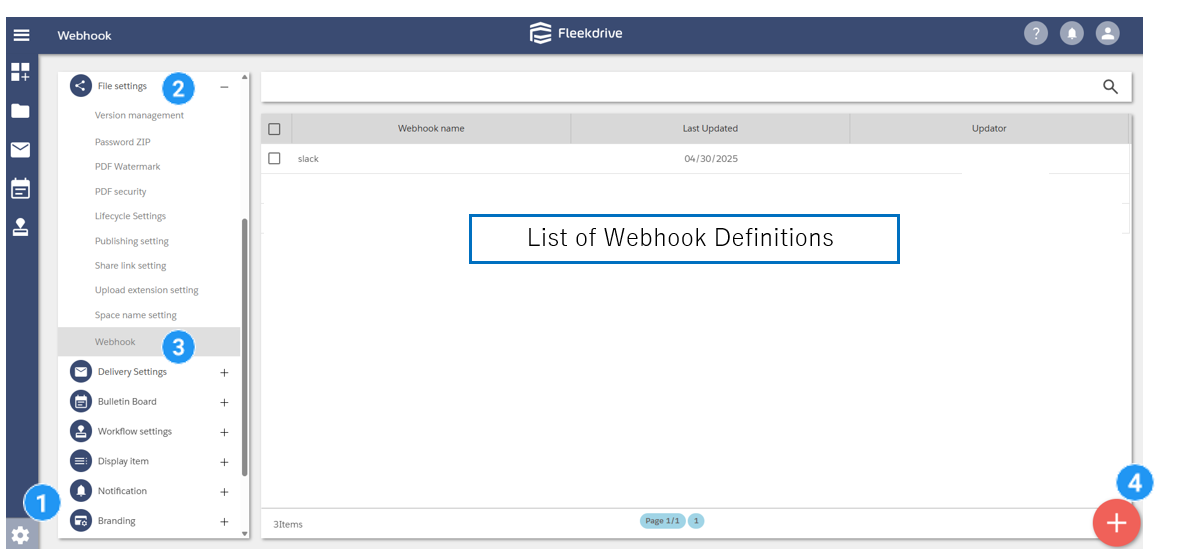
1) Create a Webhook definition in Fleekdrive
From Settings, go to “File Settings” > “Webhook” to display the Webhook Definition List screen.
Click the floating button (red plus mark) in the lower right corner to proceed to the Webhook definition creation screen.
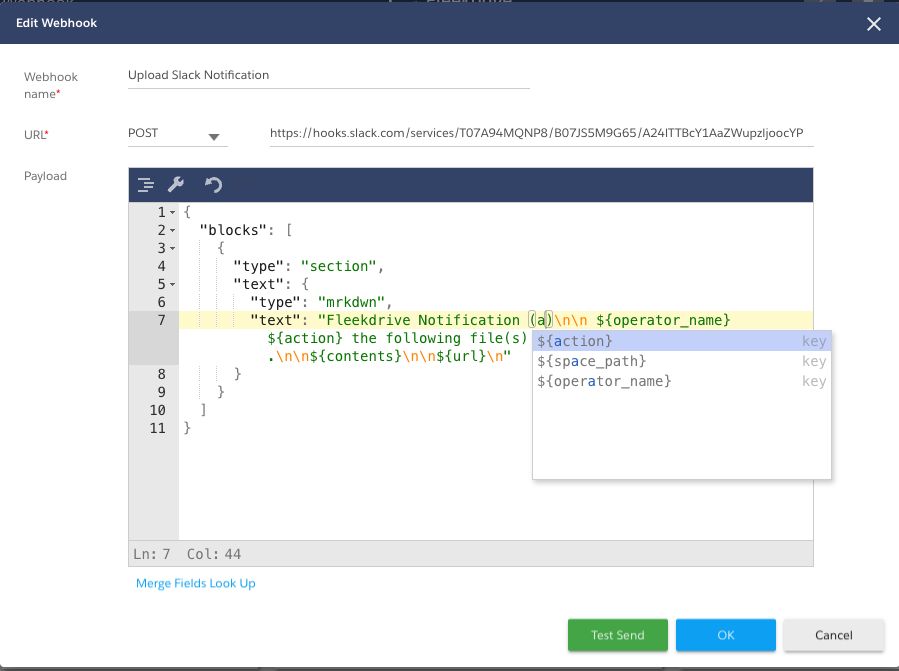
When the Webhook definition creation screen appears, enter the following information.
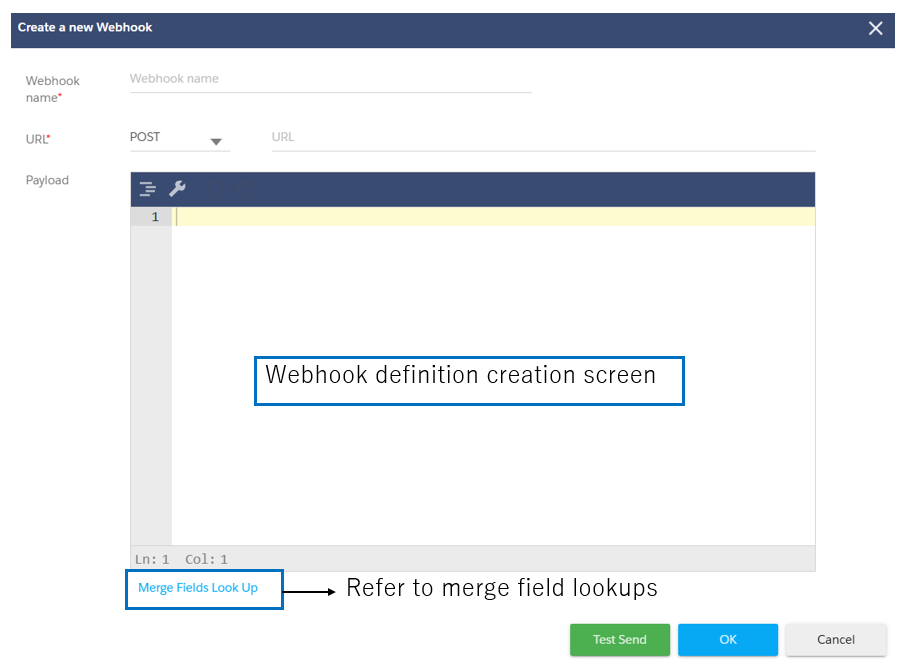
- Set the Webhook Name
Set the name to be displayed in the Smart Rule.
- Set the URL
Specify the API method and URL to which notifications will be sent.
- Set payload (in JSON format)
Set the content to be sent in JSON format.
If you enter the first letter of a merge field, suggestions will appear.
When you select a suggestion, the merge field will be inserted.
Note: If the payload is not recognized as valid JSON, it will not work correctly.
Consult the developer responsible for the receiving endpoint, as invalid or incomplete JSON format is not supported.
- Click here for a list of merge fields.
Note: You can also check the list of merge fields from the “Merge Fields” screen.
2) Registering Webhooks in Smart Rules
Click here to learn how to set up Smart Rules.
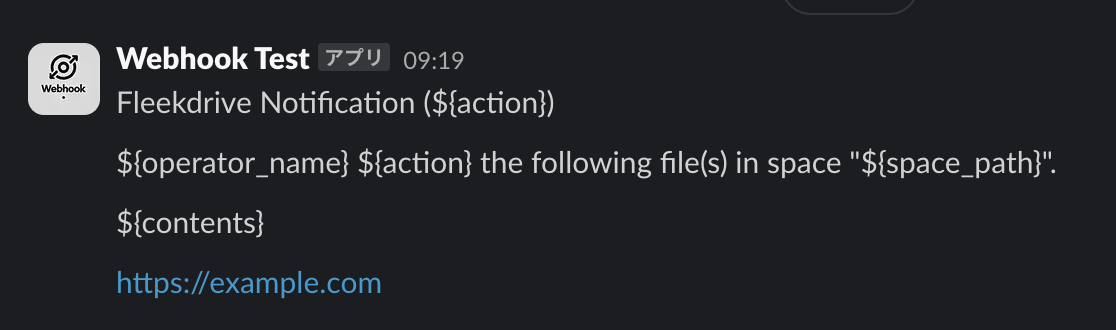
Reference: Example of a Webhook Registered in Smart Rules
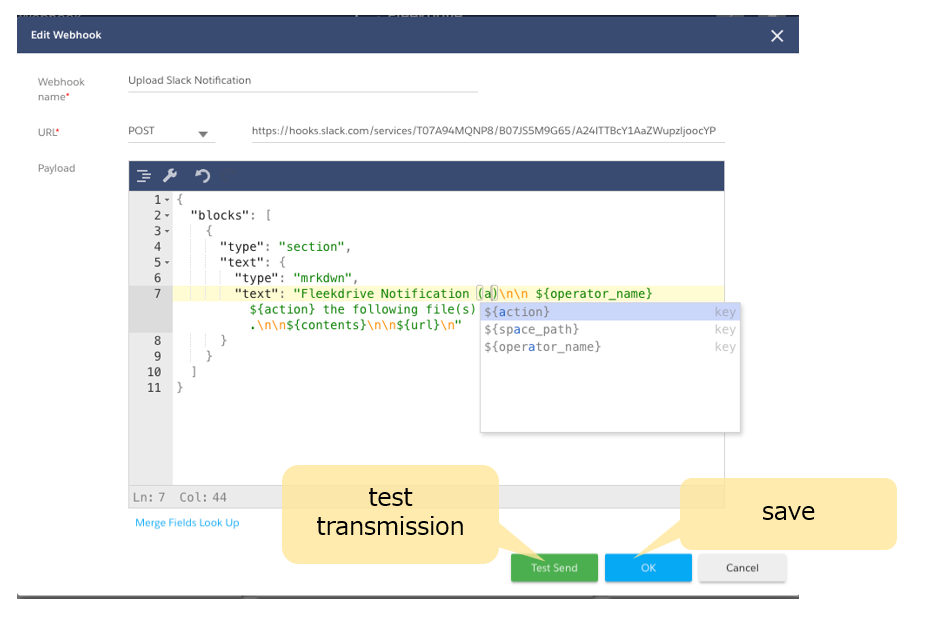
3) Checking Transmission Results – 1: Perform a Test Transmission.
Clicking the “Test Transmission” button will perform a data transmission using the configured Webhook settings.
– Merge fields (such as operator name) are not populated during the test.
Review the test results. If the test is successful, click “OK” to save the Webhook definition.
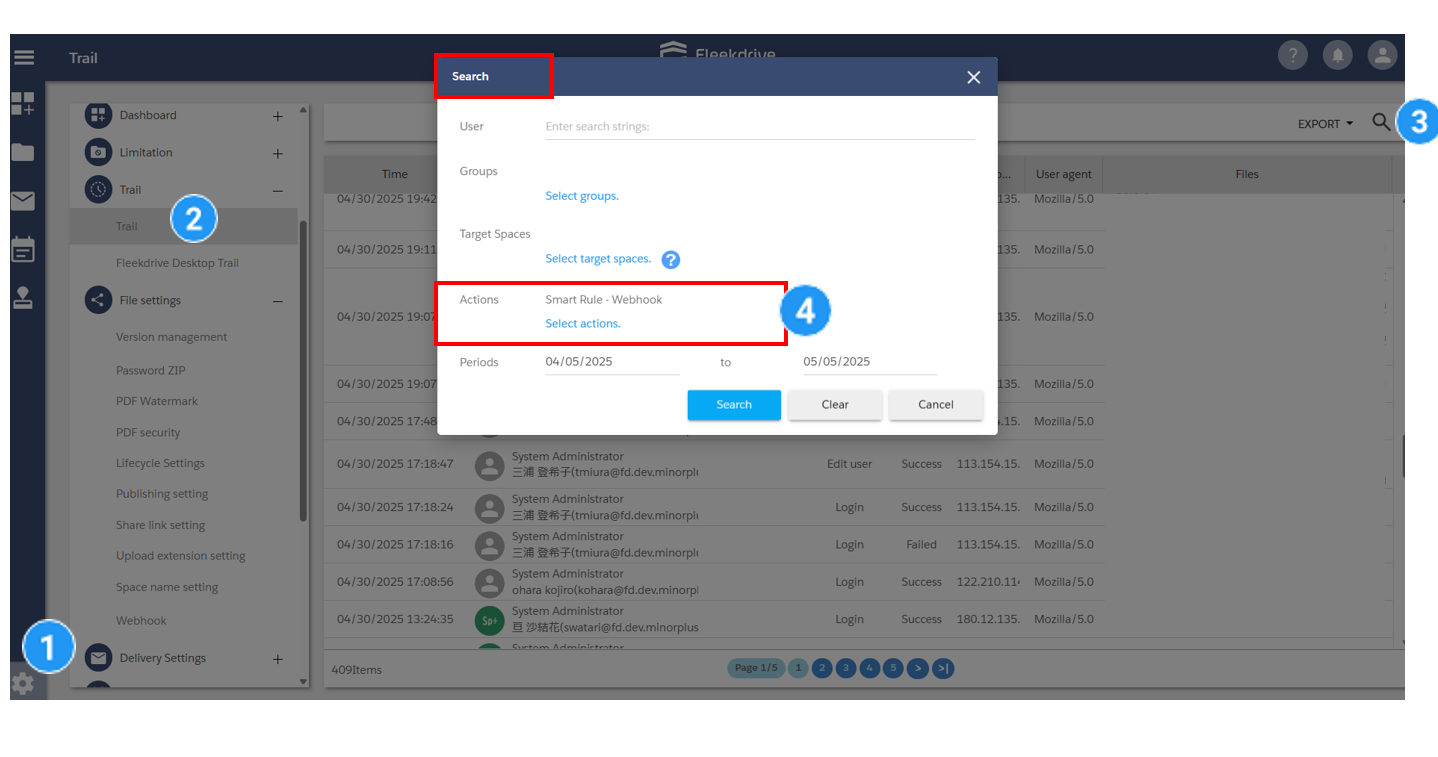
3) Checking Transmission Results – 2: In the Trail Logs.
From Settings, go to Trails, then select Trails again within that menu and select the magnifying glass icon in the upper right corner.
When the search criteria entry screen appears, set the action to “Smart Rule – Webhook”.
Set the date range and other criteria, and click “OK”.
The results are displayed.
For more information on the Trails feature, click here.
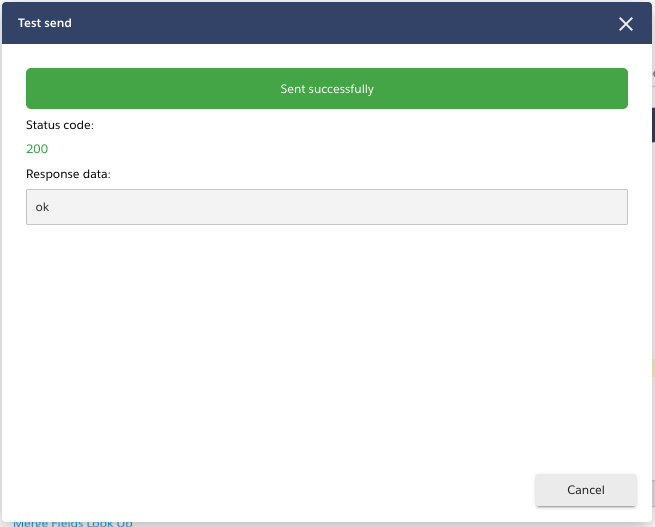
– When transmission is successful:
Result: Success
Content: The response status code is displayed.

– In case of transmission failure:
Result: Failed
Content: An error message is displayed.
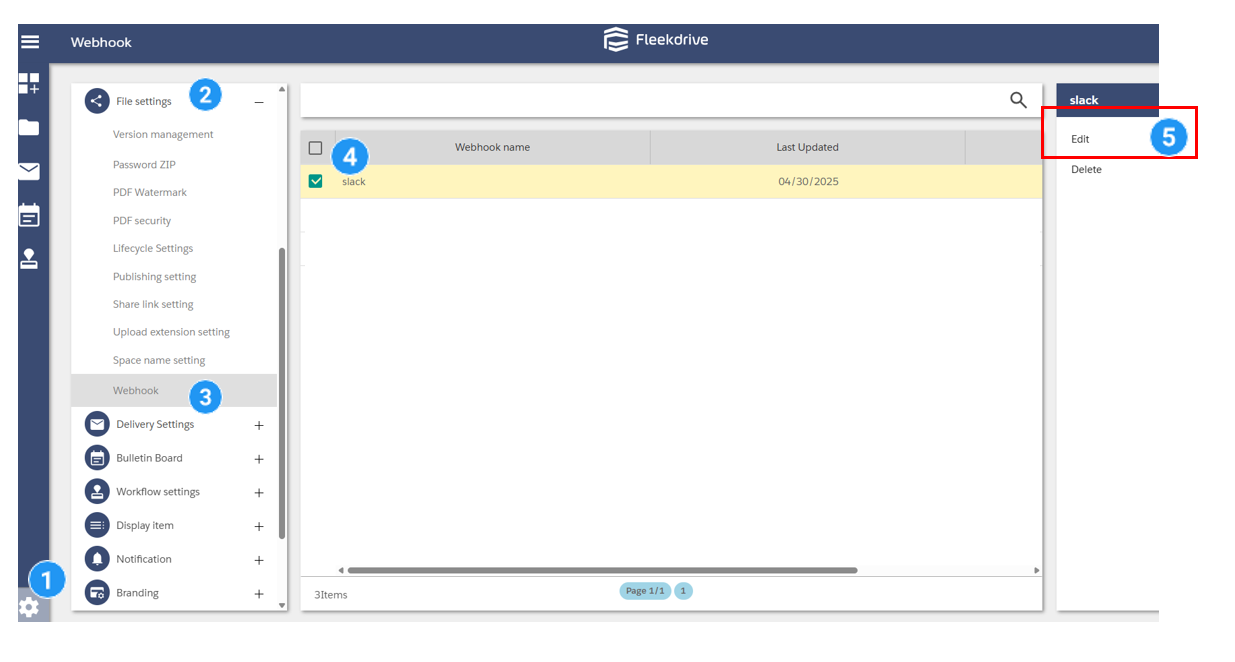
From Settings, go to “File Sharing Settings” > “Webhook” and select the checkbox next to the Webhook definition you wish to edit, then click “Edit” from the menu that appears.
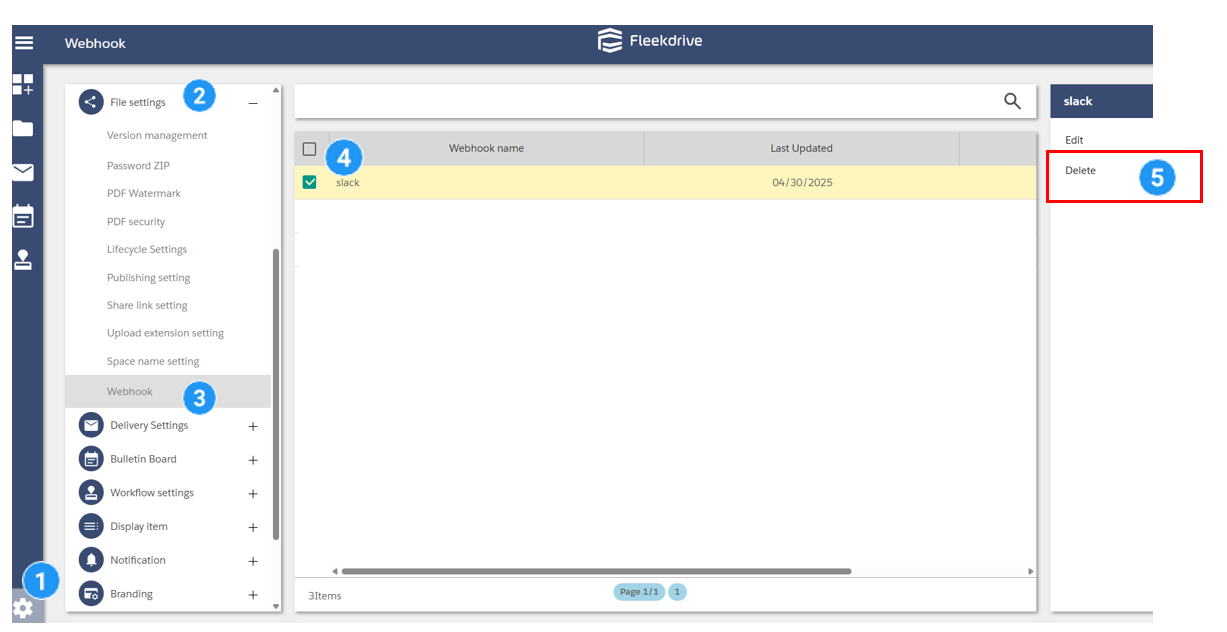
From Settings, go to “File Sharing Settings” > “Webhook” and select the checkbox next to the Webhook definition you wish to delete, then click “Delete” from the menu that appears.
Click here for detailed guides on configuring notifications to Slack and Microsoft Teams.
Last Updated : 10 Jul 2025