Set Priority
This guide explains how to manage priority levels for posts.
Note: A Business Plus plan is required to use the Bulletin Board feature.
For more details, please refer to [this page].
Each post can optionally be assigned a priority.
By setting a priority when creating a post, you can visually distinguish posts by importance in the post list.
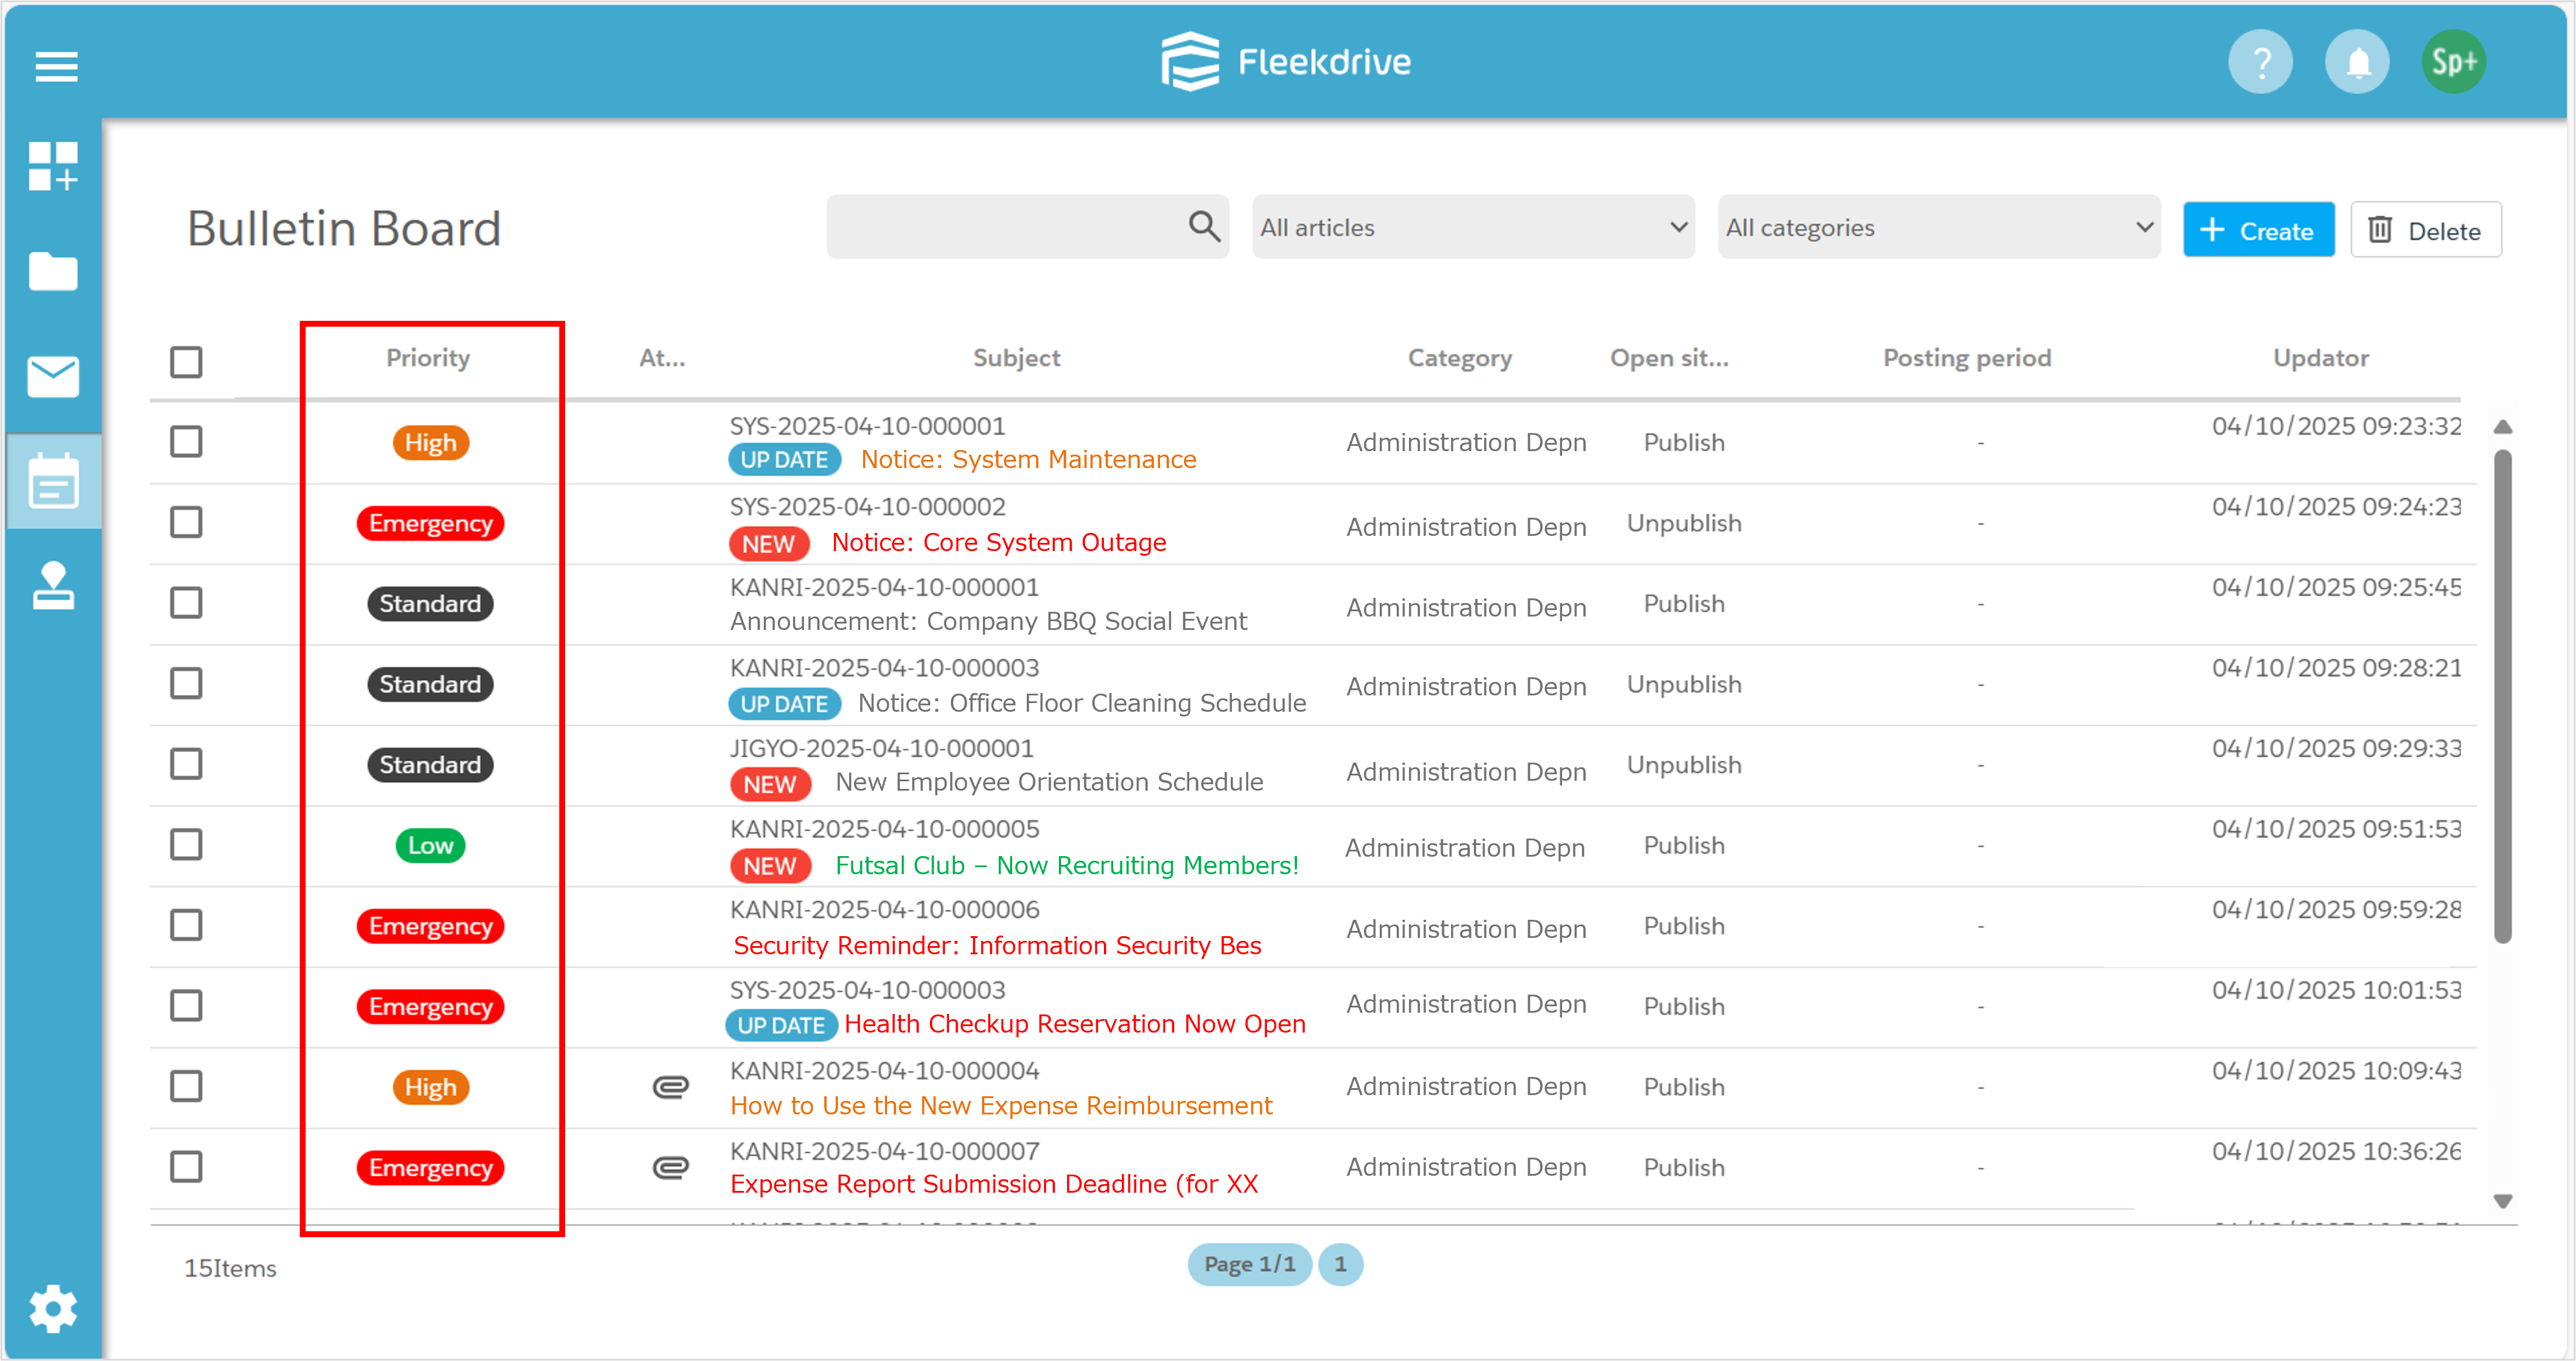
The following priorities are available by default:

When creating a new priority, configure the following items:
| Setting Item | Description |
| Enable | Set whether the created priority is enabled or disabled. |
| Priority | Set the priority value. Lower numbers indicate higher importance. In the post list, sorting by priority is based on this value. |
| Name | Enter the name of the priority. |
| Description | Enter a description for the priority. |
| Initial Display |
Set the default priority shown when creating a post. Only one priority can be set as the initial display within your organization. When a new priority is set as the initial display, the previous initial display setting is removed. |
| Color | Set the icon color for the priority. Any color can be selected. |
Click the floating button (red plus icon) located at the bottom right of the Priority settings screen.

You can edit an existing priority.
Select the priority you want to edit and choose “Edit” from the right navigation panel.
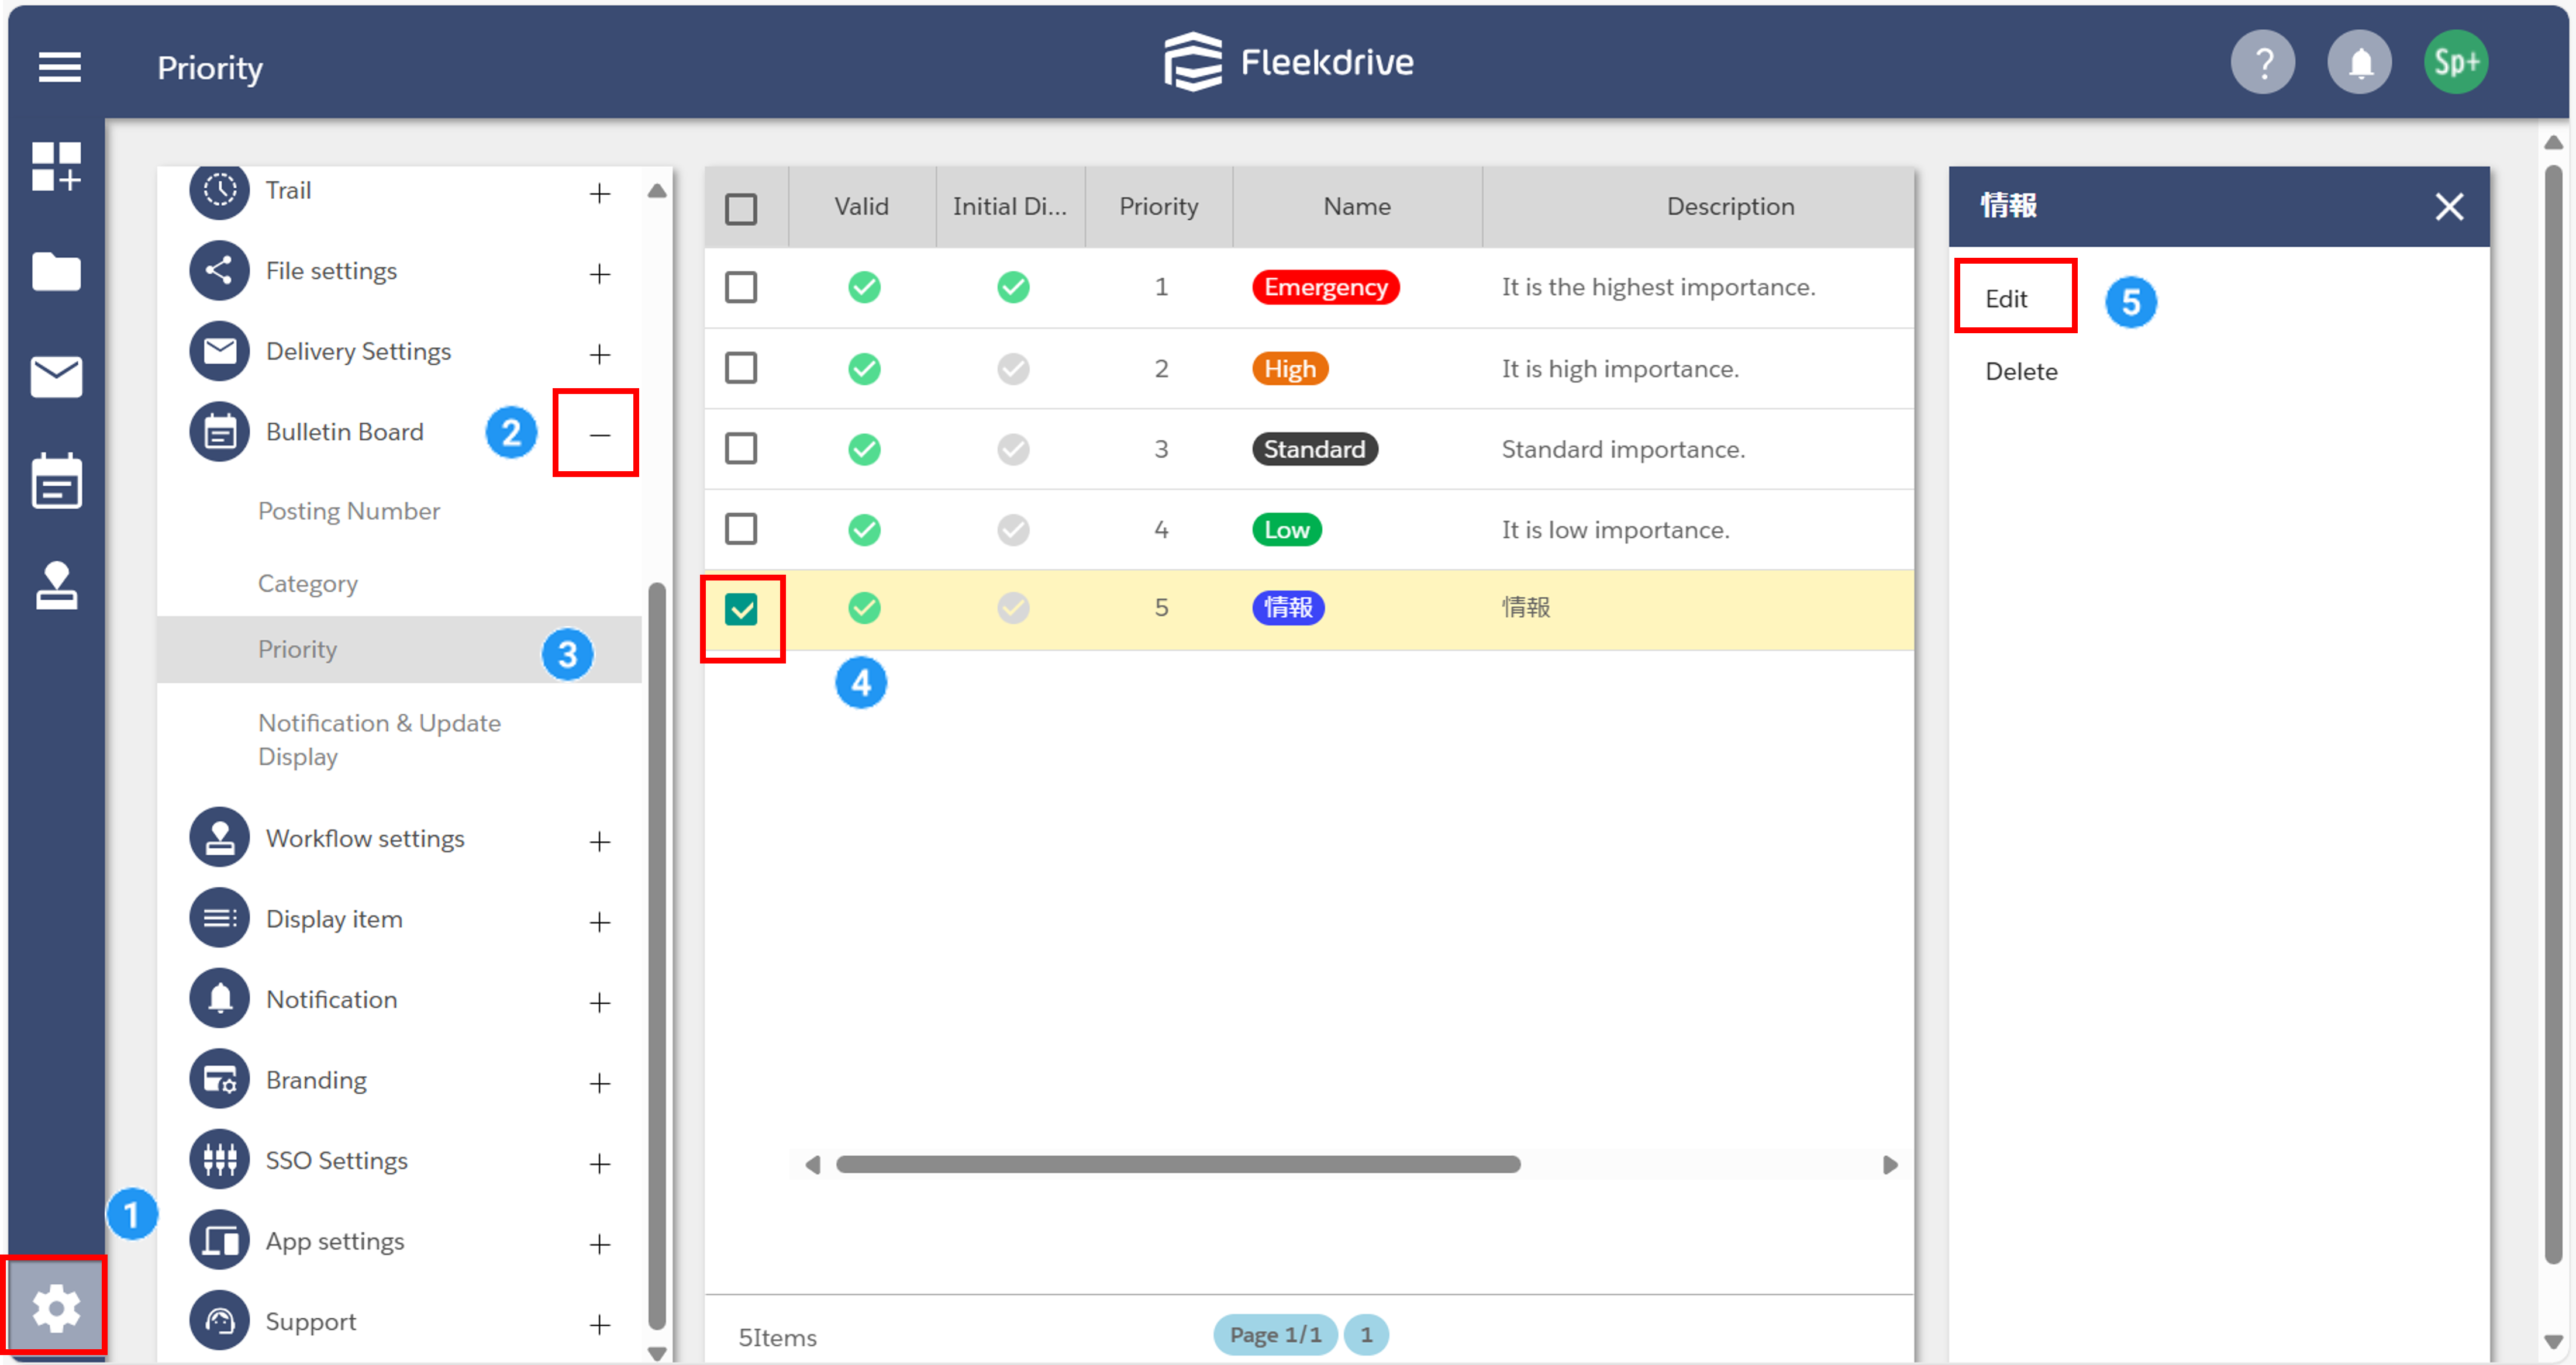
Only the following items can be edited for default priorities:
You can delete a priority that you have created.
Select the priority you want to delete and choose “Delete” from the right navigation panel.
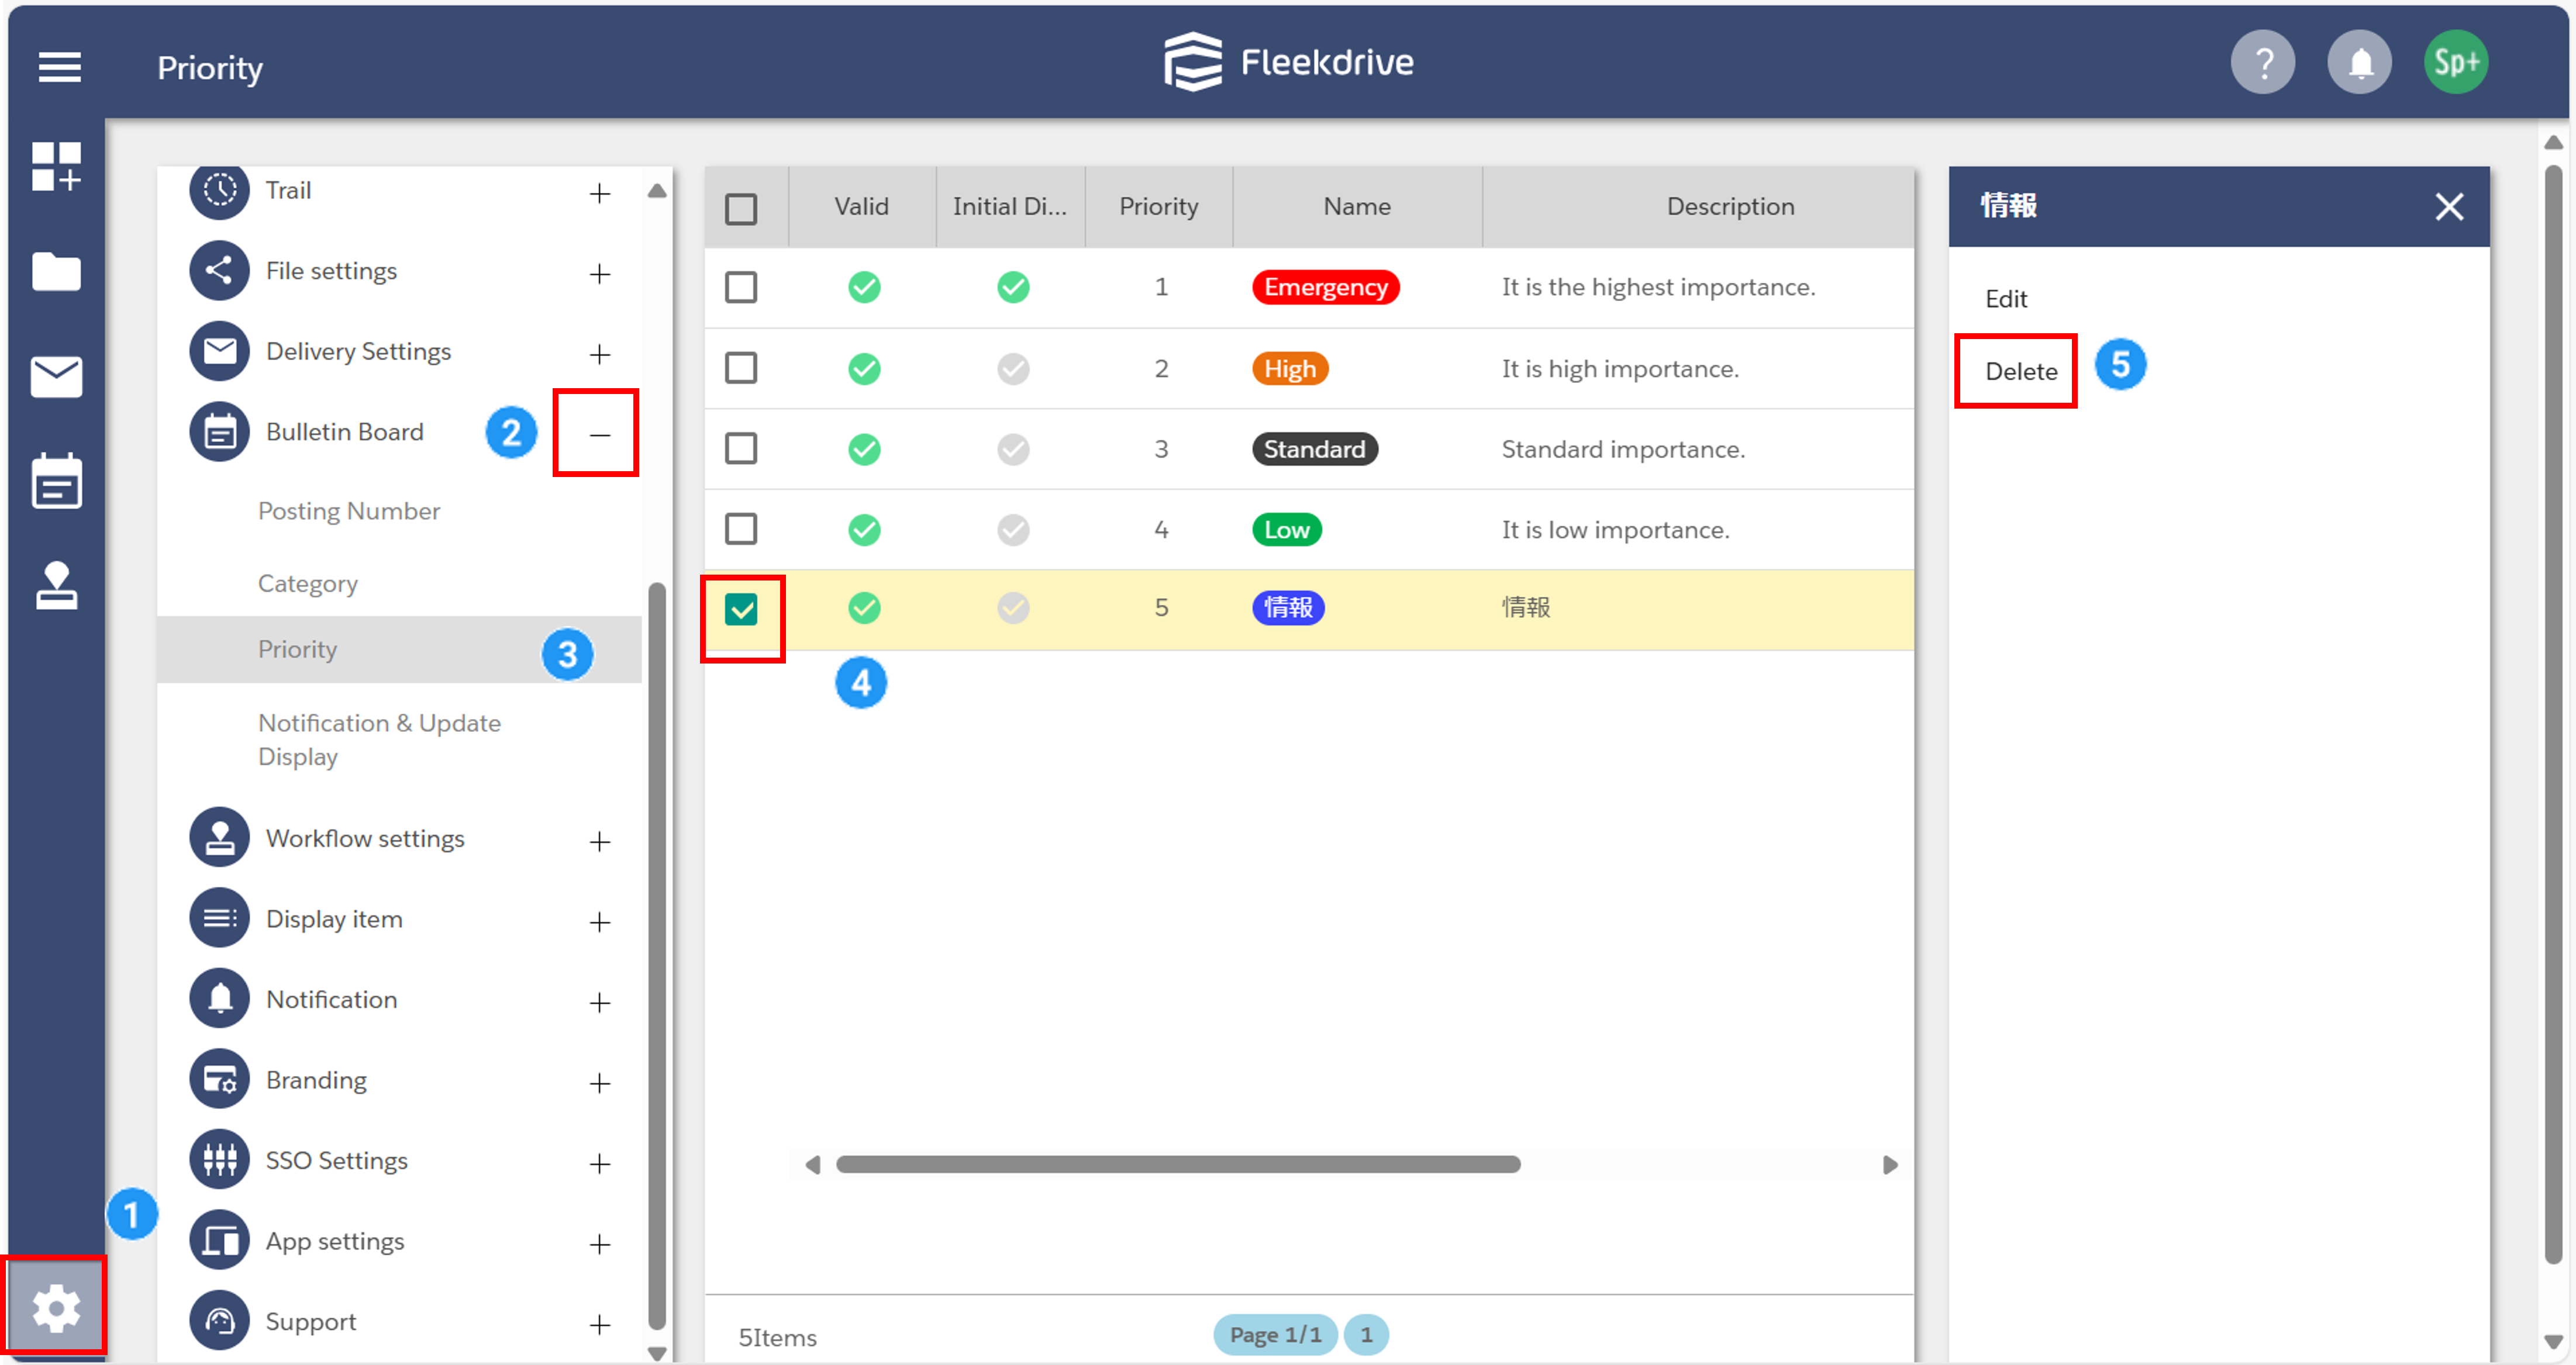
- Default priorities cannot be deleted.
Last Updated : 10 Jul 2025