
Organize the files automatically
Guide for organizing the files automatically.
This feature is available on the Business, Business User Scale, and Business Plus plans.
What is the Lifecycle?
Use the Lifecycle function to organize a file automatically.
Lifecycle is the function that you can organize automatically from the file registration to completely removal.
Set the Lifecycle.
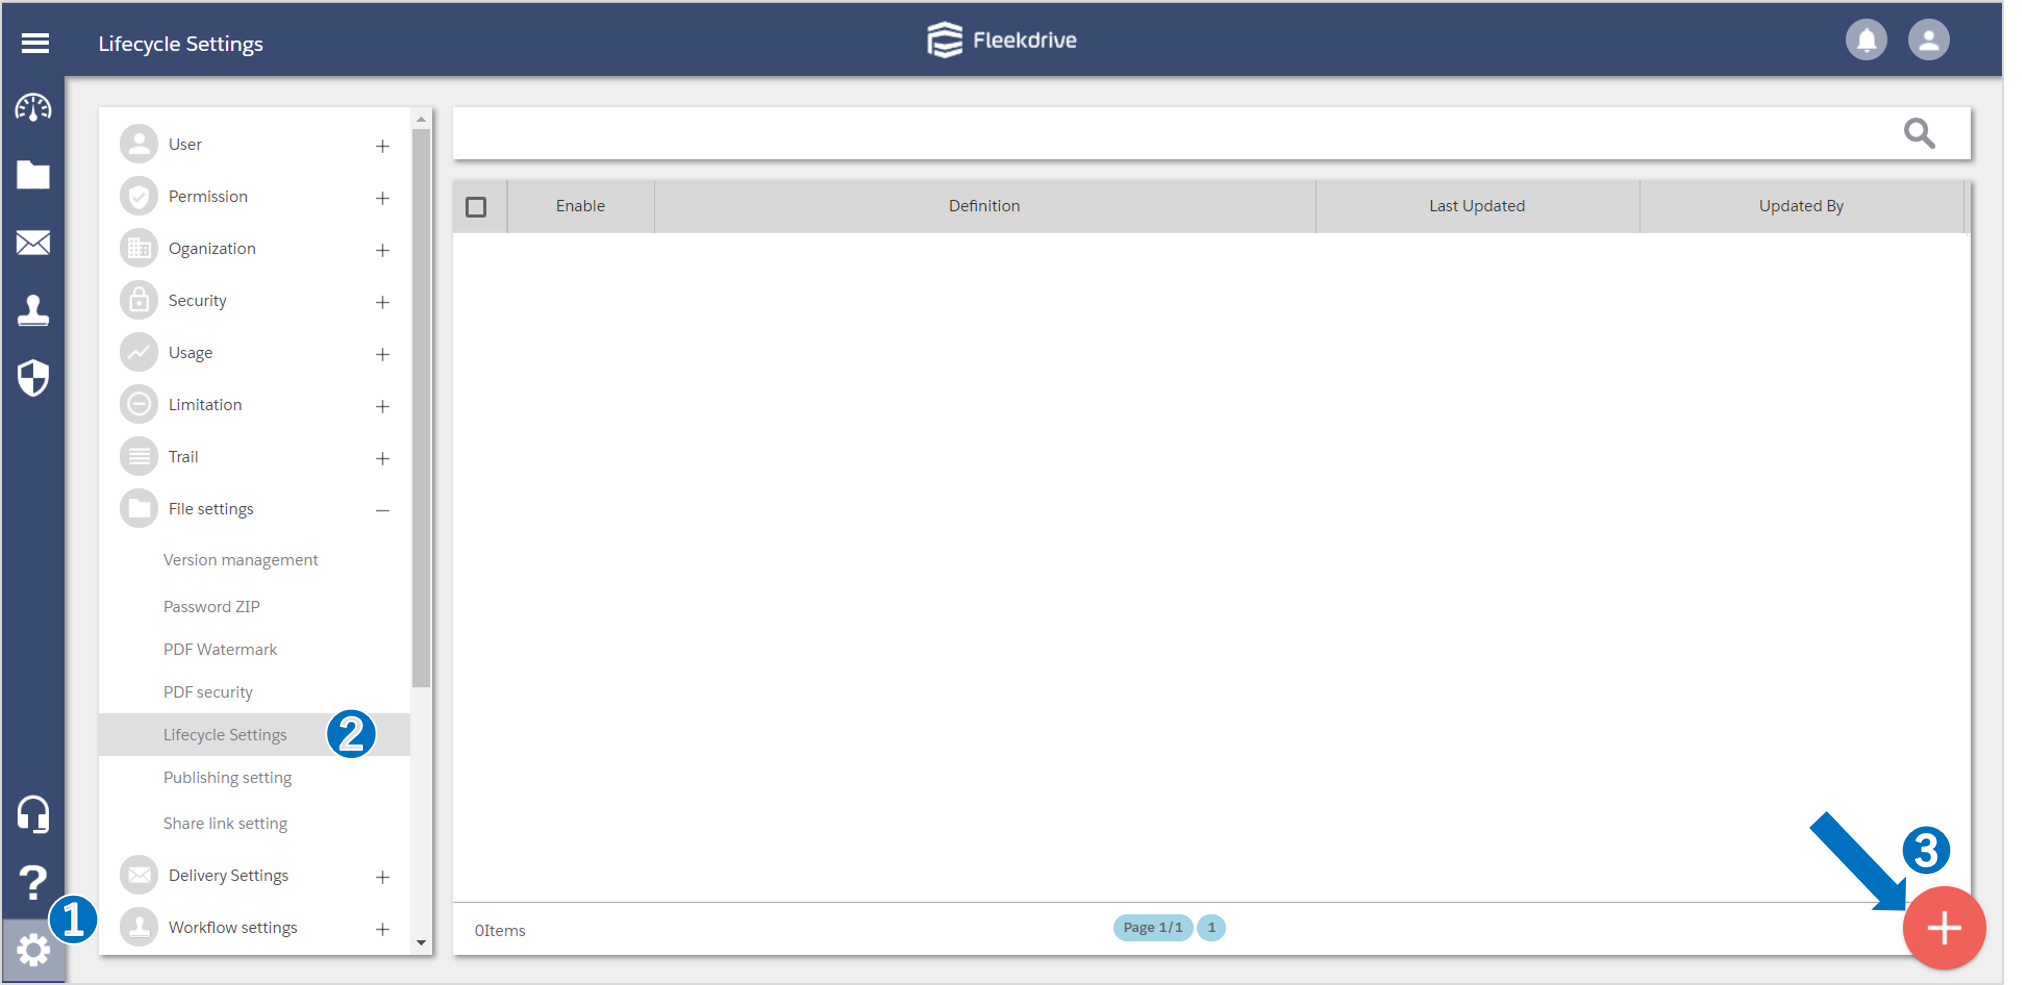
Open the Lifecycle Settings from the “Settings” menu and click the floating button of lower-right.
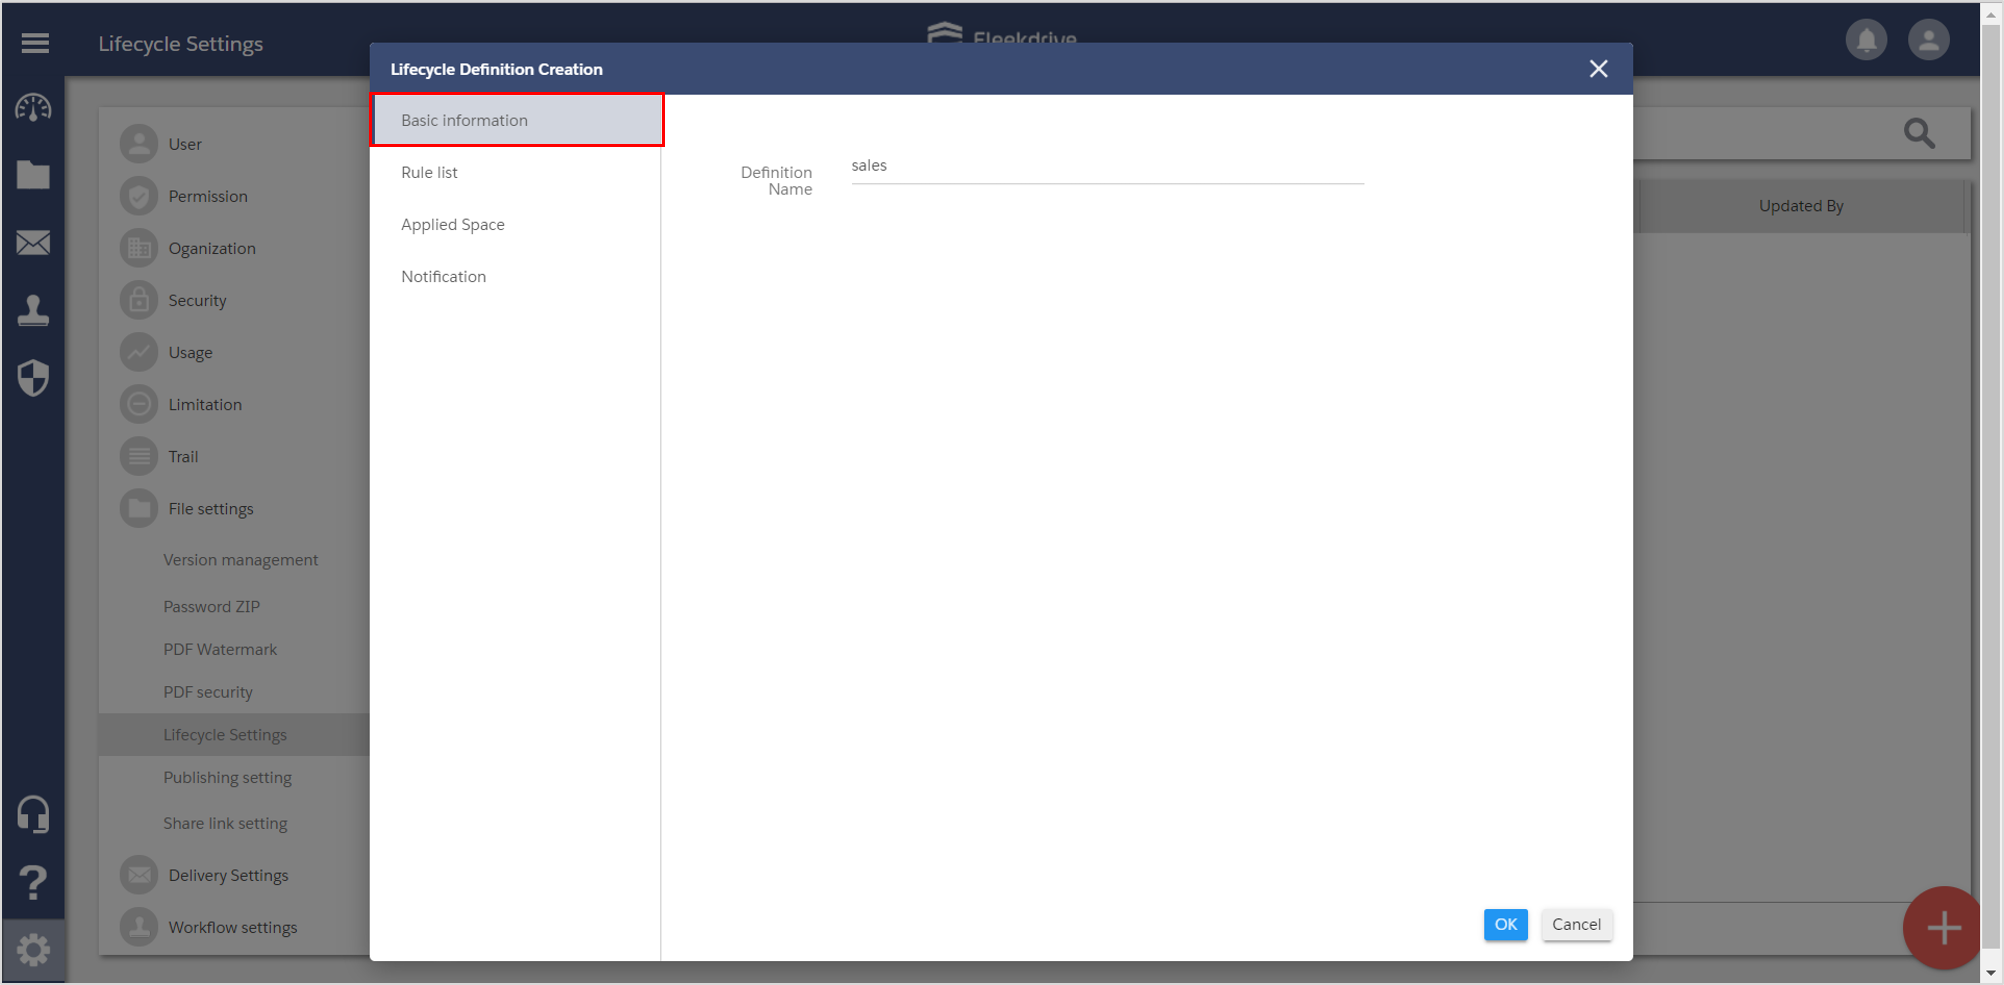
Set the definition name of the life cycle in the “Basic Information” tab.
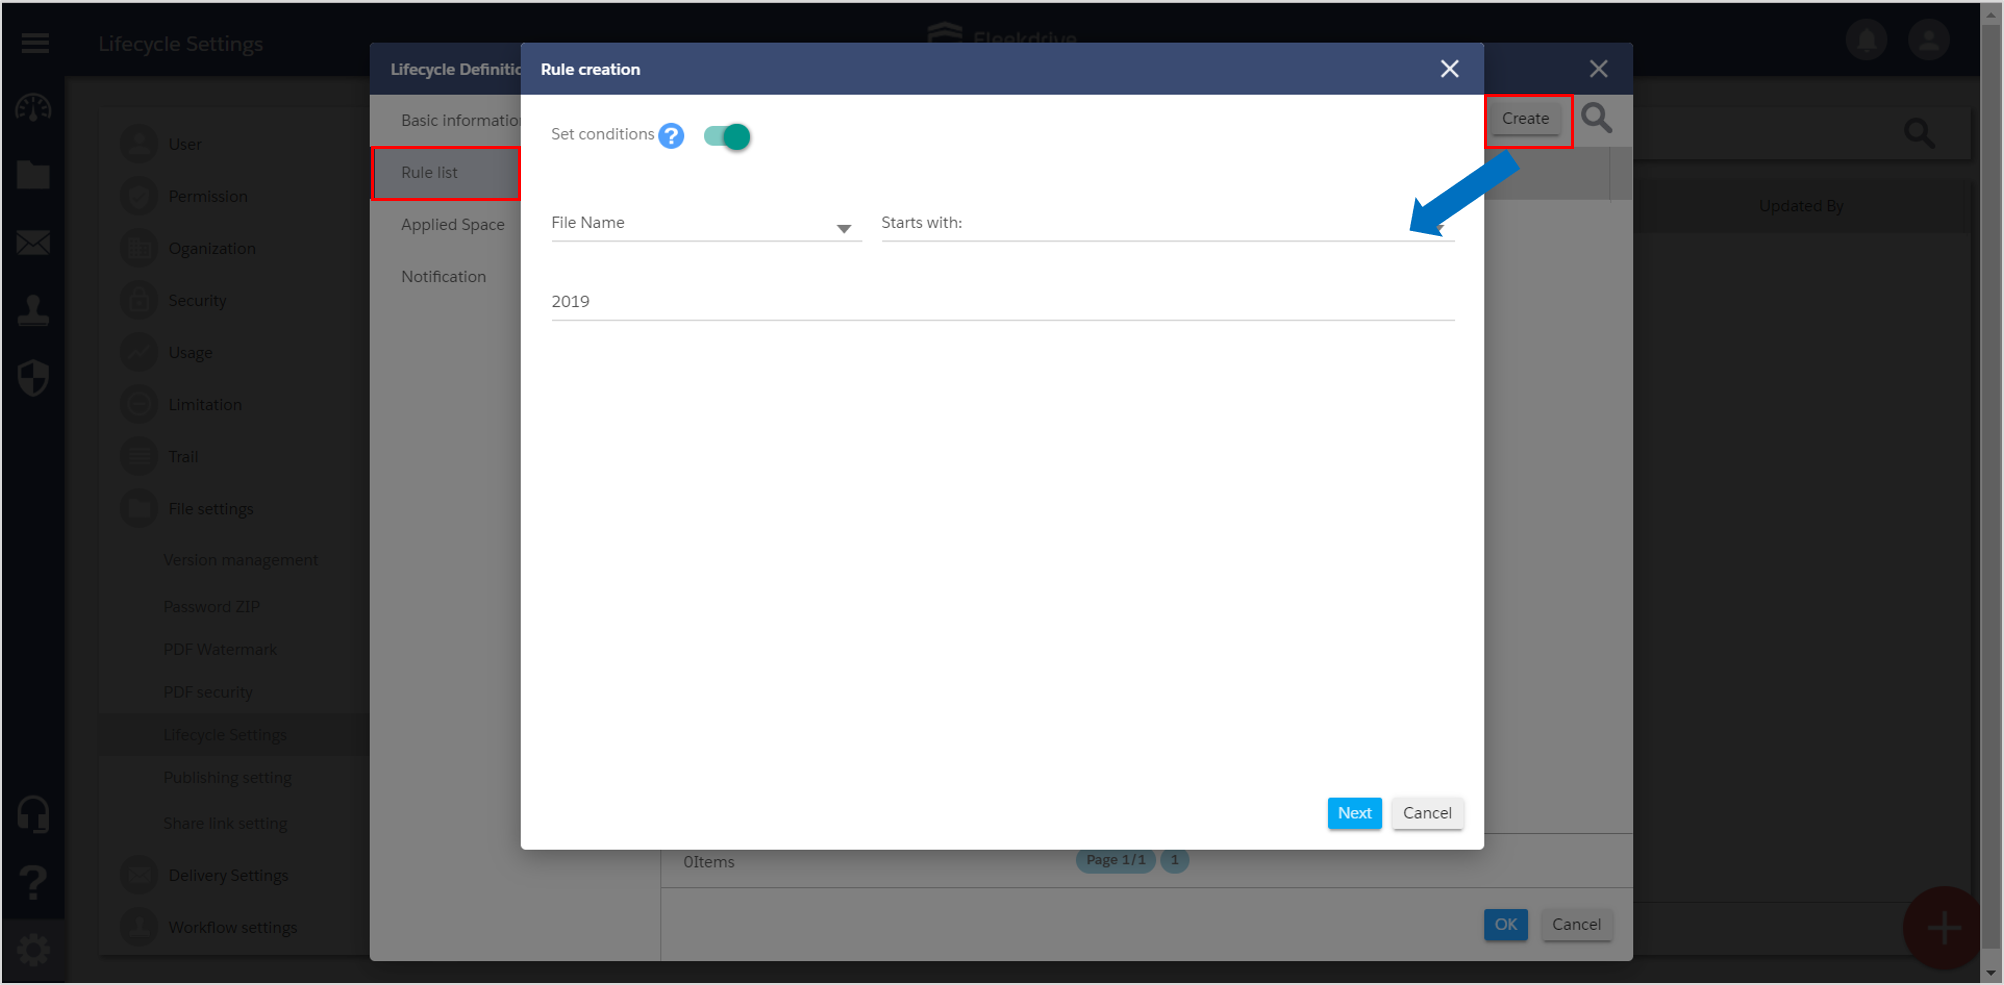
Set the application condition of the Lifecycle.
Create the new rule from the “Create” button of the top right.
When you set the application condition of the life cycle, turn on a toggle button of “Set conditions”.When you apply a rule unconditionally, turn off it.
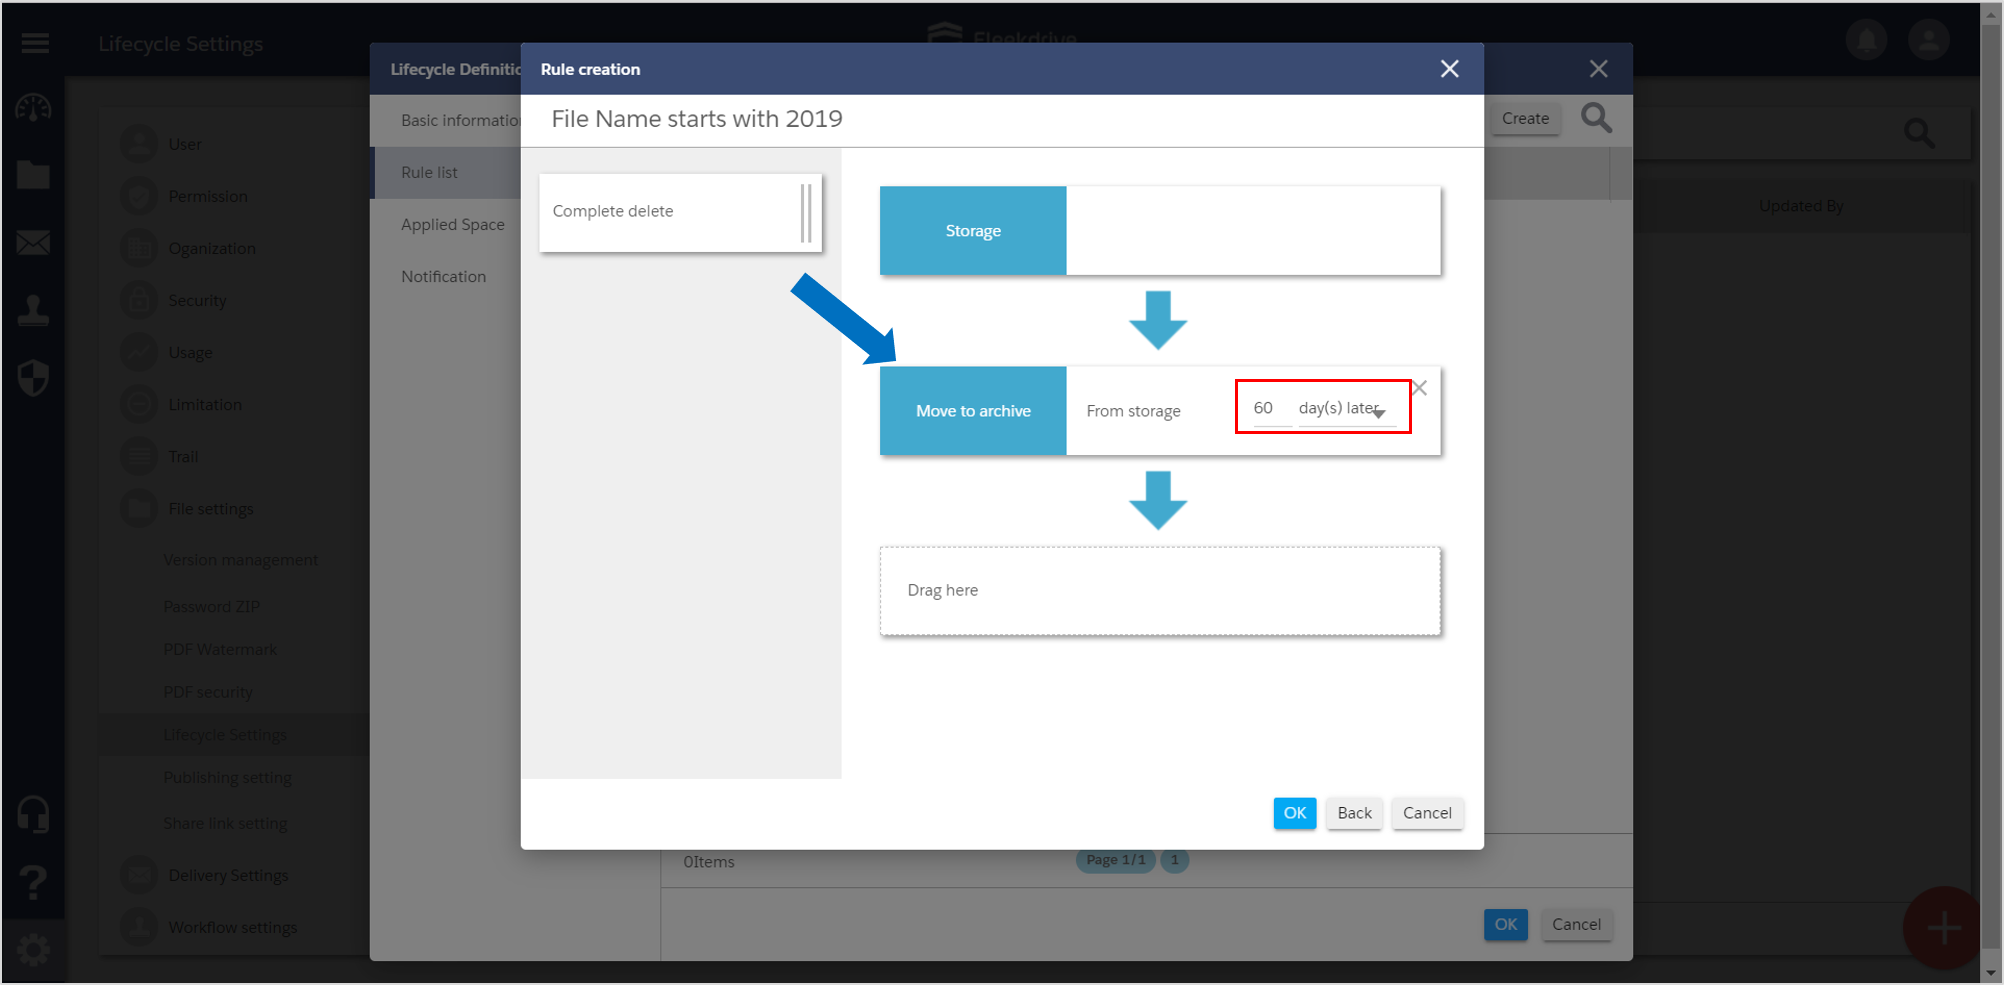
Drag & drop a left-side actions to a right side. Set the timing when the actions are executed.
Specify the spaces to apply a Lifecycle.
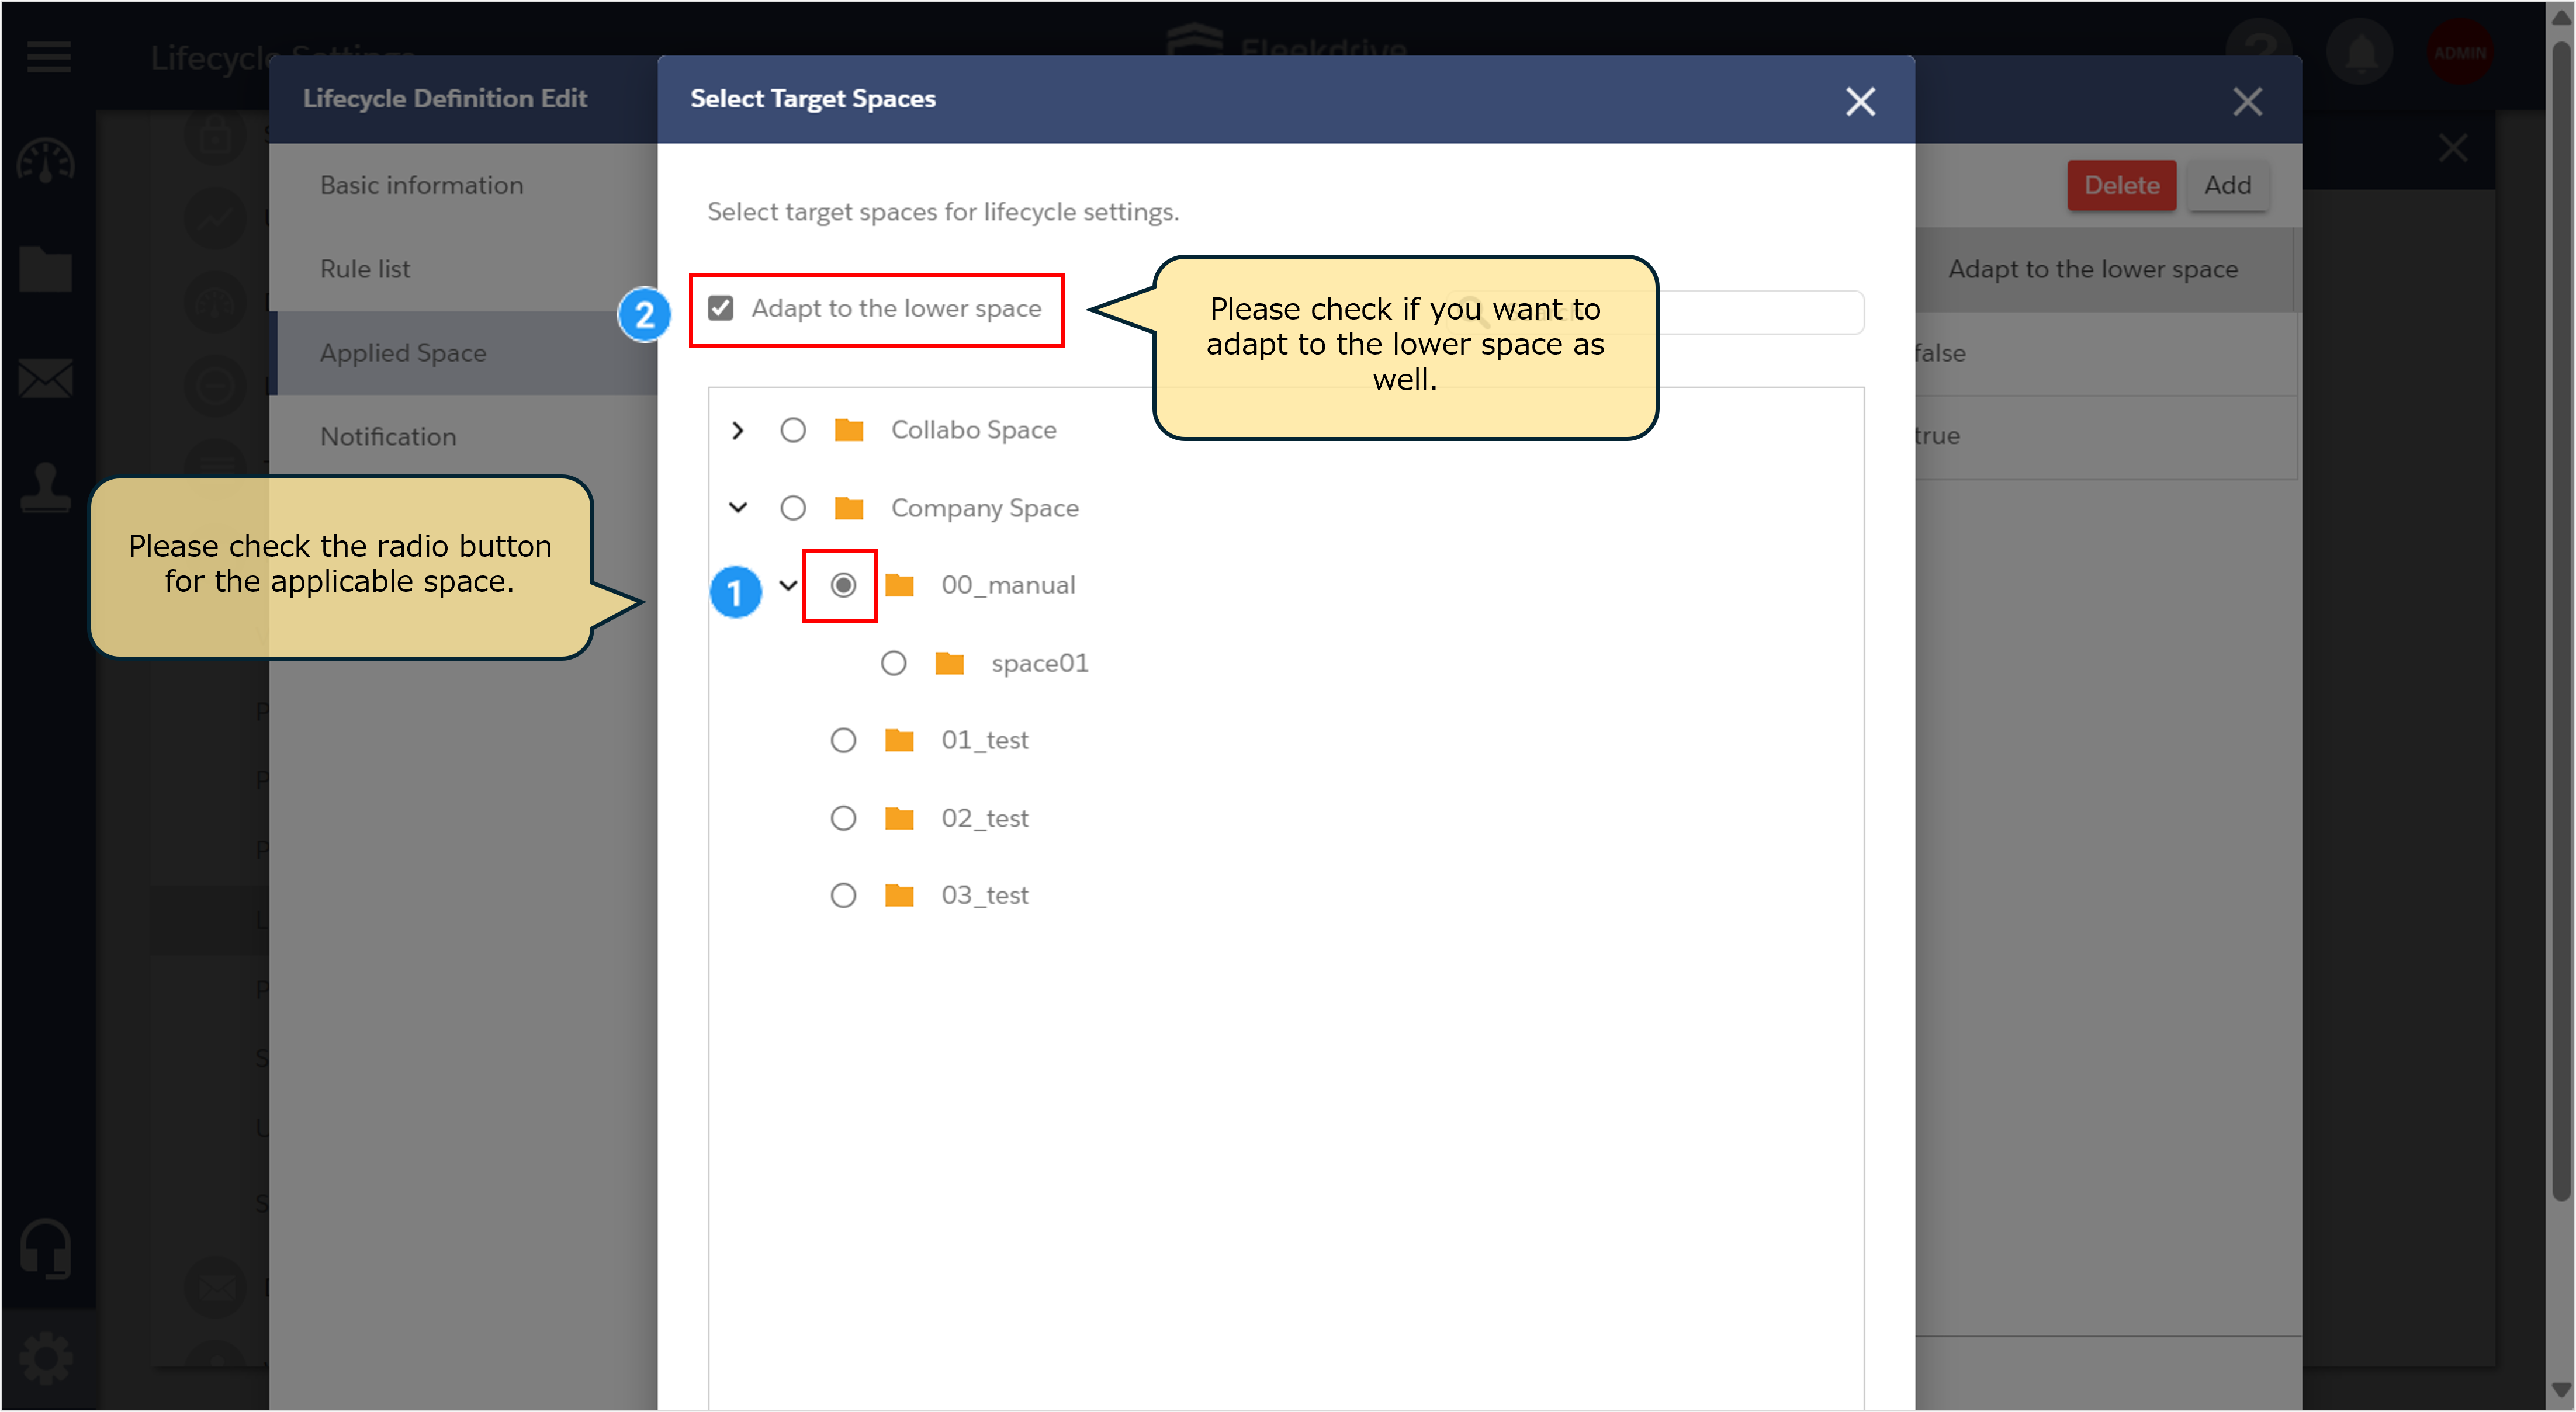
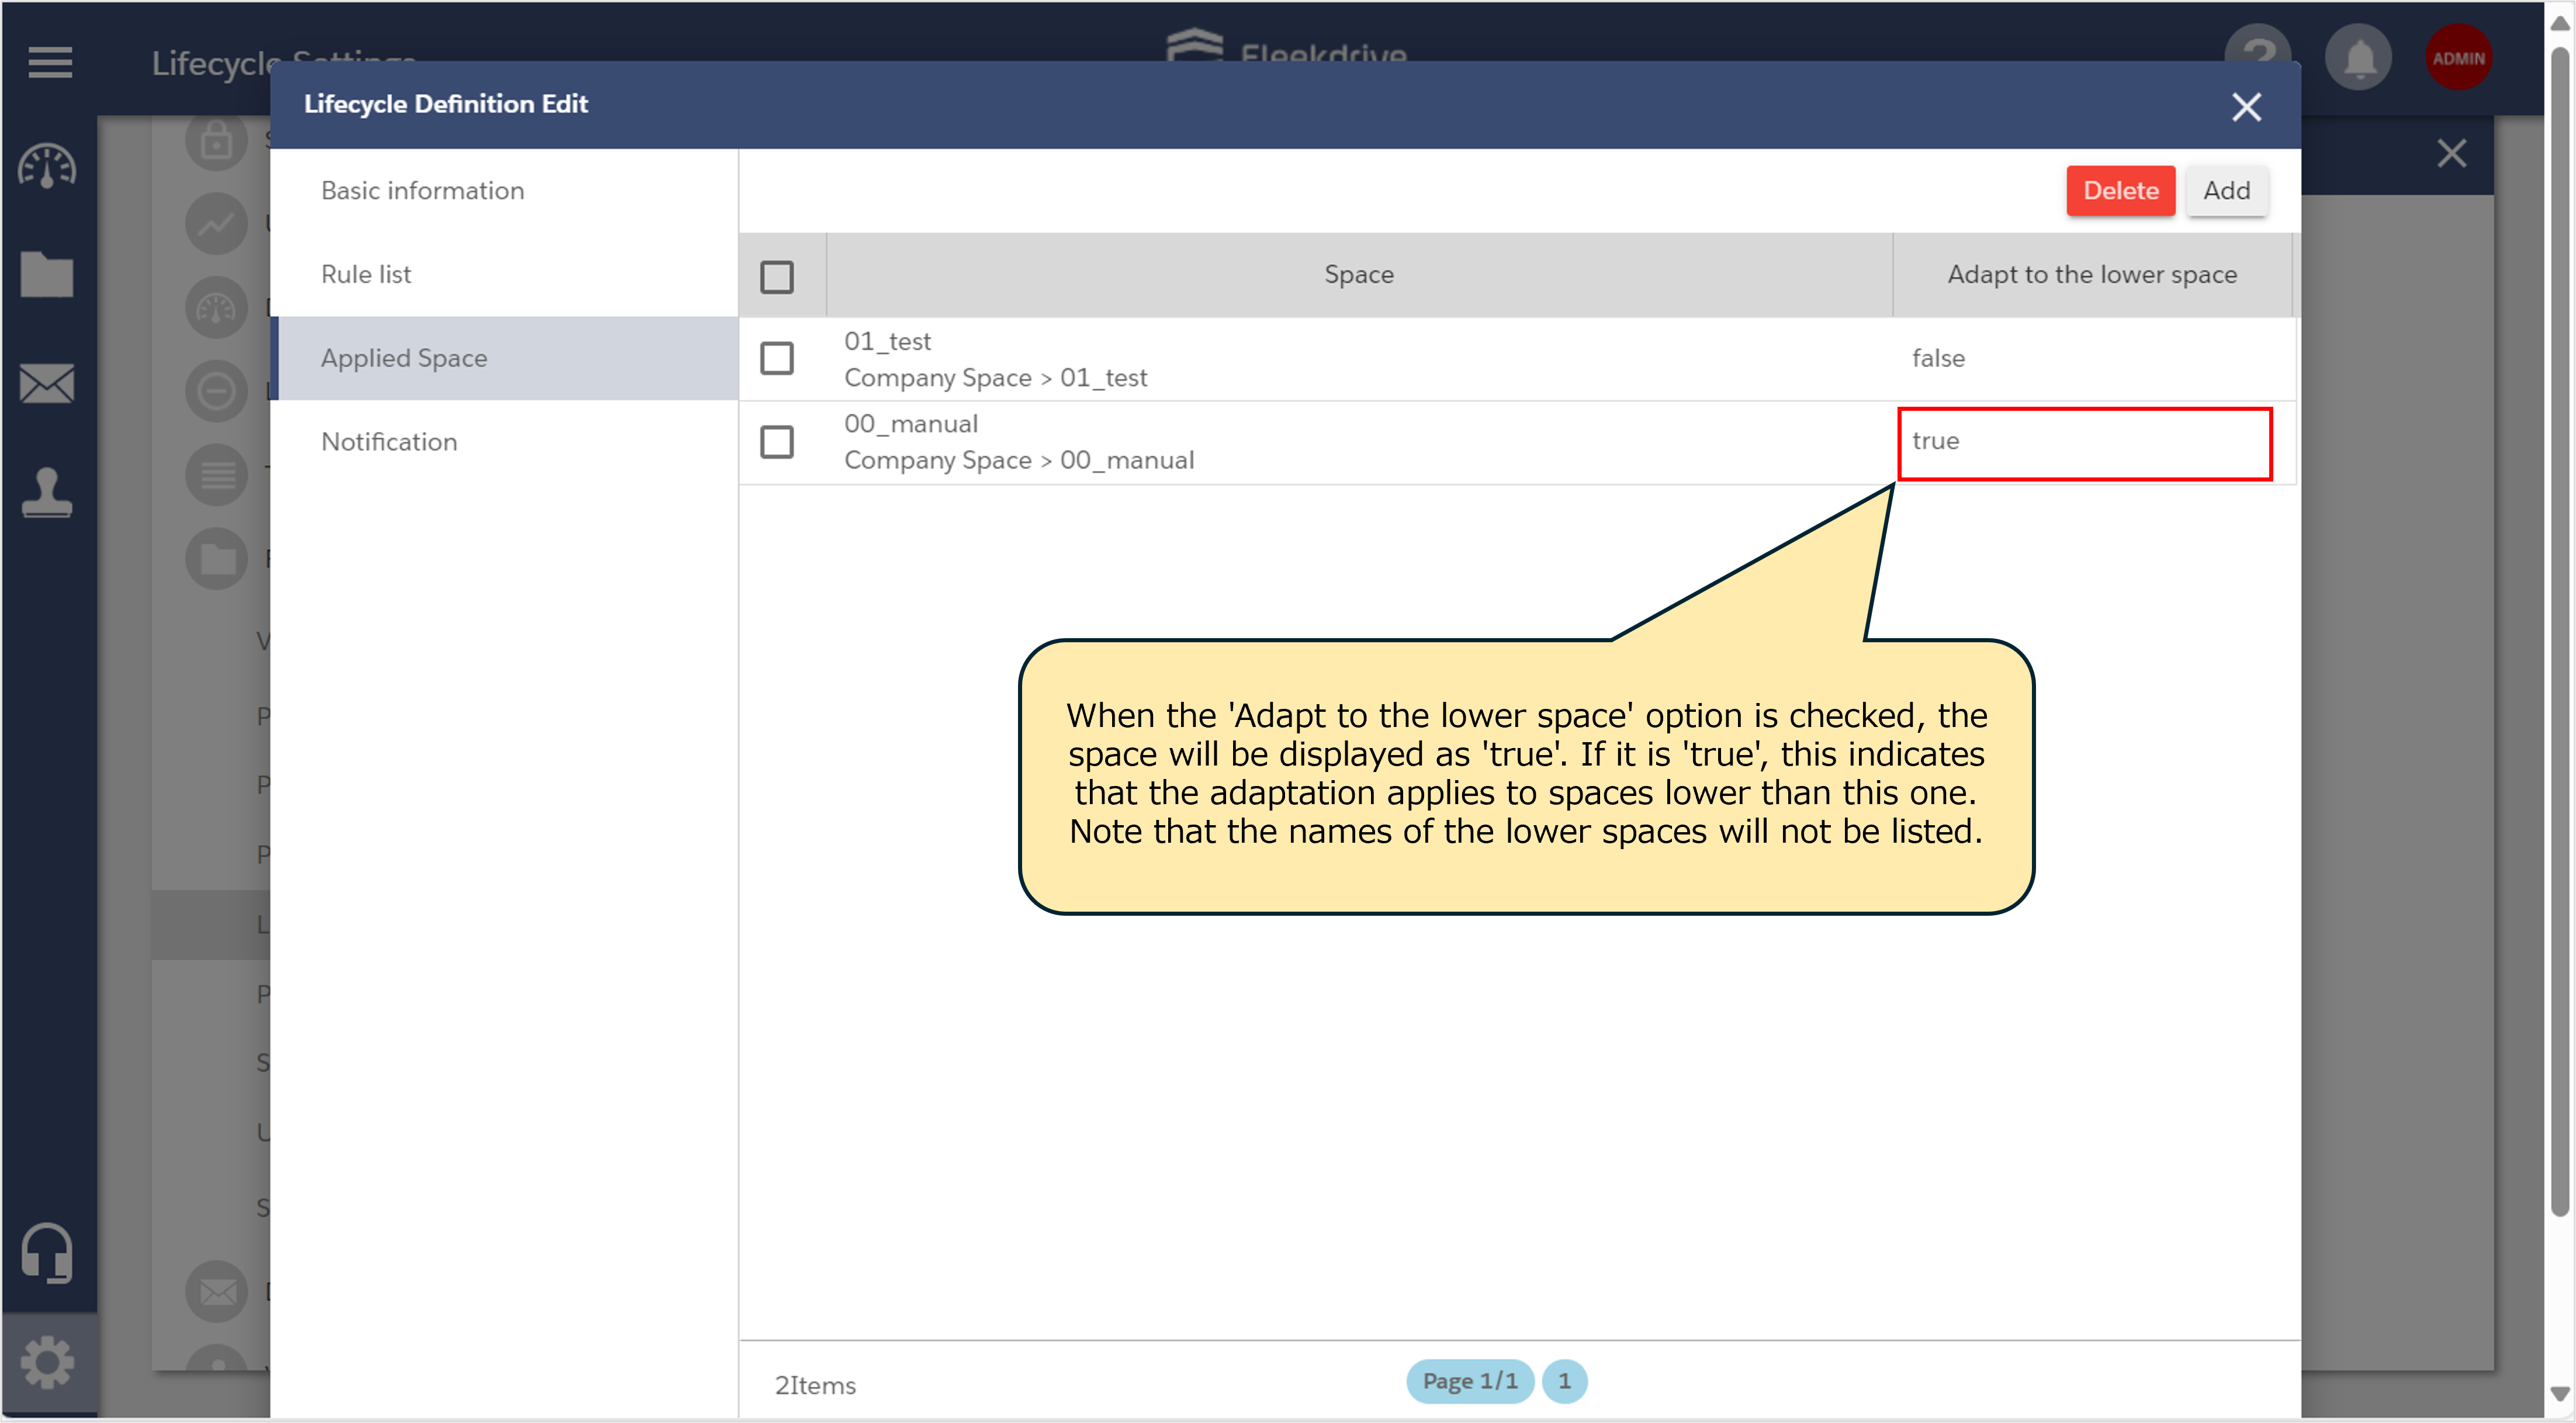
If you want to check the list of spaces applying the lifecycle, you can do so on the above screen (Lifecycle Definition Creation > Applied Spaces).
Even if a space name isn’t listed in this overview screen, if “Adapt to the lower space” is true, it applies to all subspaces below it as well.
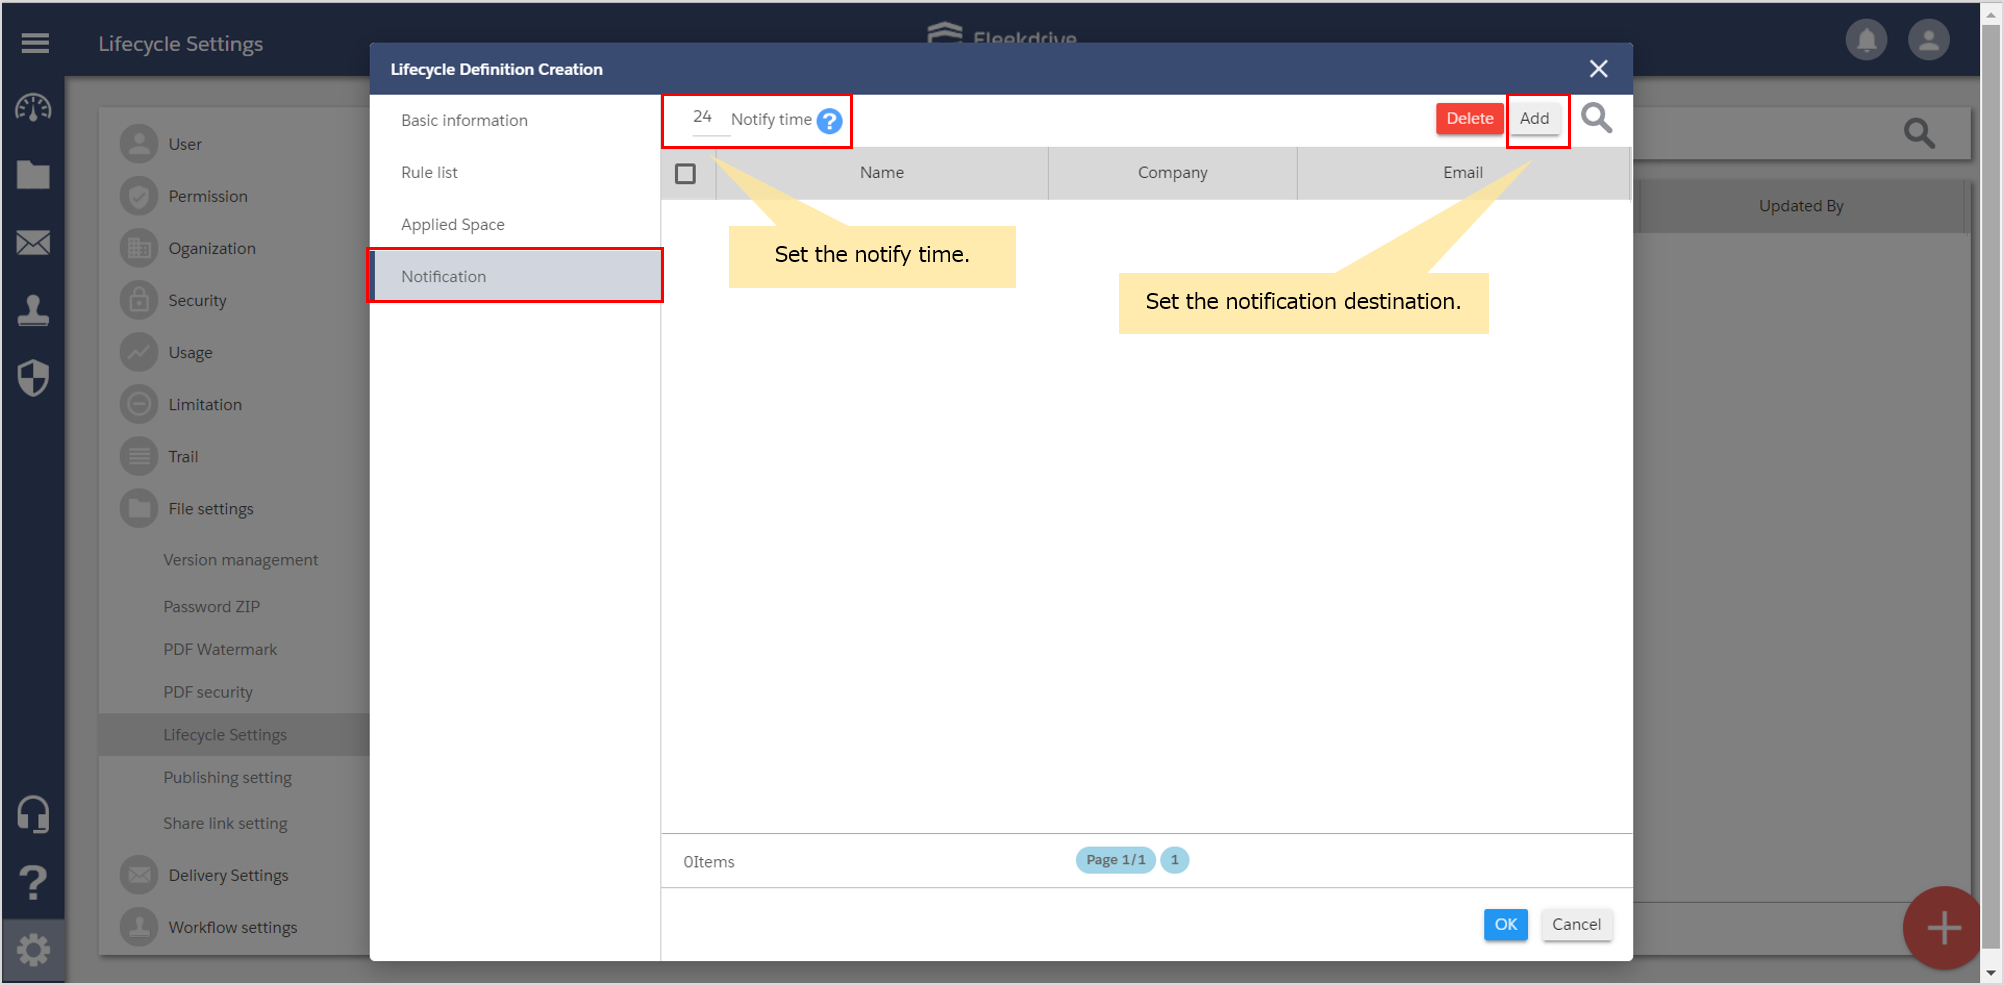
Set a reminder.
When you want to receive the remind before the Lifecycle is executed, set the notify time and click the “Add” button.
How to configure settings from the space properties screen
In addition to the setup method via “System Administrator Settings” mentioned above, lifecycle settings can also be configured individually for each space from its “Properties Screen.”
Please refer to “6. How to configure settings from the space properties screen” in this manual.
In addition to system administrators, configuration from the properties screen is only available to users who have “Setup Menu > File Sharing Rights > Lifecycle” enabled in their system permissions.
[How to Configure]
1: Select the target space where you want to set the lifecycle, and click “Properties” in the right navigation panel.
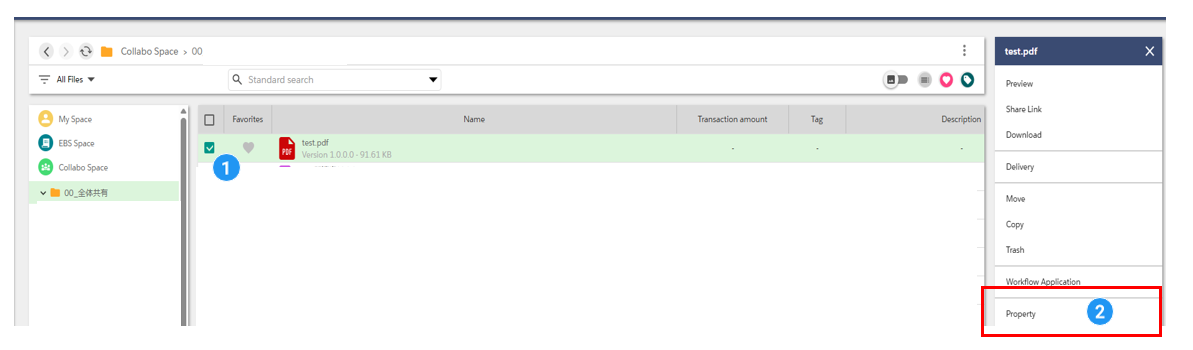
2) Click the “Lifecycle icon” at the top.
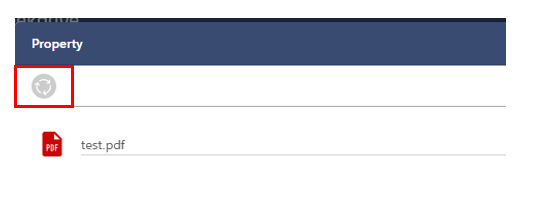
3) On the settings screen, configure the settings in the same way as “System Administrator Settings” described earlier.
Note:
Priority of Settings
Bulk settings configured via “System Administrator Settings” take precedence (have higher priority) for lifecycle settings.
If a lifecycle definition has already been applied to the target space via System Administrator Settings, the “Lifecycle” settings icon (or item) will not be displayed on the Properties screen, and configuration will not be possible.
Last Updated : 21 Jul 2026