Organize the space automatically
This feature is available starting with version 16.0.0.
Guide for organizing the spaces automatically.
Use the Space Lifecycle function to organize a space automatically.
Space Lifecycle is the function that you can organize automatically from the space registration to completely removal.
The Difference Between [Space Lifecycle] and [Lifecycle]
The “Lifecycle” feature automatically organizes [Files].
Lifecycle is a feature that automatically manages files from the moment they are registered until they are permanently deleted.
Click here for more details on “Life Cycle”
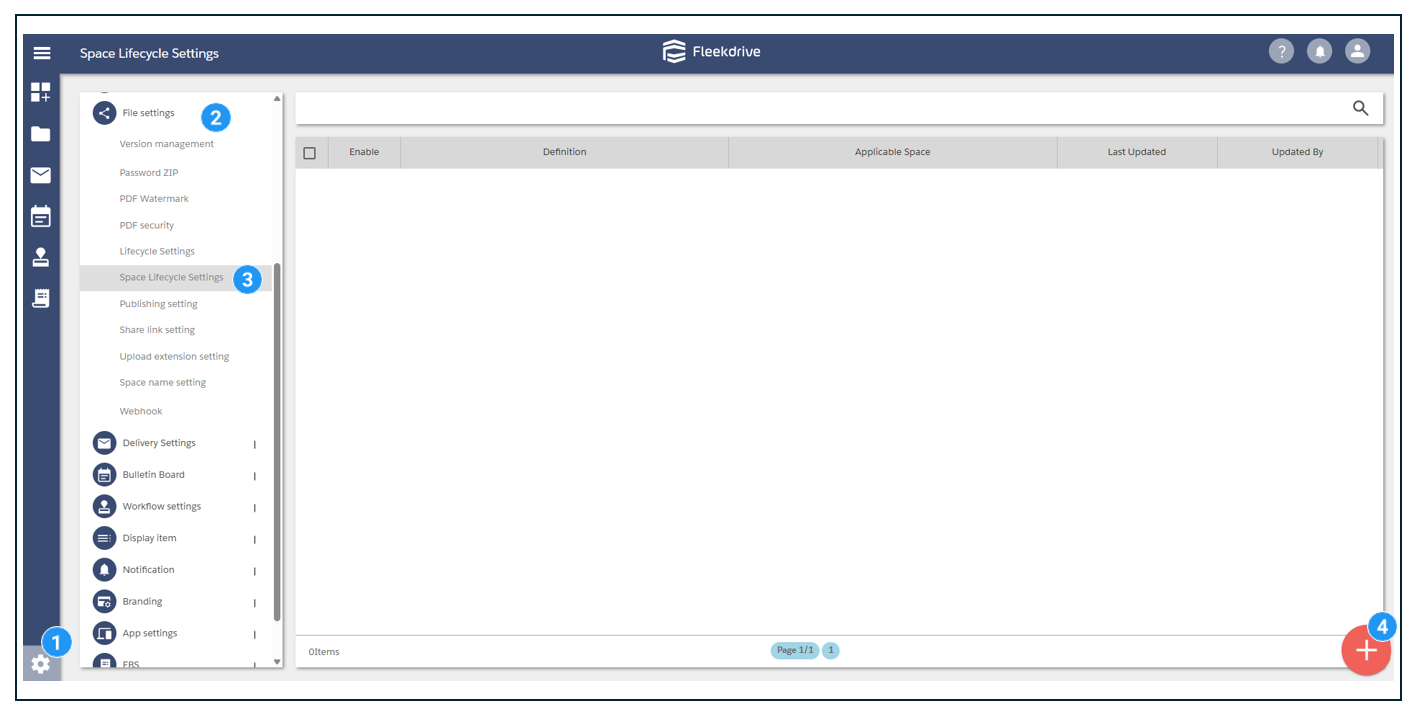
Settings > File Sharing Settings > Space Lifecycle Settings,
then click the floating button in the lower-right corner.
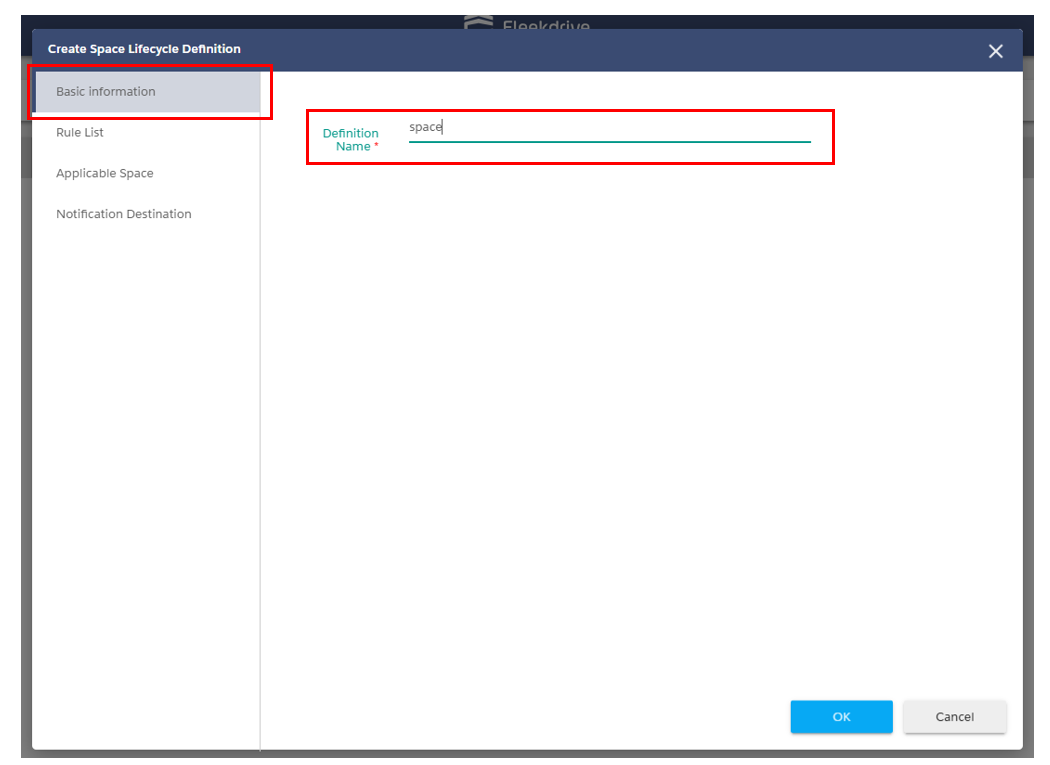
In the “Basic Information” section, set the required field “Space Lifecycle Definition Name.”
After entering the information, click the “OK” button to save.
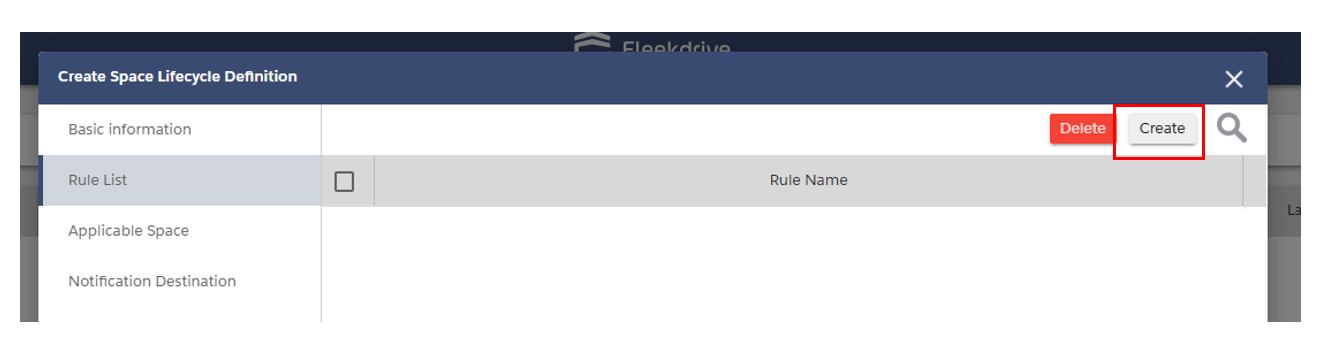
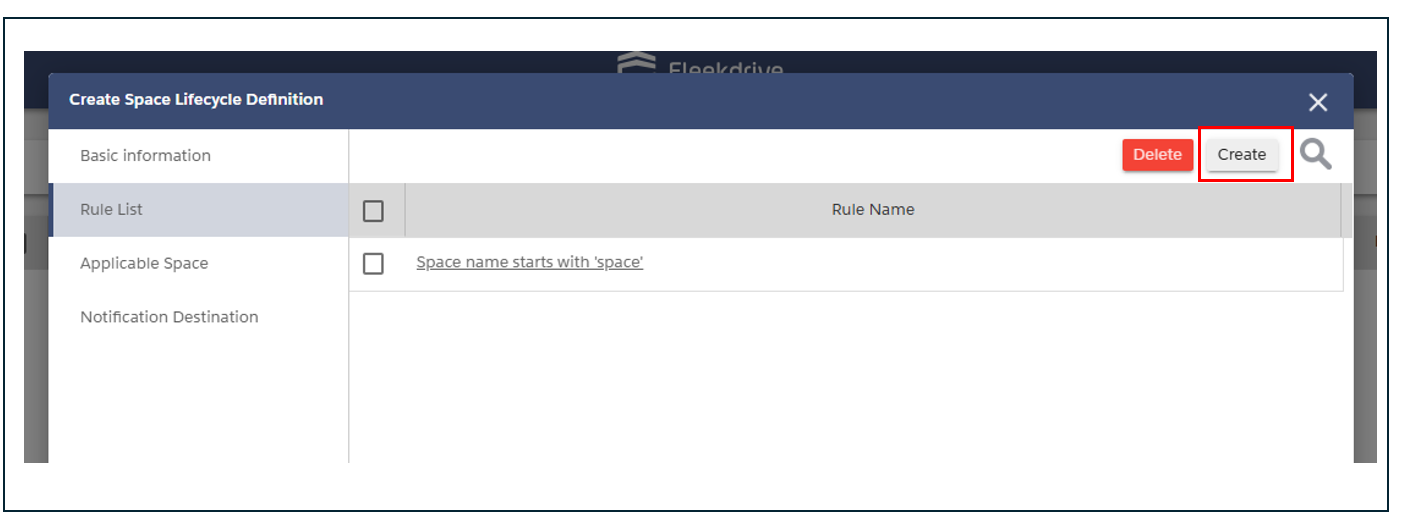
On the “Rule List” tab, you can configure the conditions and rules for the space lifecycle.
Click the “Create” button in the upper-right corner to create a new one.
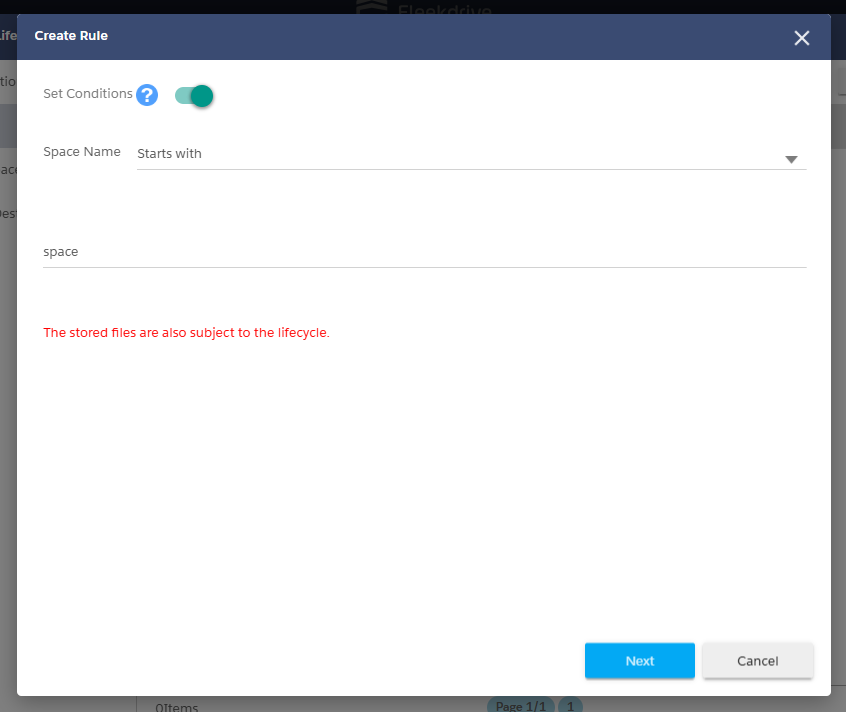
To set conditions for applying the space lifecycle,turn on the “Set Conditions” toggle button.
To apply the rule unconditionally, turn it off.
Drag and drop the action from the left side to the right.
Set the time at which the action will be executed.
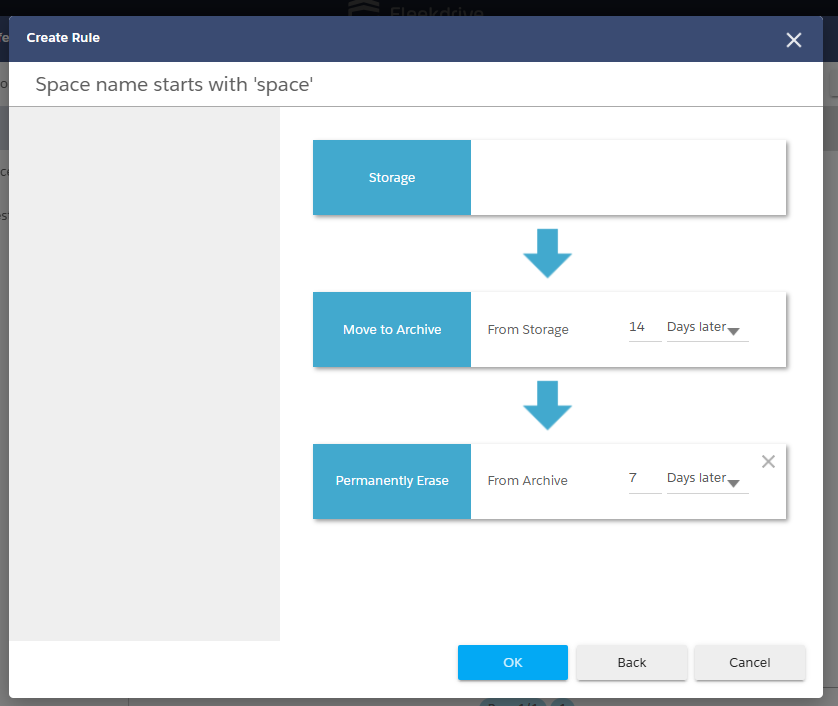
Click “OK” to save, and the change will be reflected in the “Rule Name” field.
Specify the space to which you want to apply the space lifecycle.
Under “Apply to Space,” click the “Add” button in the upper-right corner.
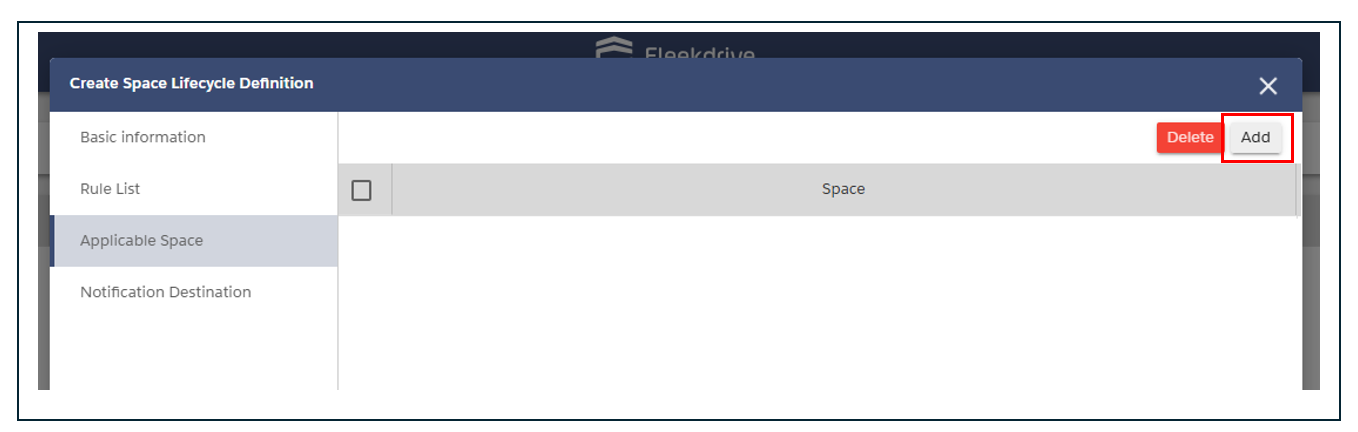
Once the screen changes, select the space you want to apply and click the “OK” button to save.

-
The space lifecycle settings do not include a feature to “apply to subordinate spaces.”
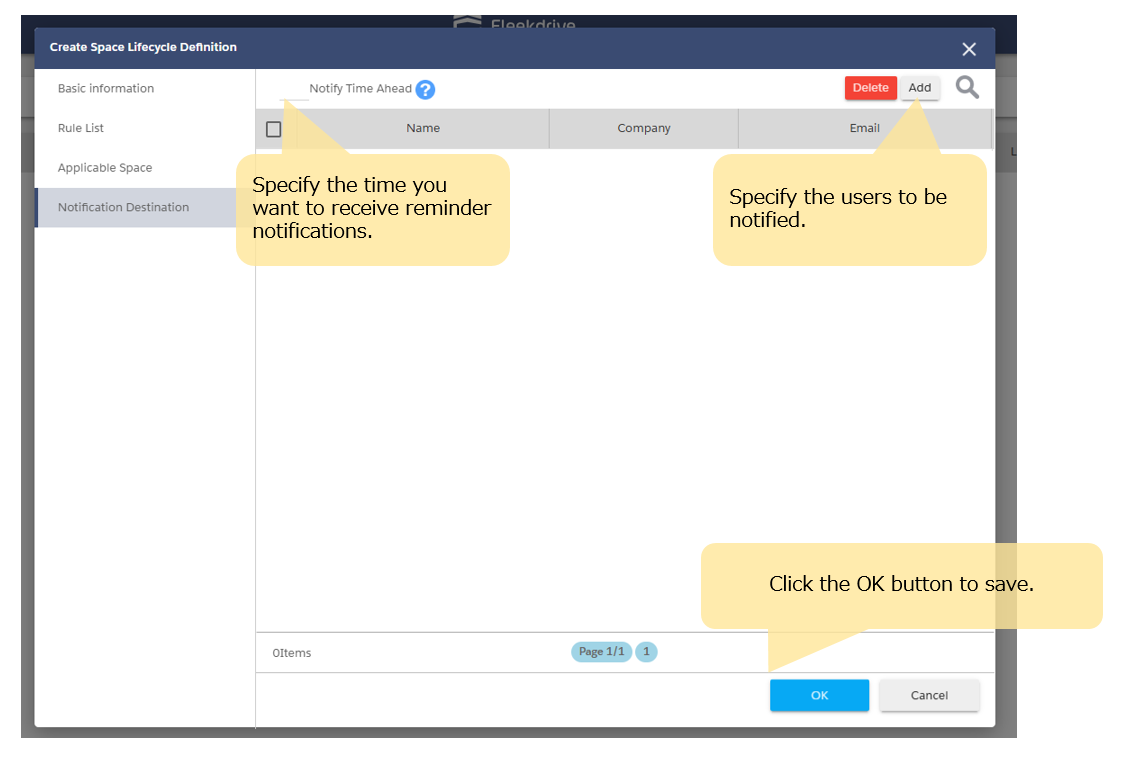
To set up a reminder before the Space Lifecycle is executed, set the delivery time and
select the users to be notified by clicking the “Add” button.
-
You cannot configure the space lifecycle settings
by selecting a space and then going to Light Nav’s properties.
Last Updated : 23 Mar 2026